


How to Remove White Background from Image in PowerPoint
We must have encountered such a problem: when preparing a presentation, we found that the picture could match the content of the presentation well, but the background of the picture did not fit the style of the slide. What would you do then?
Don’t worry; PowerPoint provides tools that make it easy to get rid of backgrounds from images. By removing the background, you can give a neat and consistent visual effect throughout the slide, helping to make your presentation more engaging.
Here, we are going to guide you on how to remove white background from image in PowerPoint. Let’s go!
Remove White Background with the Set Transparent Color Tool
The best tool for removing white background from an image in PowerPoint is the Set Transparent Color tool. The tool can make a color in the current picture transparent. It will identify the pixel in the current image you have clicked on and then turn all pixels of the particular color transparent. Here are the steps for how to remove white background from image in PowerPoint.
Step 1. Insert the Image. Open PowerPoint, find Insert in the upper toolbar, click Pictures, and choose This Device. Then, double-click the image to open it.

Step 2. Find the Set Transparent Color tool. Select Picture Format tab on the toolbar, click Color, and choose Set Transparent Color.
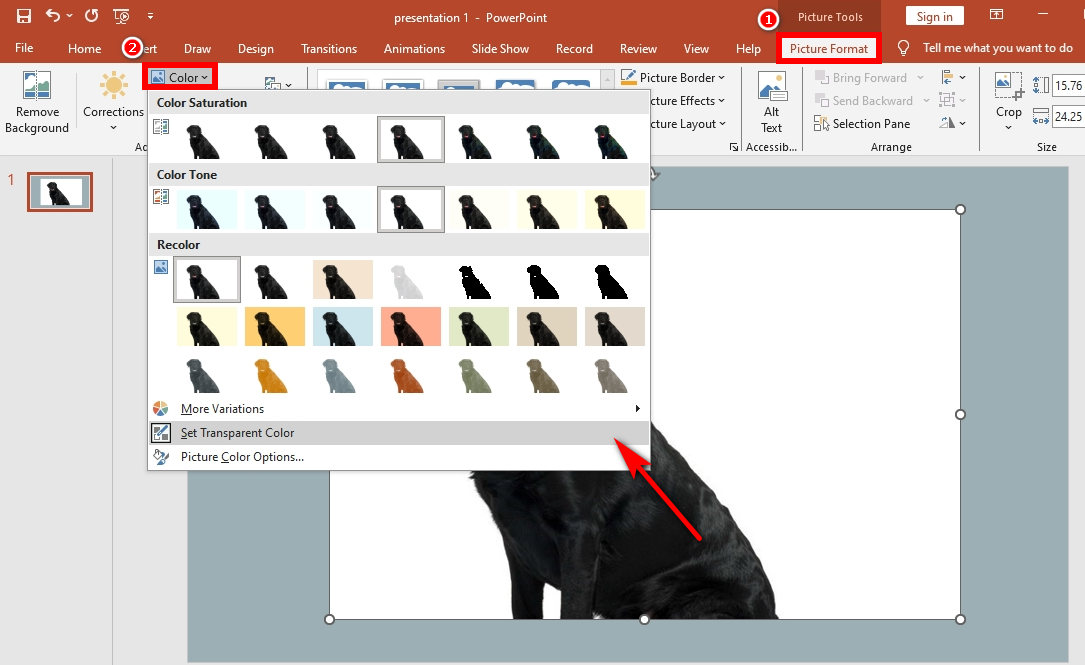
Step 3. Set a transparent color on the background. Move the cursor to the picture, and then click the white background. Now you can see the white background color you click on becomes transparent.

Remove Complex Background with the Remove Background tool
After reading the above guide, you have learned how to remove white background from image in PowerPoint. Now, let’s go further and see how we get rid of complex backgrounds.
The second tool is Remove Background, which is more suitable for images with relatively complex backgrounds. It can automatically remove unwanted parts of the picture. You can use marks to select areas to keep or remove from the picture if needed.
Step 1. Insert the image. Run PowerPoint, and go to Insert > Pictures > This Device.
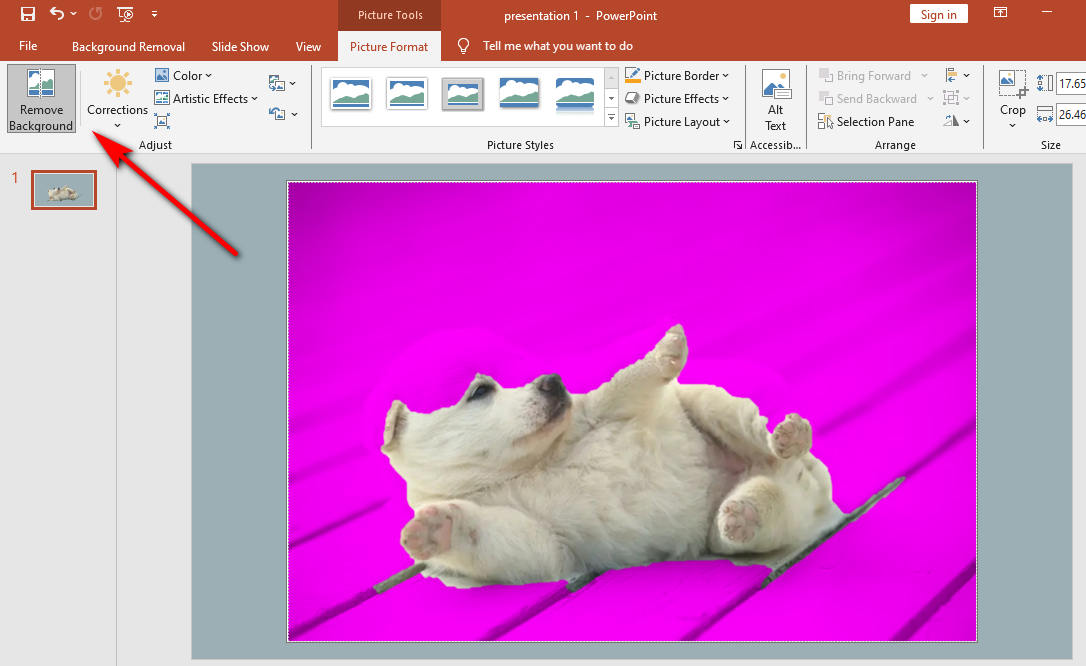
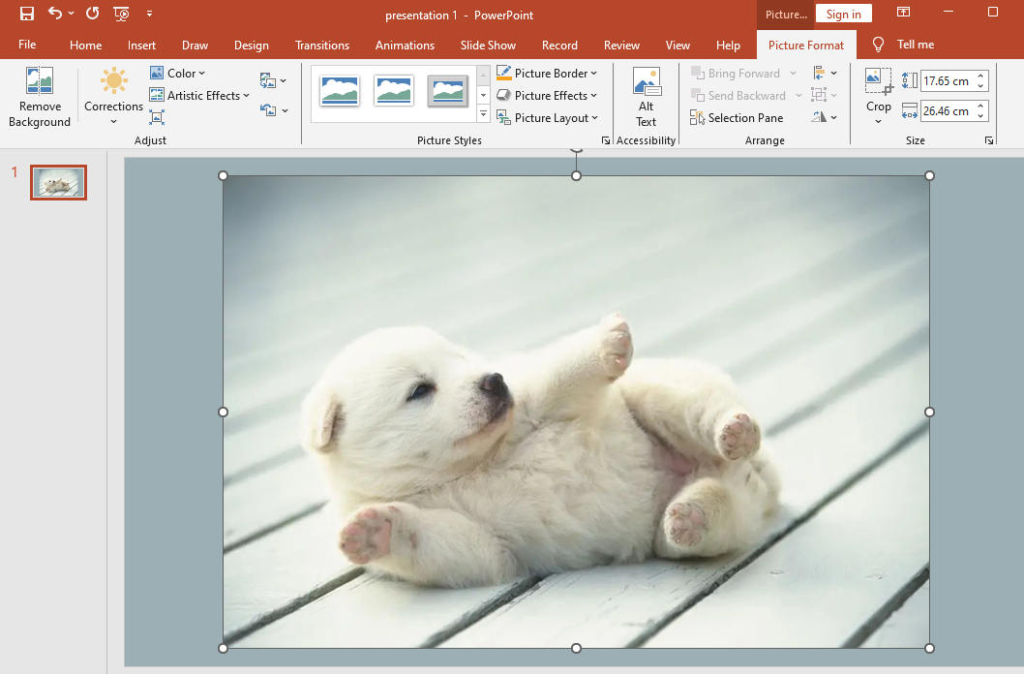
Step 2. Use the Remove Background tool. Go to Pictures Format and click Remove Background. Sometimes, this tool cannot accurately distinguish the subject and the background. As shown in the figure below, it ignored a small part of the background and removed the puppy’s body.
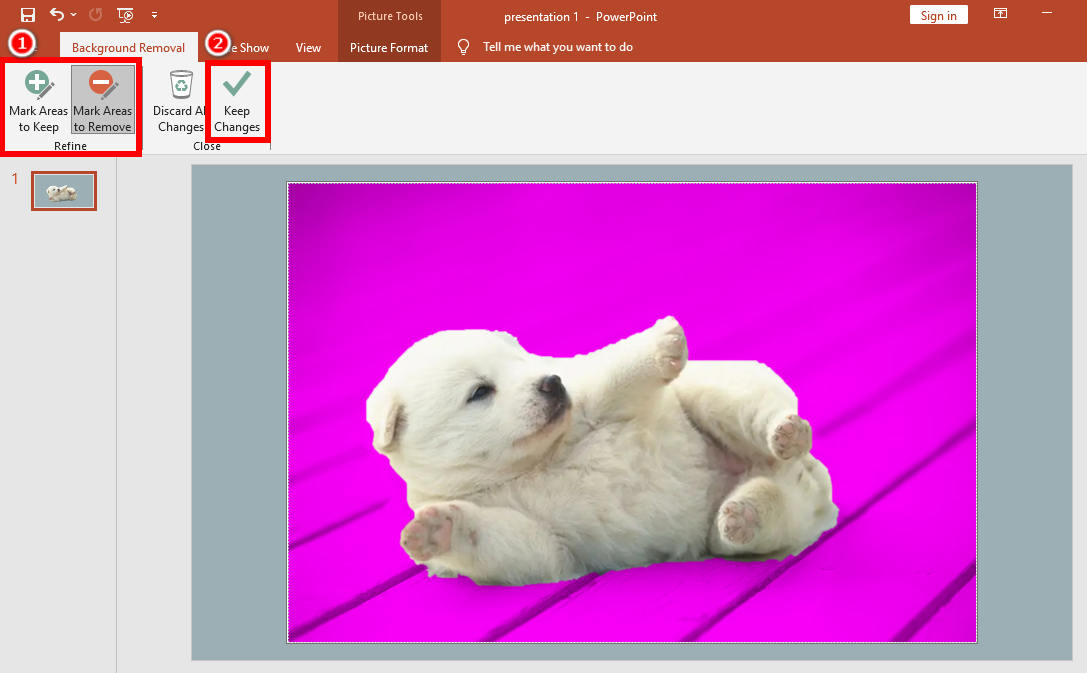
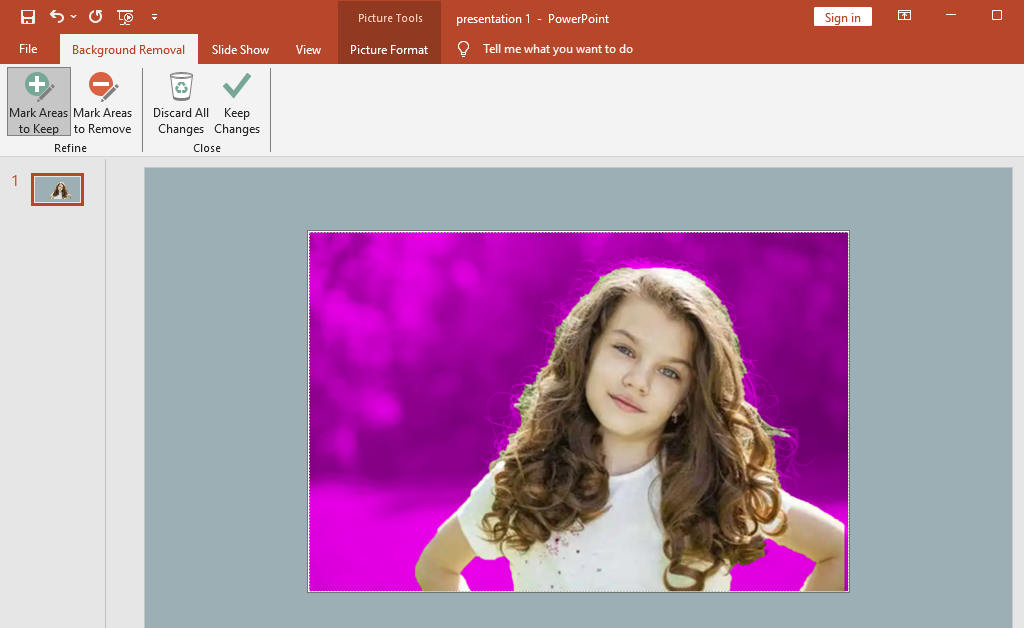
Step 3. Use Mark Areas to keep or remove. Click Background Removal and choose Mark Areas to Keep. Use the drawing pencil to mark the areas you want to keep. To select a small part, simply click; to select a larger area, click and drag to draw the shape. By the way, you can choose Mark Areas to Keep and use the drawing pencil to pick the background remains, ensuring the background can be deleted clearly. When you finished, press Keep Changes button.
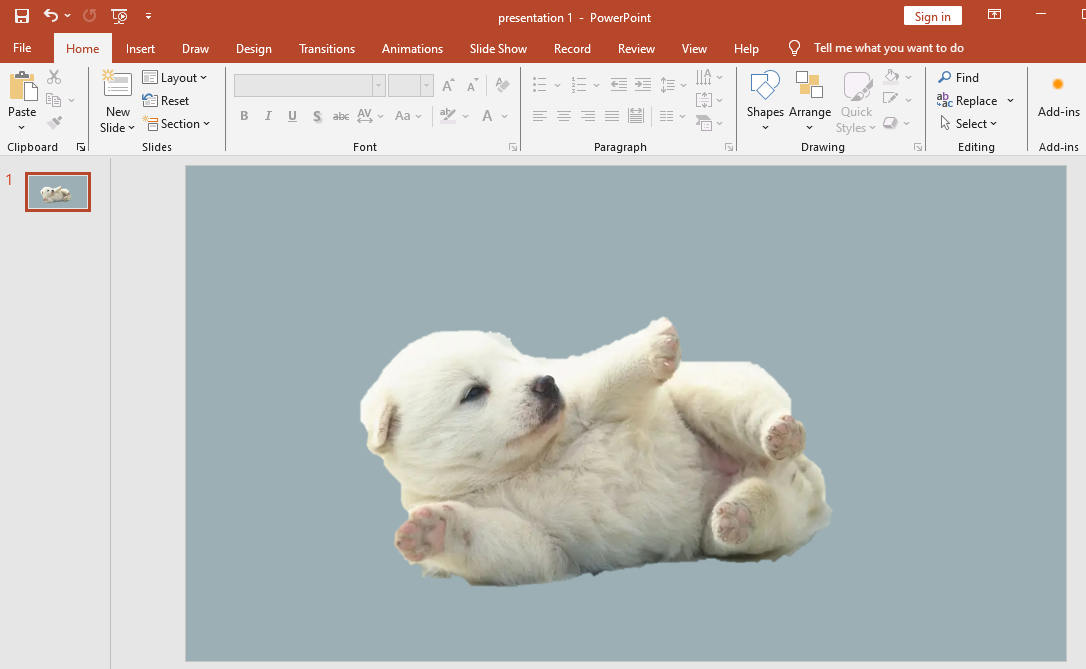
Step 4. Press Keep Changes button. As the result shows, the puppy’s body is completely kept, and the background is completely removed after processing with the tools.
The Limitations of Removing Background in PowerPoint
Although PowerPoint provides many tools to remove backgrounds, it is not a professional image manipulation editor. Therefore, it is still possible to make errors in the processing of some images with complex backgrounds, which may have a negative impact on your presentation. For example, when you handle images with similar color tones with PowerPoint tool, you may get an unsatisfactory result with most of the background remains. In the following part, we explain to you with two examples.
Images in Similar Color Tone
Because of the shadows and similar colors in the picture, it is not easy for PowerPoint to determine which parts of the picture should be kept or removed. Let’s go back to the example image of the Remove Background tool. You can see that the puppy and the background are in a similar color tone, which makes it difficult for PowerPoint to exactly distinguish the whole subject when identifying it. Obviously, we can see that some parts of the floor have been kept while some parts of the puppy’s body have been removed.
Images with Fine Lines
In addition, PowerPoint is not able to handle small details such as hair, fur, or other elements around the edges of the subject accurately. Let’s see how the girl’s hair looks after using the Remove Background tool.
In the image, some of the girl’s hair was removed along with the background. And it isn’t easy to use Mark to keep the fine hair. So, what should we do in this situation? Keep reading.
3 Free Background Removers That Work Perfectly with Any Image
Since PowerPoint cannot remove the background exactly, you need to find other tools to help remove background from image. Let me recommend three free background removers for you.
AnyErase
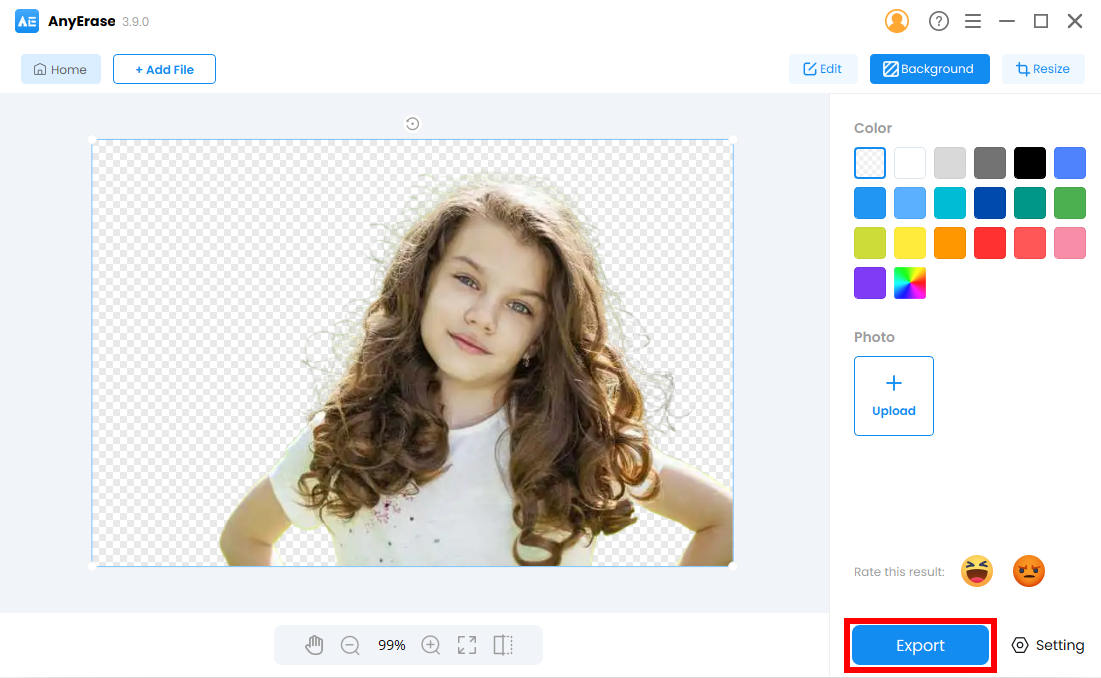
AnyErase, a powerful and professional photo background editor desktop program, will help you. It can handle photos in JPG, JPEG, PNG, TIFF, BMP and WebP formats. With the support of artificial intelligence technology, AnyErase can quickly distinguish the background from the subject in the snap of a finger and instantly make the background transparent. What’s more, you can use the program to freely edit or change the background of the image to help your presentation become more outstanding. Move on to get detailed steps on how to use it.
Secure Download
Step 1. Launch AnyErase and you will see a window. Click on Remove image background.

Step 2. Click the button to upload the image or drag the image into the box.

Step 3. Now, you can find that the background of the image has been removed. You can customize the background color in the right toolbar according to your needs. Finally, click the Export button to download and save the result.
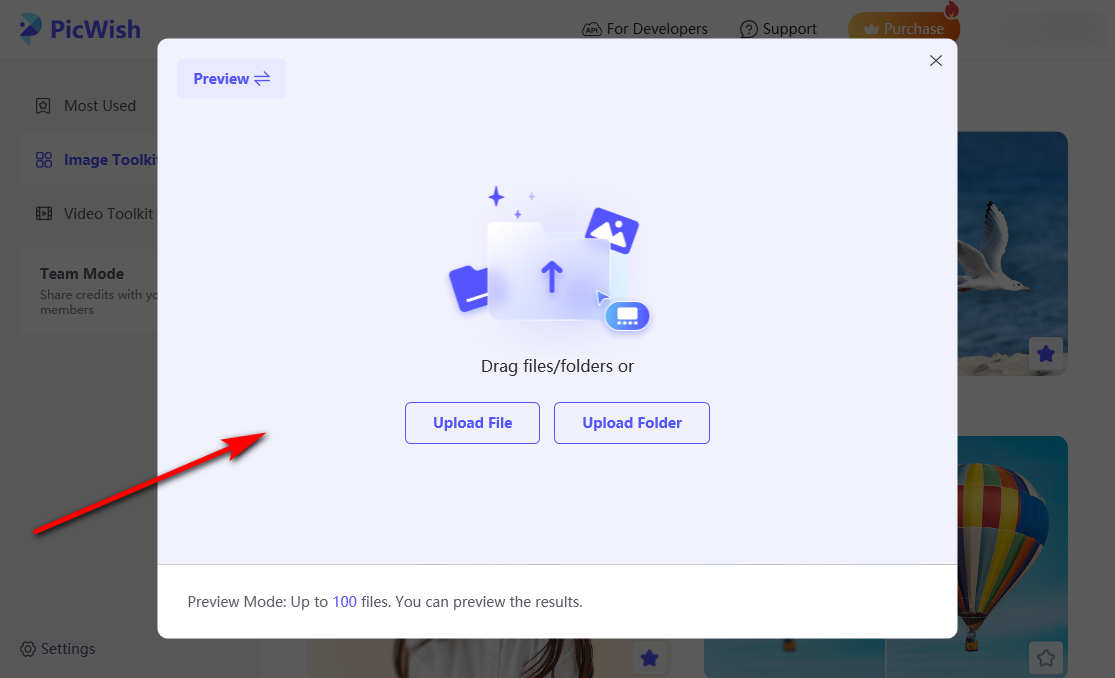
PicWish
PicWish is a powerful photo editor. It is rich in functions and provides various tools based on AI processing, such as Blur to Clear, Remove BG, etc. It is worth mentioning that it also supports removing background in bulk, helping free you from removing the background manually.
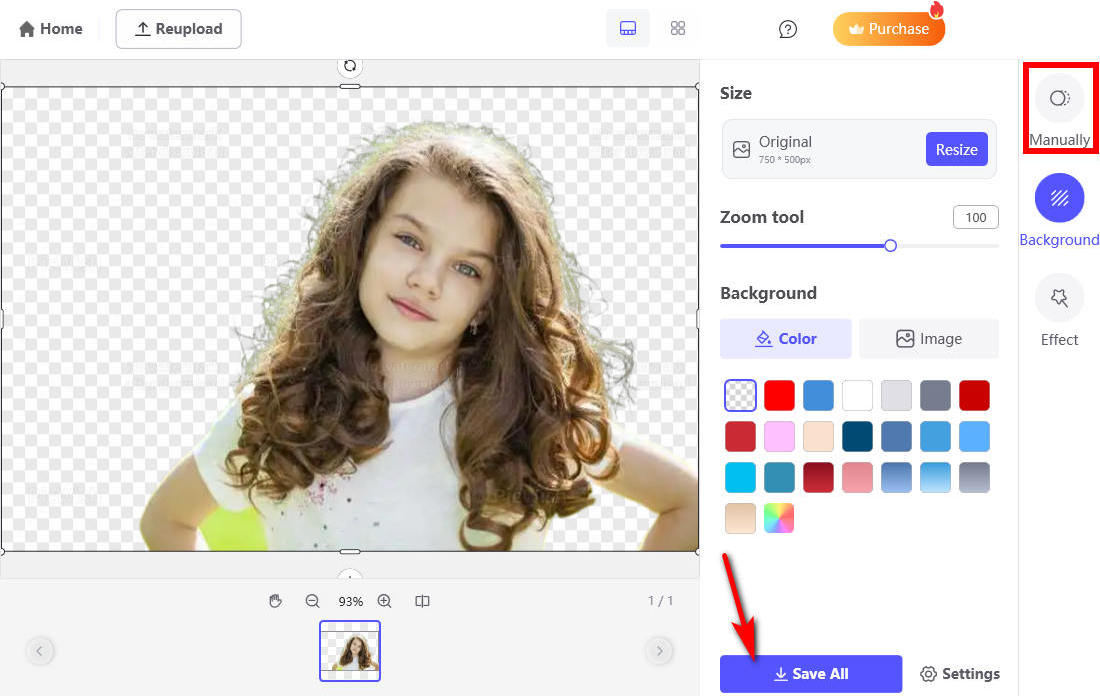
Step 1. Open PicWish and go to Remove BG.

Step 2. Drag or upload the image to the popup window.
Step 3. The tool will automatically remove the original background. If there remain some unwanted background pixels, you can click Manually to further remove them. Till you are satisfied with the result, hit Save All button to download it.
Fotor
Fotor is a comprehensive image editing software that provides a series of image editing functions, such as crop, touch up, resize, collage, etc. Take the Background Remover as an example. This tool not only helps you remove the background automatically but allows you to do further editing such as adding filters, resizing the cutout.
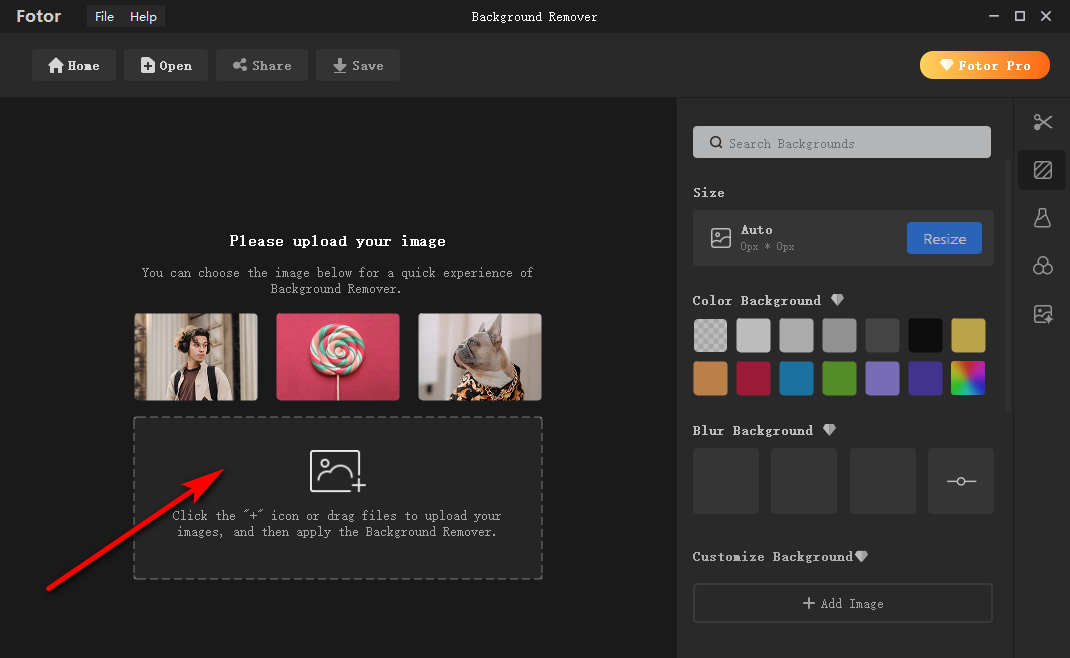
Step 1. Open Fotor and click Background Remover.

Step 2. Click the “+” icon or drag the image to upload.
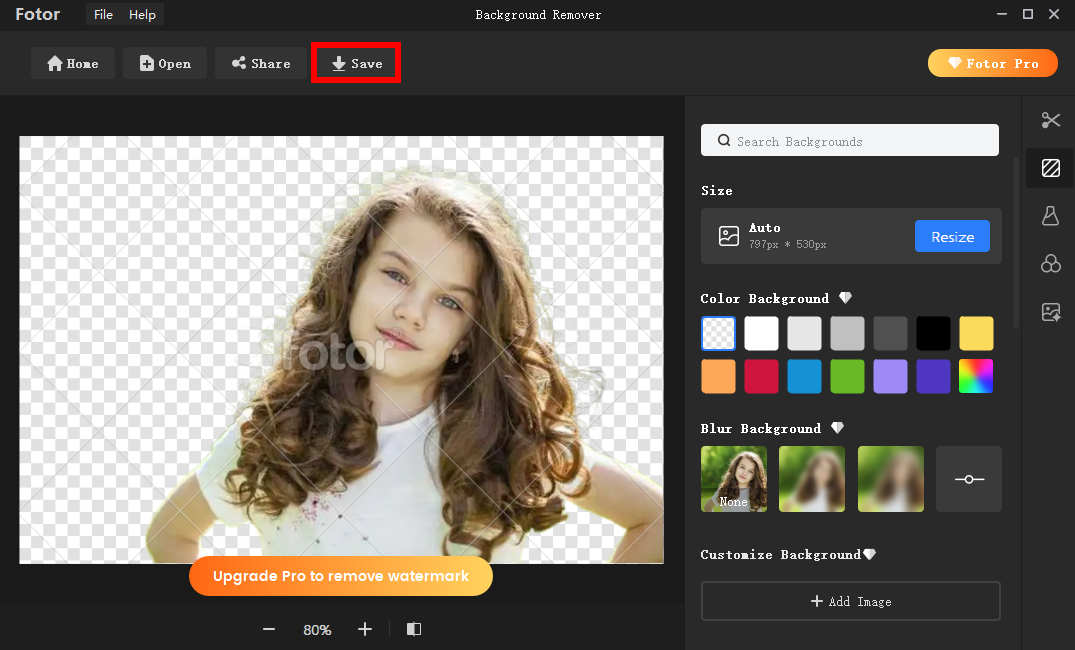
Step 3. Wait for seconds; you will find that the background has become transparent. Then, click Save to download the result.
Conclusion
We believe that after reading this post, you have learned how to remove white background from image in PowerPoint.
Presentations have become ubiquitous these days. We need it in product introductions, lectures, classes, etc. Therefore, it is particularly important to master the skills of making good presentations. This page aims to provide you with tutorials on removing picture backgrounds in PowerPoint. In addition, we also recommend some AI photo background editors like AnyErase, which saves you from manual background removal. We hope this post can help you.
Secure Download
FAQs
1. How do I insert a picture in PowerPoint without background?
Run PowerPoint, go to Insert, click Pictures, and choose This Device. Or you can drag the picture onto the slide. The inserted pictures may clash slide’s content. You can use Set Transparent Color or Remove Background to remove their backgrounds.
2. How to get rid of white background on image?
You can use PowerPoint Set Transparent Color tool to get rid of white background from image. Open PowerPoint, upload the picture and choose Set Transparent Color tool.Move the cursor to the picture, and then click the white background.