


How to Remove Background in Illustrator in 3 Ways
If you are a designer, you may frequently use Adobe Illustrator, creating and saving numerous designs like logos, icons, symbols, et cetera. When you want your design to have a transparent background, you may turn to Photoshop or other photo editors.
The good news is that you can do it just in Illustrator, and you don’t have to switch between different programs repeatedly.
In this article, we will show you how to remove background in Illustrator in 3 ways: some easy and some precise. In addition, we will share an efficient and accurate online background remover – AnyEraser, which can save you precious time.
Part 1. How to Remove Background in Adobe Illustrator
Unlike Photoshop, Adobe Illustrator does not have many fancy tools for removing an image’s background. However, it still provides us with 3 handy tools. You can vectorize a raster image and delete background in Illustrator via Image Trace, automatically remove the background from a vector file with the Magic Wand tool, or make background transparent in Illustrator precisely with the Pen tool.
Let’s get started.
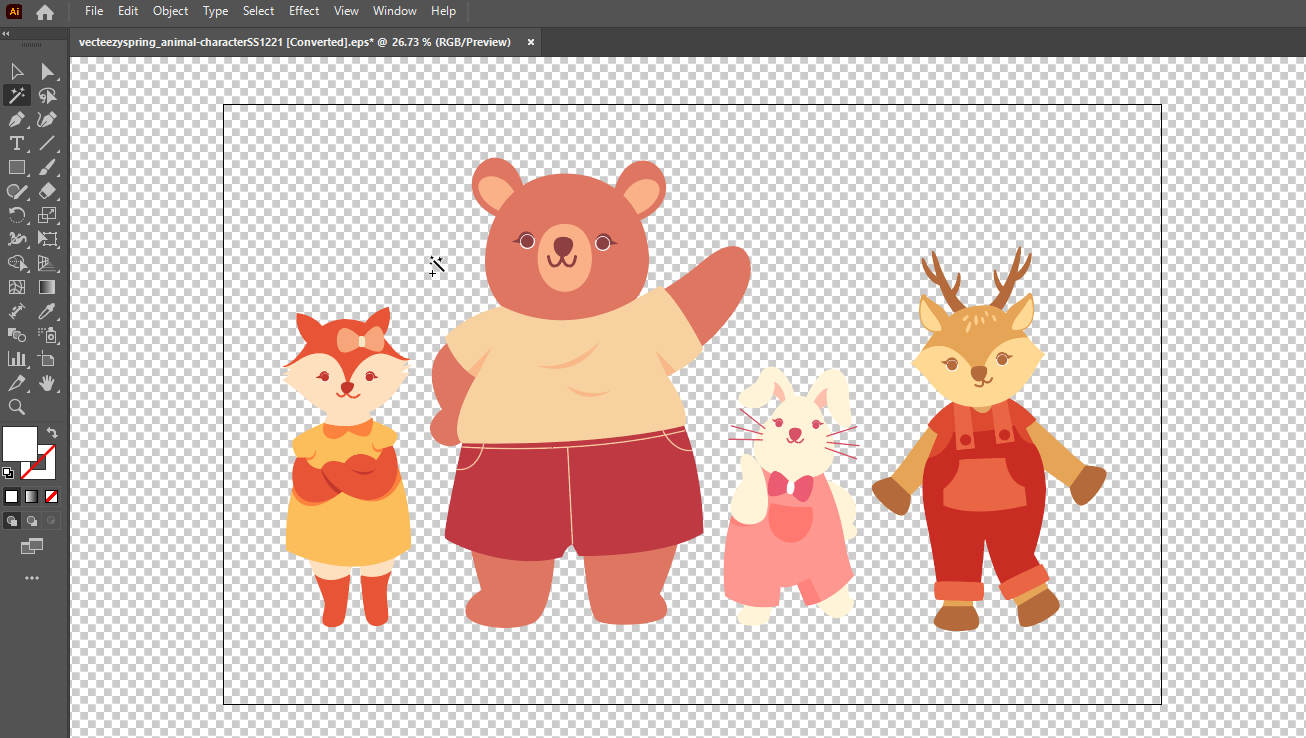
Image Trace: Vectorize an Image and Erase Simple Background
Now that Adobe Illustrator is a vector graphics editor, it works best with vector images. Therefore, before we use Illustrator to remove background, it is better to initially vectorize a photo by Image Trace, Illustrator’s built-in tool. Then, you can use Adobe Illustrator to remove background from an image part by part via clicking.
However, this tool has two defects. First, it impairs a photo’s quality during vectorization, causing some details to be lost. Second, if your photo image has a complex background, removing background in Illustrator will be time-consuming. Therefore, it’s better to use it to erase simple backgrounds.
How to remove background in Illustrator with Image Trace? Here are the steps.
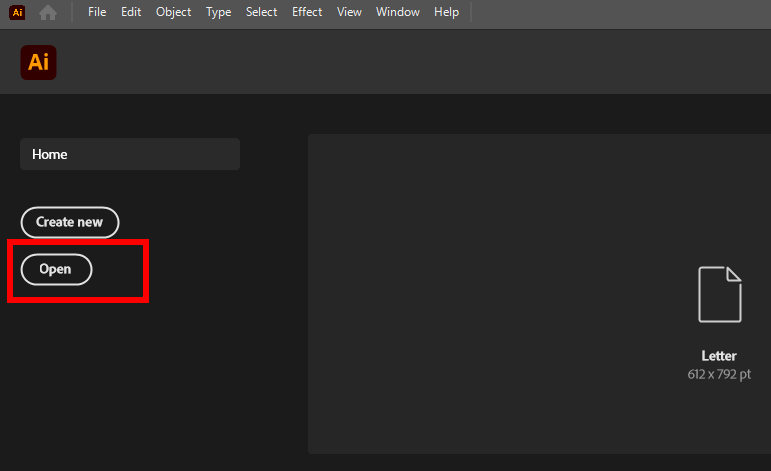
- Step 1. Launch Illustrator and hit Open to open the photo whose background you want to get rid of.
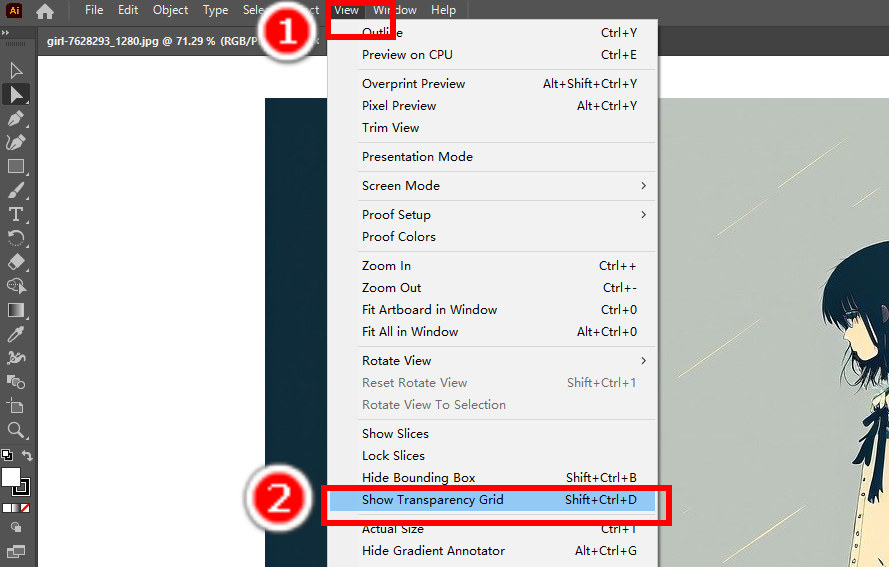
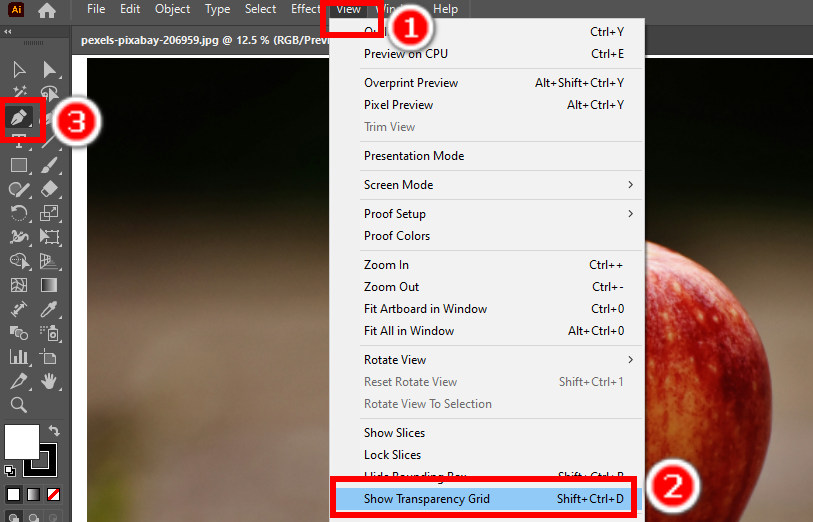
- Step 2. Click on View on the top panel and choose Show Transparency Grid. It will replace the white artboard with a transparent background.
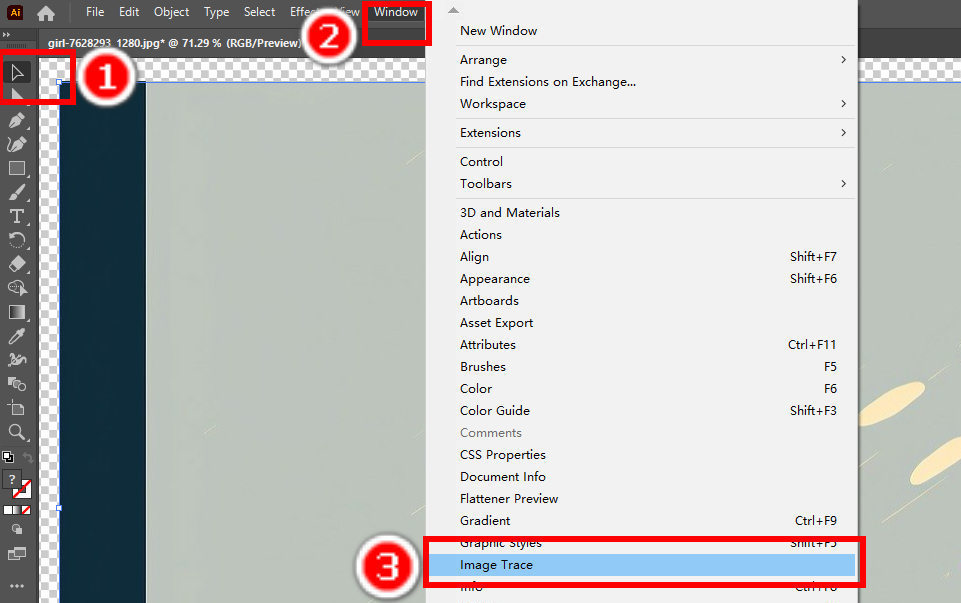
- Step 3. Choose the Selection tool (a black arrow icon) and click on the photo to select it. Then, hit Window > Image Trace.
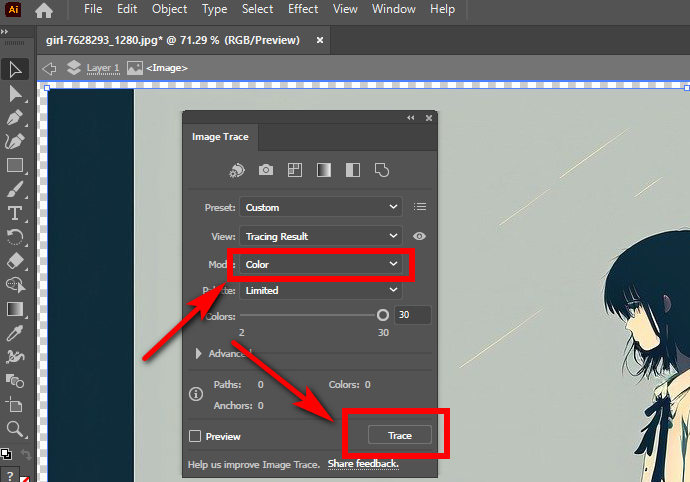
- Step 4. A window will pop up to let you adjust the Image Trace settings. We recommend you choose color mode. Hit the Mode option box and choose Color from the drop-down menu. Then, click on Trace to vectorize the photo.
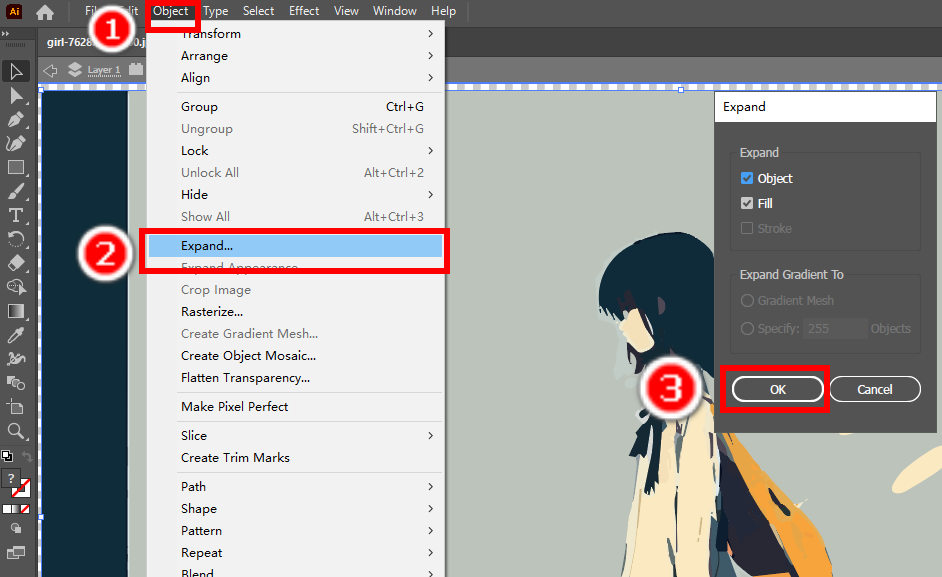
- Step 5. Now you’ve got a vector image. However, the image is still an inseparable whole, and you have to divide it to delete background in Illustrator part by part. Click on Object > Expand, and a pop-up window appears. Click on OK to expand the image.
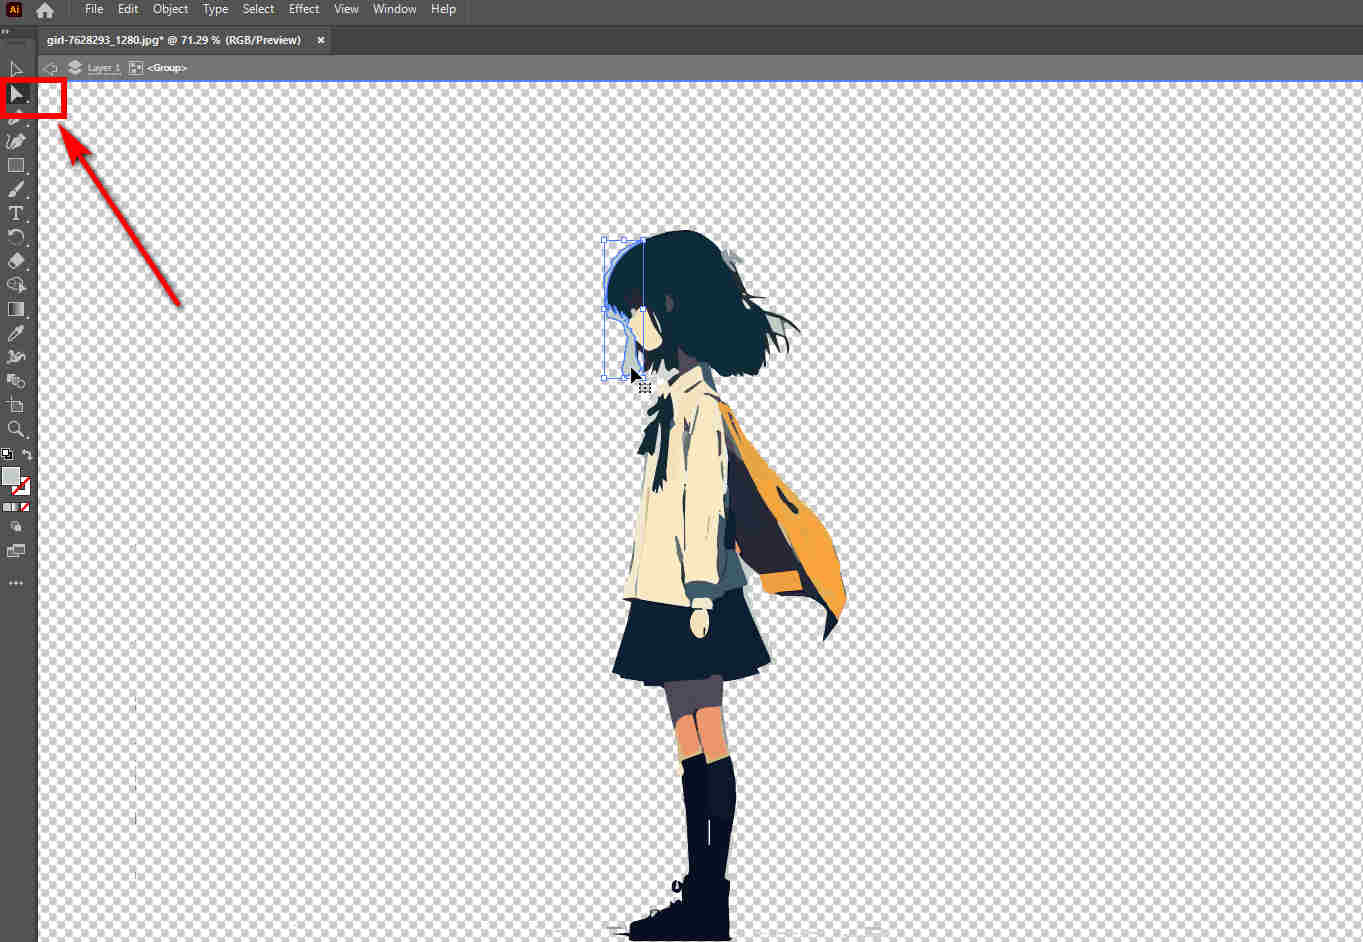
- Step 6. After expanding, the whole image is now divided into many parts, each of which is a continuous area with pixels of the same color. Then, choose the Direct Selection tool (the white arrow one). Click on a part of the background, then press the Delete key to delete it. Repeat the act, and you will finally delete background in Illustrator part by part.
Magic Wand: Remove the Backgrounds of Vector Images Quickly
If you want to utilize Adobe Illustrator to remove background from a vector image, we recommend trying the Magic Wand tool. This efficient tool can automatically select the areas or subjects sharing similar characters. Like the former tool, this tool works best with photos with simple backgrounds. Hence, it is your go-to tool to remove white background in Illustrator. If the backgrounds contain various colors, it will take quite a few steps to remove background in Illustrator. Here are the instructions for how to remove background from image in Illustrator with Magic Wand tool.
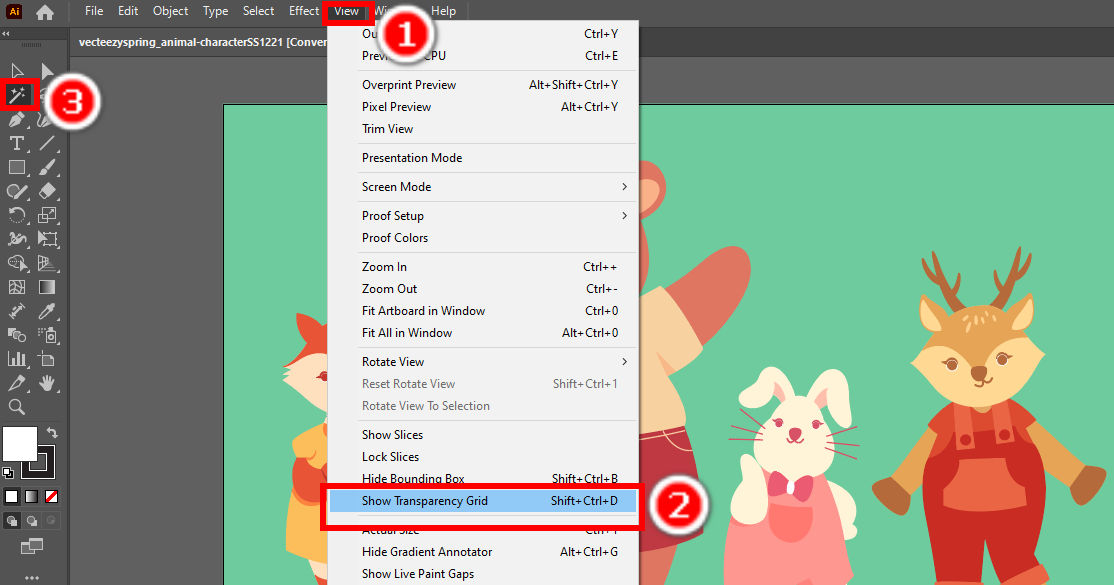
- Step 1. Open a vector file and hit View > Show Transparency Grid. Then, choose the Magic Wand tool on the toolbars. Alternatively, press “Y” to switch to the Magic Wand tool.
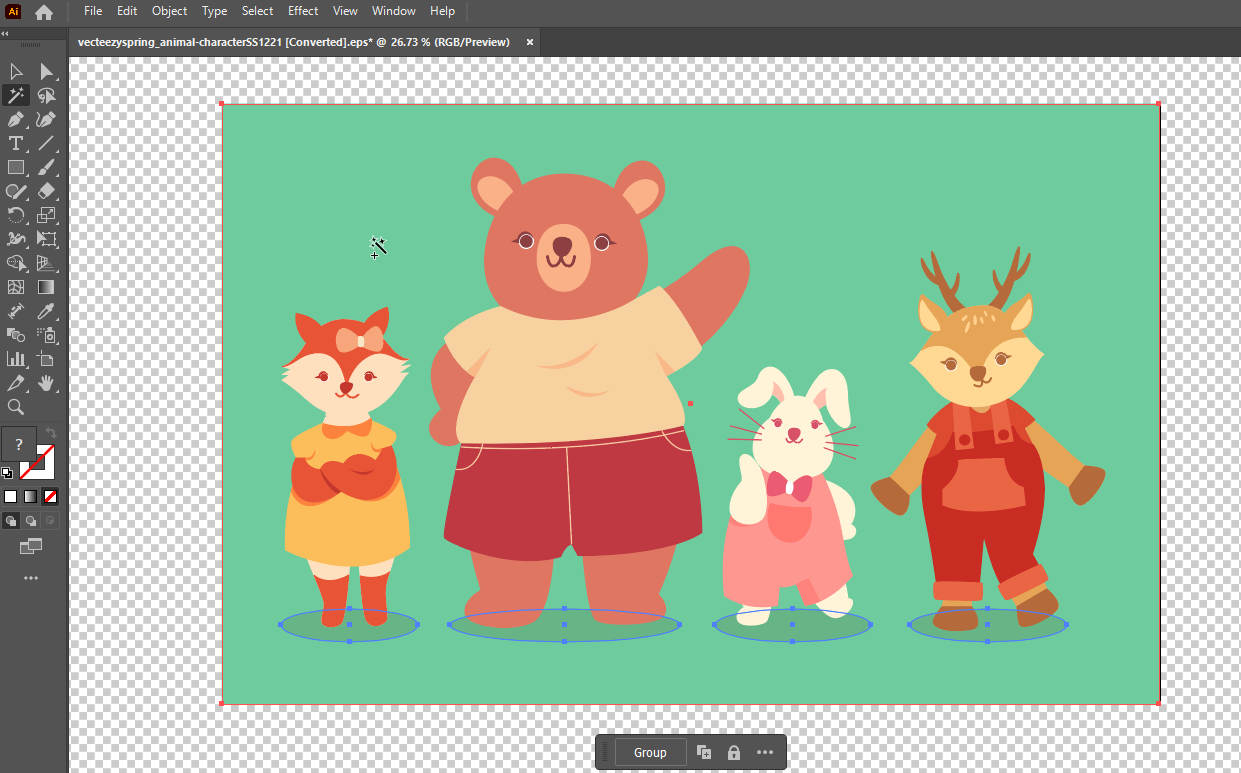
- Step 2. Click on the background, and the Magic Wand tool will select all areas with the similar attributes. If you want to add an object or area to the selection, press and hold the “Shift” key and click on that object. To subtract an area from the selection, press and hold “Alt” and click the object.
- Step 3. Press “Delete” to create a photo with a transparent background in Adobe Illustrator. Then, save the background-removed image on your computer.
TIPS
The Magic Wand tool will select all objects and areas with similar characteristics, so it may mistakenly delete some objects sharing the similar colors with the background. If you want to adjust the settings of the Magic Wand tool, you can double-click its icon on the toolbars to open its settings window.
Pen Tool: Precisely Delete Background in Illustrator
The two former tools can remove image background in Illustrator. However, as you can see, their functions are too simple to handle pictures with complex backgrounds. Fortunately, there is a tool in Adobe Illustrator to remove background precisely, no matter how complex the background is. With the Pen tool, you can manually select the object by drawing its outline and delete the background accurately. Now, let’s learn how to remove background in Illustrator with Pen tool.
- Step 1. Open your image in Illustrator, click View > Show Transparency Grid, and choose the Pen tool. You can also press “P” to use the Pen tool.
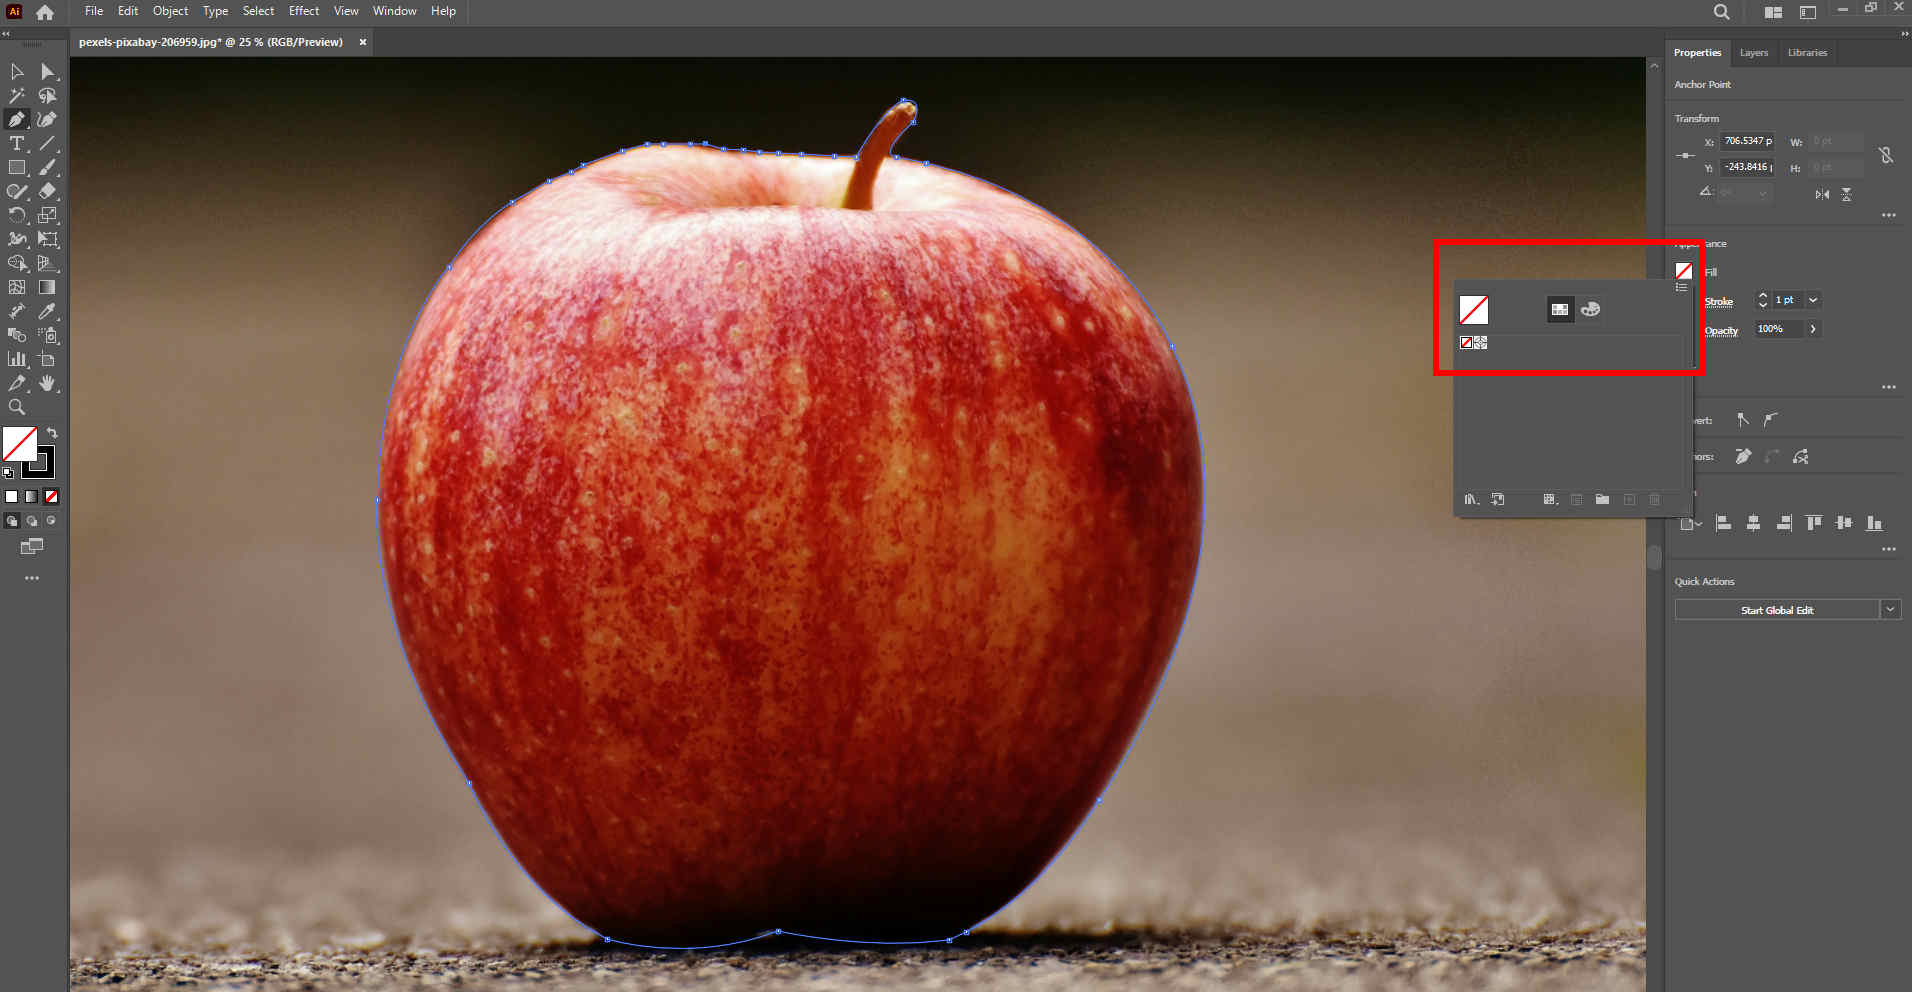
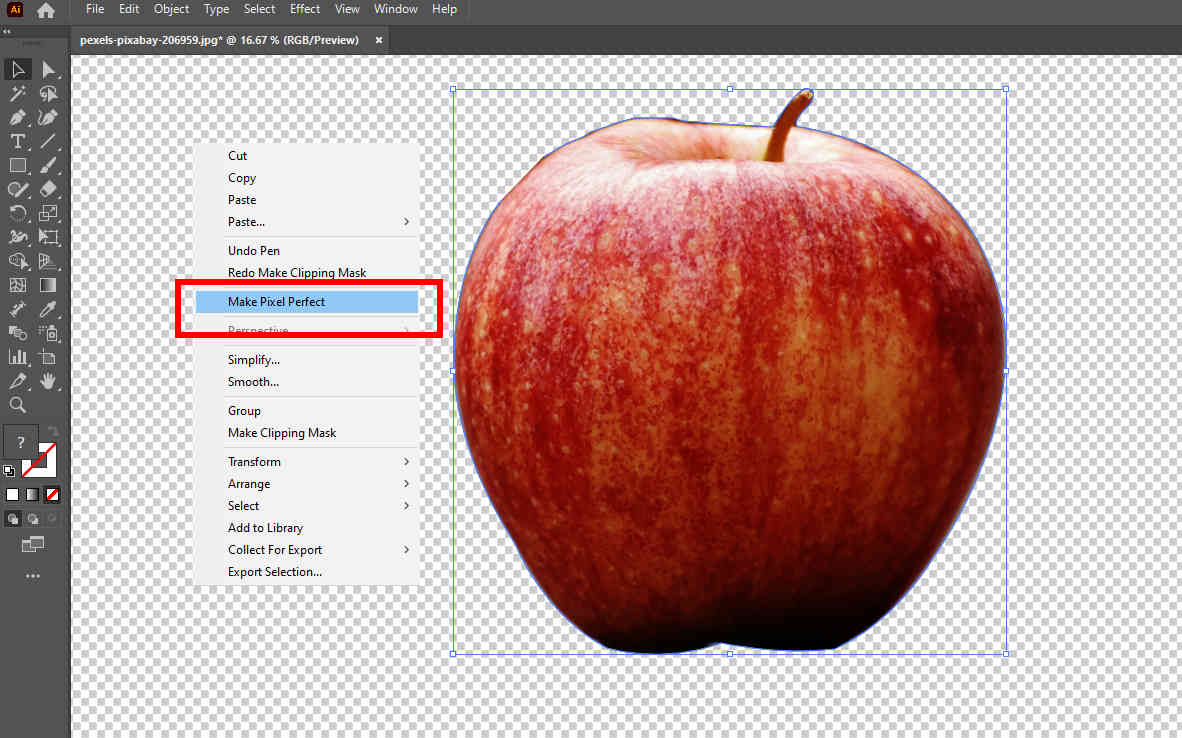
- Step 2. Go to the right panel, click the Fill option, and choose No Fill. Then, draw a freehand outline of the subject. First, click on a point around the edge of the subject to drop an anchor point, and then drop another anchor point near the former one to create a straight line between then. If you want to create a curve, drag the Pen tool and release it to make direction handles of the anchor point, and next, drag again to set the slope of the curve and release again. Drop anchor points one after the other repeatedly until you click on the initial anchor point to finish the selection.
- Step 3. Choose the Selection tool on the toolbars, hold down the Ctrl key and click on the background to add the background to the selection.
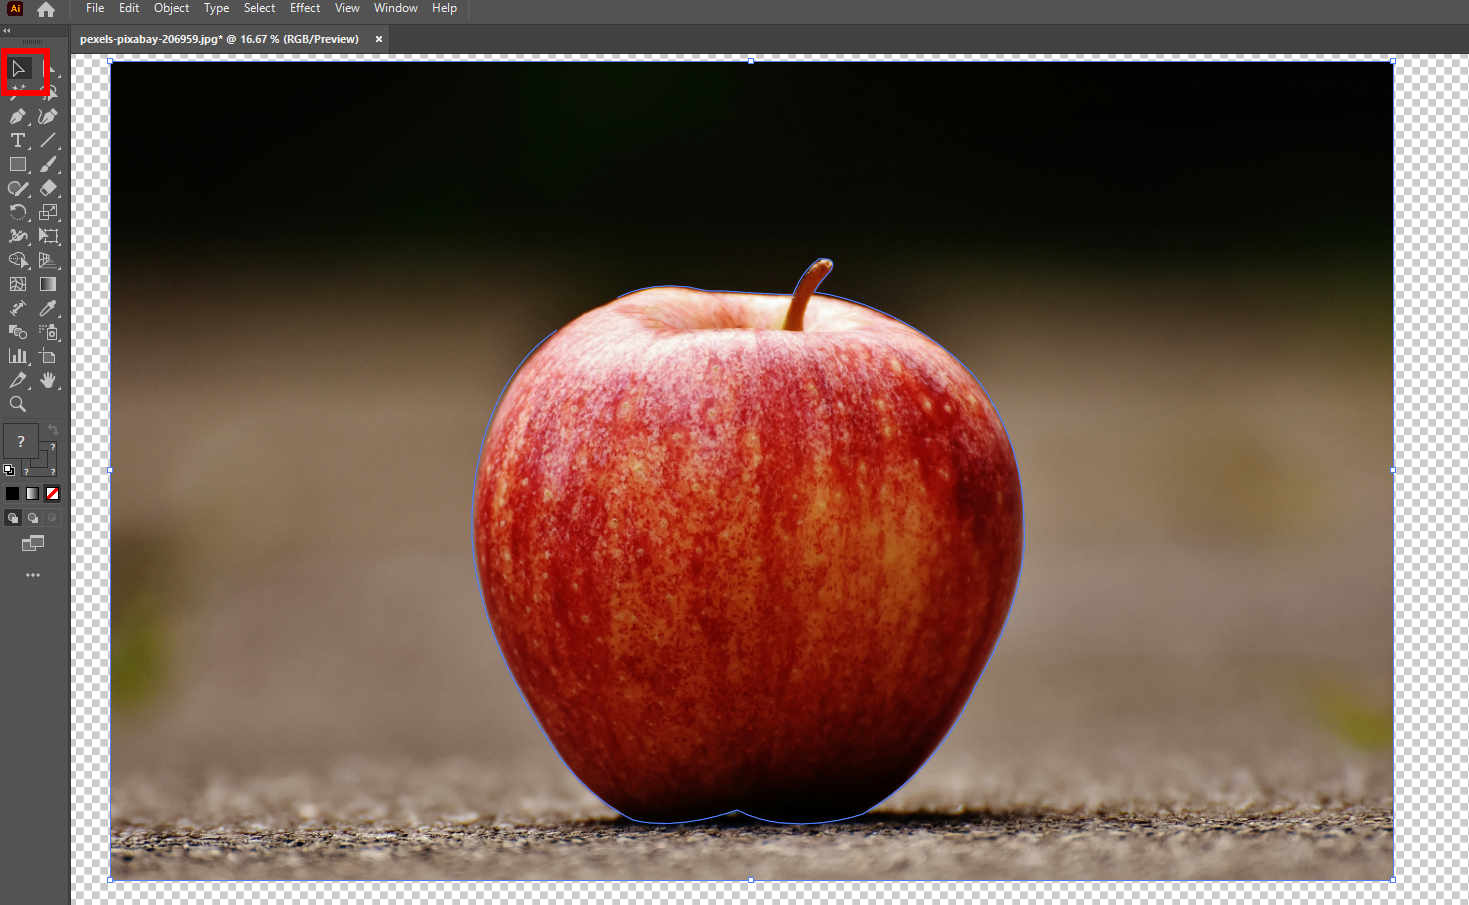
- Step 4. Finally, right-click on the background, and a menu will pop up. Choose Make Clipping Mask to make background transparent in Illustrator. Then, save the result on your computer.
Part 2. Intuitive Online Alternative – Remove Background in 1 Click
Removing background in Illustrator requires much time and quite a few skills. You can try AnyEraser, a one-click online background remover, to boost your efficiency. Powered by an AI-based algorithm, AnyEraser can precisely detect the foreground subject and background and erase the background with the subject intact. All these are done in seconds automatically. Let’s go, and we will show you the steps.
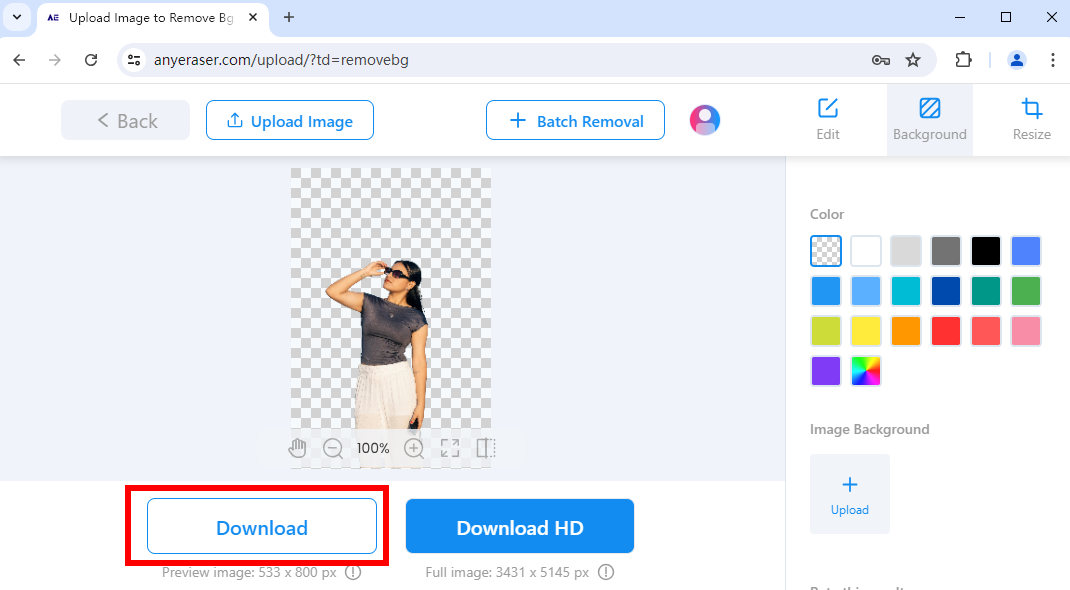
- Step 1. Access AnyEraser Background Remover and hit Upload Image to pick a photo whose background you want to take off.

- Step 2. AnyEraser will process the photo in seconds and output an image with a transparent background. Then, click on Download to save that photo on your computer.
Conclusion
In this article, you have learned how to remove background in Illustrator using three tools. The steps are not that hard. Next time you want to remove the background of your design, follow the steps here, and it will be a piece of cake. If you expect no time-consuming steps, we also recommend you try a one-click intuitive online background remover – AnyEraser.
We hope this page is helpful to you! Thanks for reading.
1. How to use the Magic Wand Tool to remove background in Illustrator?
First, click on View and choose Show Transparency Grid. Select the Magic Wand tool on the toolbars or press Y alternatively. Click to choose the background and press the Delete key to erase it.
2. How to remove background in Illustrator with Pen tool?
Hit View and Show Transparency Grid. Select the Pen tool or press P instead. Then, trace around the subject by dropping anchor points. After outlining of the subject, choose the Selection tool and click the background to select it. Finally, right-click on the background and choose Make Clipping Mask.