


How to Make Background Transparent in Photoshop
The transparent background image is widely used in our daily lives. Learning how to make a transparent background allows you to remove distracting backgrounds from your images so that others can put the focus on your subject.
You may ask: how do I make background transparent? I think the first tool that comes to your mind is Photoshop when it comes to taking some photo editing tasks. Known as a versatile photo editor, Photoshop provides an extensive array of manipulation features, allowing users to handle all types of editing needs. But it’s challenging to use the professional tool for newbies. No worries, my friends. we’ll walk you through the step-by-step process of creating a transparent background using the powerful tools in Photoshop.
Now, let’s explore how to make background transparent in Photoshop.
Part 1. 4 Methods to Make Background Transparent in Photoshop
Photoshop provides a rich library of tools for users to manipulate images; the same is valid for removing background.
There are two methods that only take a few seconds for simple background and two methods for complex background. The method that you choose depends on the complexity of your images.
We pick 4 easy-to-go tools from Photoshop and share their usage with examples of different images. Let’s go for learning how to make background transparent in Photoshop.
How to Convert a Solid Background to Transparent in Photoshop?
The following will introduce two tools—the Magic Eraser tool and the Quick Selection tool. They offer a practical solution when you handle images with simple color backgrounds. You can even convert background to transparent instantly with some simple clicks. How does the magic happen? Read the following content to uncover.
Method 1. Use the Magic Eraser Tool
The Magic Eraser Tool is perfect for a solid background because it can detect the pixels in the same color and then erase them clearly. For example, when handling the image with a white background, you hand the tool and tap on the background, and then the white background turns transparent instantly. The detailed steps are shown below.
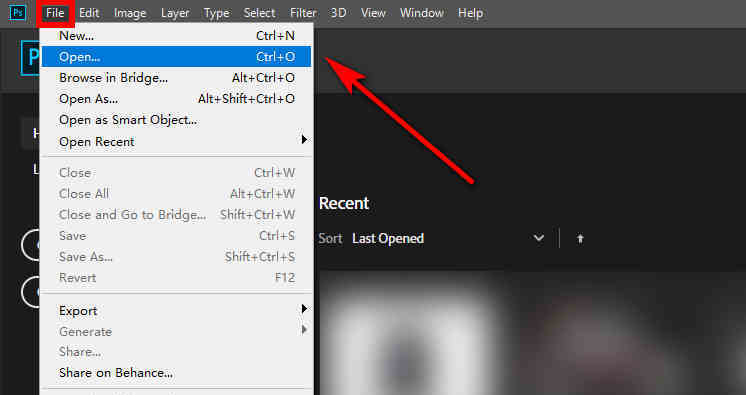
Step 1. Open your image in Photoshop. Run Photoshop, and go to “File” > “Open”. Then, you can double-click the image to open it.
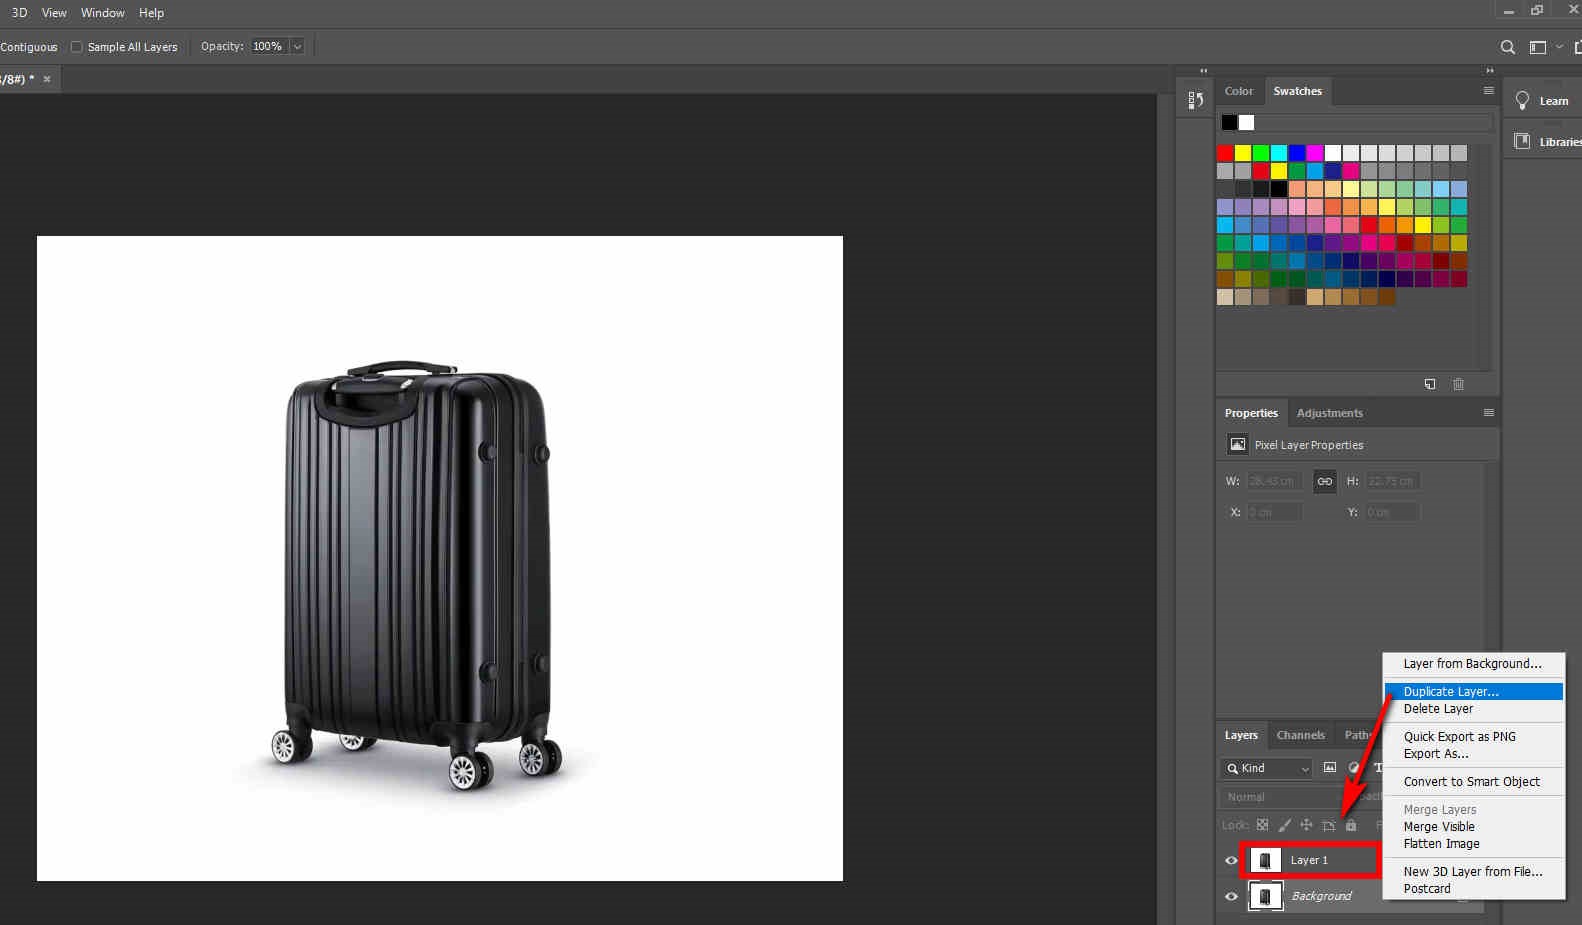
Step 2. Duplicate a new layer. In the Layers panel, find the background layer, right-click, and choose “Duplicate Layer”. Or you can use the shortcut—press Ctrl+A to select the layer, then Ctrl+C to copy the layer, and finally Ctrl+V to paste the layer. Now you can see a new layer appear in the Layers panel on the right side.
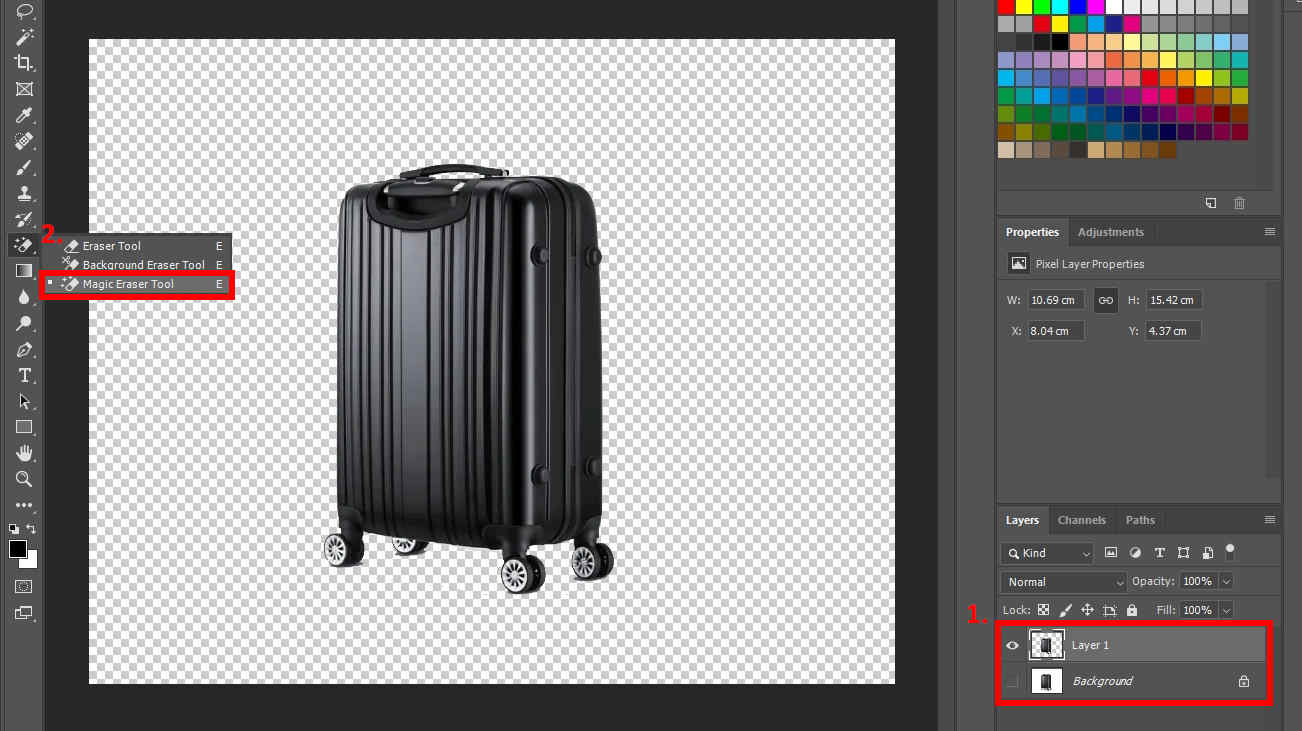
Step 3. Erase the background. In the Layers panel, find the background layer and click the eye icon on the left to hide it. Next, find the Eraser Tool in the left toolbar, then use the “Magic Eraser Tool” to erase the white background.
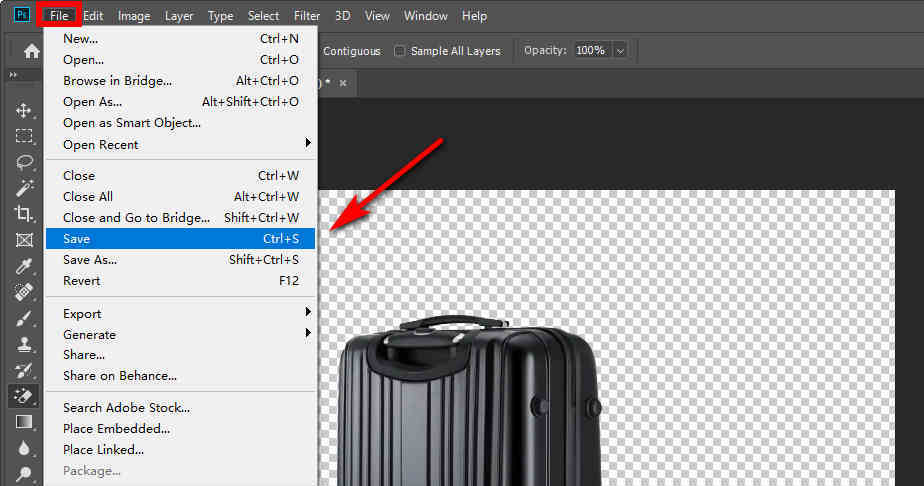
Step 4. Save your image. At this point, if you see the image represented in a checkerboard pattern (indicating a transparent state), it means that the background has been erased clearly. Then, you can go to “File”, click “Save”, and choose PNG format to save the result (only PNG format is supported to save transparent images).
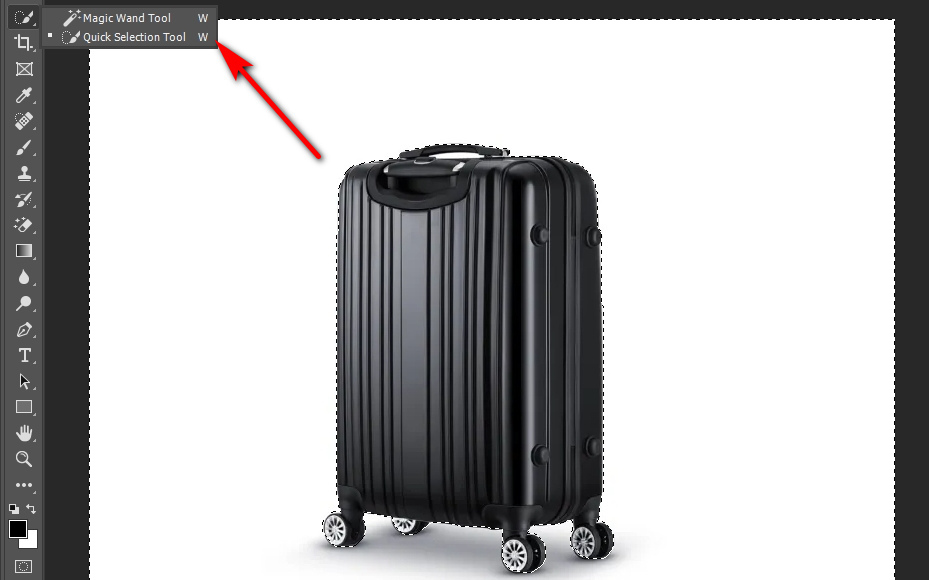
Method 2. Use the Quick Selection Tool
The Quick Selection Tool works well for high-contrast and sharp edges. When you select an area, Photoshop detects and selects the edges, so you do not need to track them manually.
Step 1. Open your image in Photoshop. Run Photoshop, click “File” on the top left, and then go to “Open”; finally, select an image from your library.
Step 2. Duplicate a new layer. Right-click on the background layer and choose “Duplicate Layer” on the pop-up menu. Or you can use the shortcut we taught in the previous part.
Step 3. Remove the background. In the left toolbar, find “Quick Selection Tool”, then click on the image to select the background. It is successfully selected if the background is outlined with the dotted line. Next, you can press the Delete key to remove the unwanted background.
Step 4. Save your image. Click the eye icon to hide the background layer in the Layers panel. Now, an image with a transparent background appears. At last, click “File”, and choose “Save” to save your image.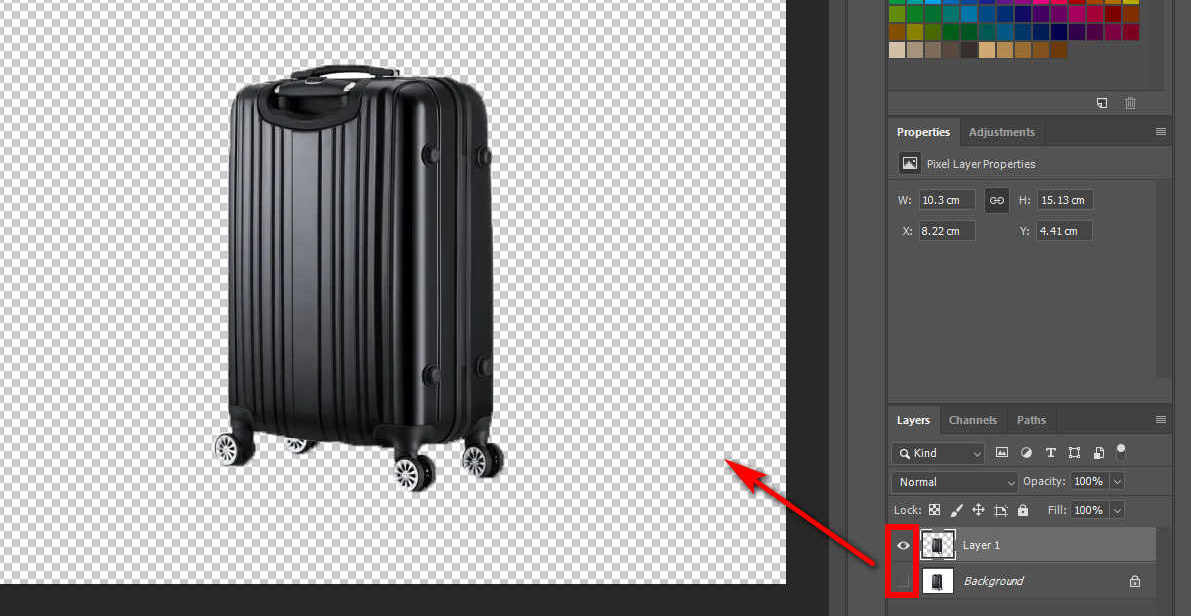
How to Convert a Complex Background to Transparent in Photoshop?
Background removal for complex background images requires another two tools — the Pen Tool and the Lasso Tool. These two tools require you to select the edges of objects manually.
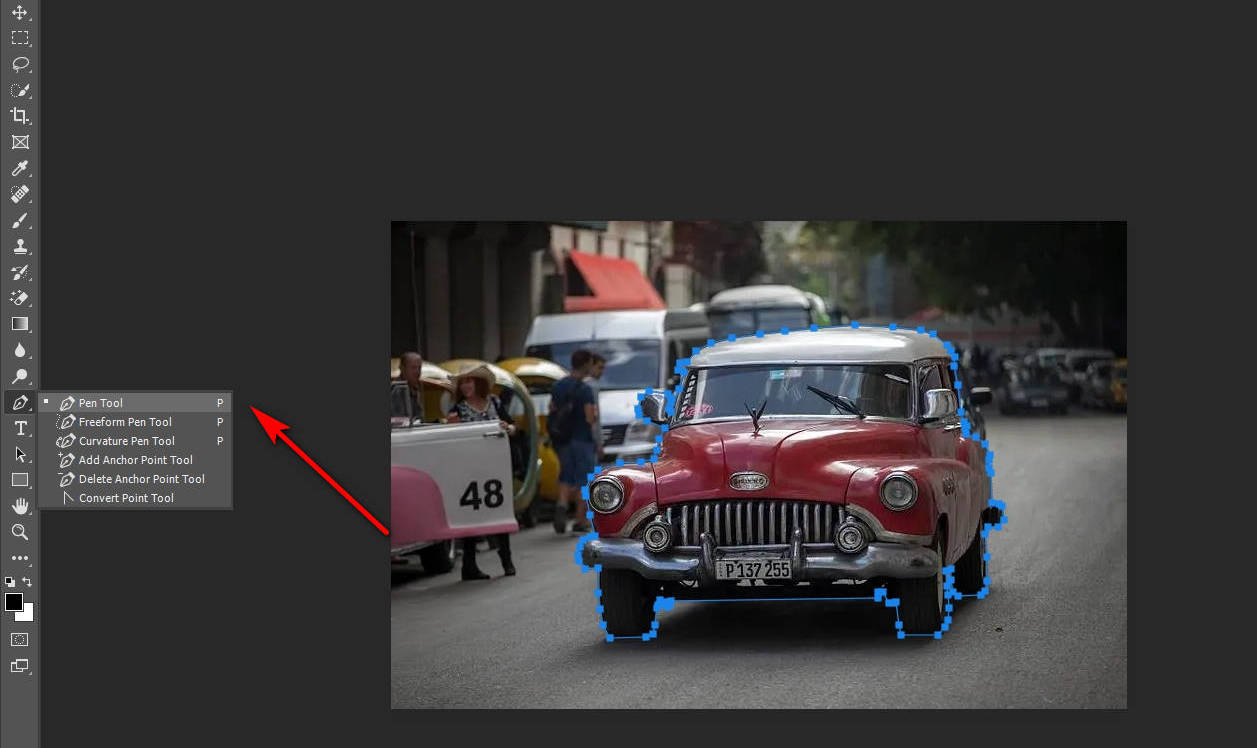
Method 1. Use the Pen Tool
You can use the Pen Tool to precisely outline curved objects; however, it is essential to lay as many anchors as possible to ensure a tightly-matched outline. In other words, the tool is most effective for simple objects without too many curved angles.
You can get the detailed tutorial on the following content. Keep reading.
Step 1. Open your image in Photoshop. Run Photoshop, find “File”, and choose “Open” to select the image you want to remove the background.
Step 2. Duplicate the image in a new layer. Right-click on the background layer and choose “Duplicate Layer”. You can also use the shortcut we taught above.
Step 3. Trace the outline of the subject. In the left toolbar, find the “Pen Tool” and draw a path. Select an anchor point first, then trace the subject’s outline along the edge. You can get a straight line by setting two anchors while creating a curved line by setting and dragging the third anchor.
Step 4. Select the traced area. In the Paths panel, hit the Load Path as Selection icon to select the area you traced.
![]()
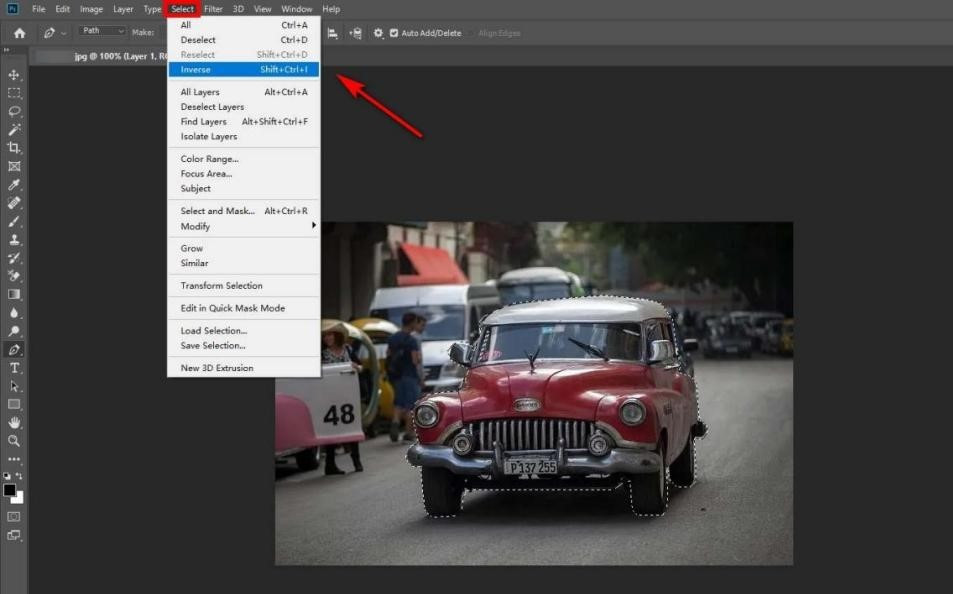
Step 5. Delete the background. The area we have selected is the subject, but it is the background we want to remove, so we need to invert the selected area to the background. Therefore, you should go to “Select” > “Inverse” and press the Delete key. Alternatively, you can use the shortcut Ctrl + Shift + I to invert the area.
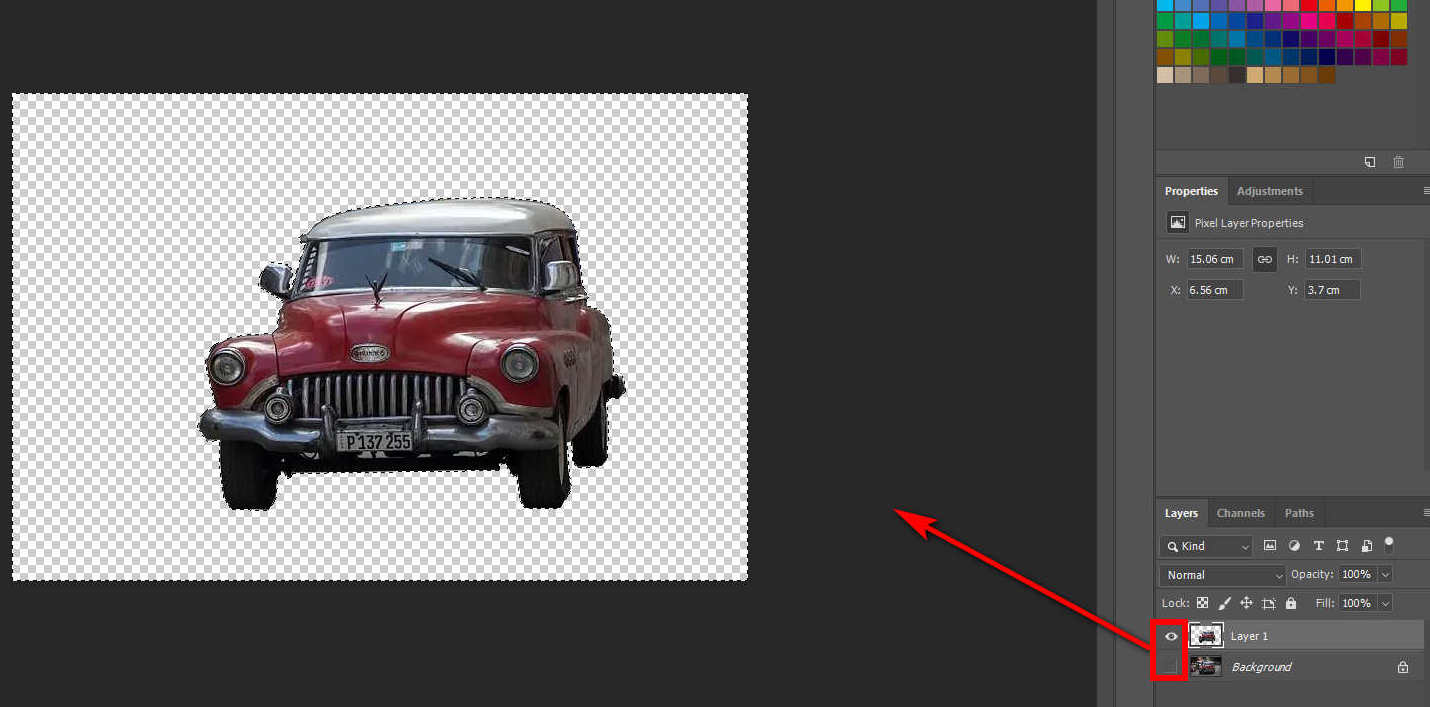
Step 6. Save the image. In the Layers panel, find the background layer and click the eye icon on the left to hide it. Then, you can save the image.
Method 2. Use the Lasso Tool
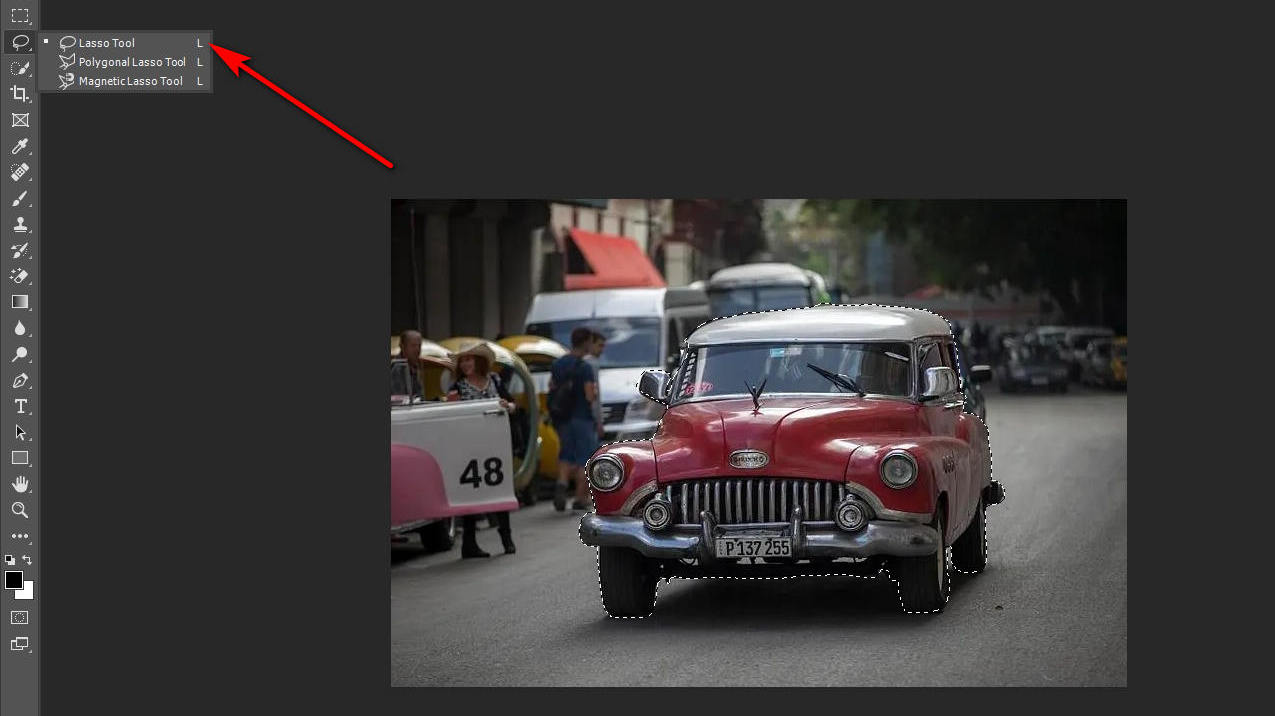
Lasso Tool can make freehand selections. If the subject of the image is an irregular shape with rugged edges, then we can use this tool to trace the subject’s outline quickly. Lasso Tool is helpful in drawing free-form sections of a selection border.
Step 1. Open your image in Photoshop. In the Photoshop interface, find the “File” and go to “Open”. Now, you can choose the image that you want to open.
Step 2. Duplicate the image in a new layer. Right-click on the background layer and choose “Duplicate Layer”. Or use the shortcut to do it.
Step 3. Trace the edges of the subject. In the left toolbar, find the Lasso Tool. This tool can select the subject using a freehand drawing motion.
Step 4. Select the traced area. Now, you should select the area you just traced. Hit the Load path as selection icon In the Paths panel.
Step 5. Delete the background. Find Select in the menu bar, click “Inverse”, and press the Delete key. You can also use the shortcut Ctrl + Shift + I instead of clicking Inverse.
Step 6. Save the image. In the Layers panel, click the eye icon on the left to hide the background layer. Then, you can save the image.
Part 2. How to Make a Transparent Background Online
Using Photoshop to make background transparent can be difficult for newbies because Photoshop is specialized. So, is there any way to get a transparent background without Photoshop? The answer is yes. In the following, we will recommend several ways to remove background online.
AnyEraser
AnyEraser is a fast background remover online. It can help you make background transparent from the image in 1 click within a few seconds. In addition to its fast speed, AnyEraser also supports the accuracy. It is supported by artificial intelligence to distinguish between subject and background accurately. What’s more, you can find that the cutout’s edges are clean and smooth.
Here are the steps on how to make an image transparent using AnyEraser.
Step 1. Drag or upload the image to this page.Open the AnyEraser website, click “Upload Image”, and choose the image you need to process.

Step 2. The remover will instantly recognize the subject, handle the curving edge, and replace the complex background with a transparent one.
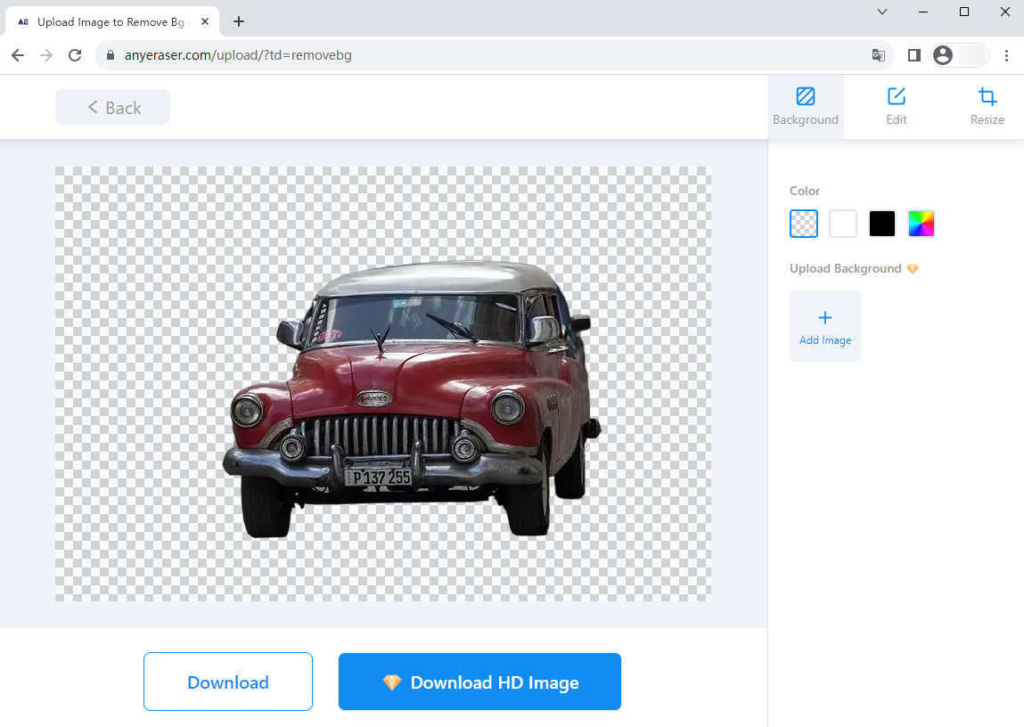
Step 3. Hit the Download button and save the picture in transparent PNG format. No watermark will be added to the result.
Erase.bg
Erase.bg is an online tool that uses AI to remove backgrounds from images automatically. It can handle with images in PNG/JPEG/JPG/WebP. If you have images in these formats, you can convert them to PNG with a transparent background on Erase.bg. It will quickly give you perfect clipping with smooth edges.
Step 1. Open the Erase.bg website, and upload the image on this page.

Step 2. Wait for the picture to be processed, and you will see a transparent background image.
Step 3. Click the Download button to save the edited photo.
Slazzer
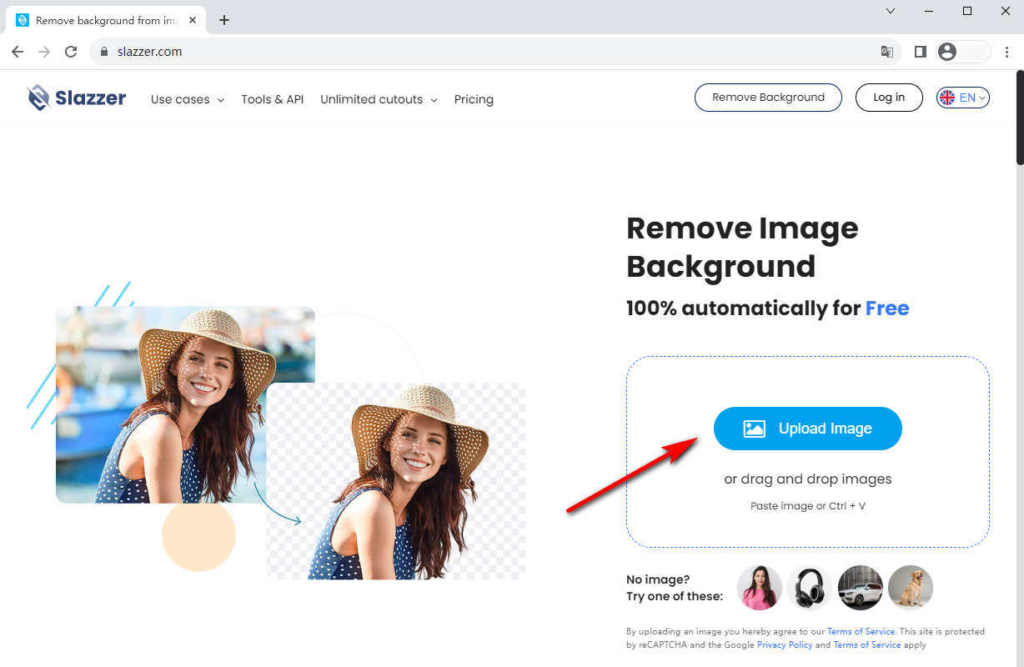
Slazzer can instantly detect the subject from any photo and gives you a smooth & precise cutout. You can save an amazing amount of time because it can work with complicated edges in a matter of seconds.
Step 1. Open the Slazzer website and click the Upload Image button to upload the image.
Step 2. Wait for the remover to recognize the background. The remover will automatically remove the background.
Step 3. Download and save the transparent image.
Conclusion
All in all, how to make background transparent in Photoshop is no longer a problem. This post introduces 4 tools to remove background in Photoshop, and you can pick a suitable one after considering the type of your photo. If you think Photoshop is complicated, you can use free online automatic background remover like AnyEraser to make a transparent background.
Get rid of the things you don’t want in your background so your subjects can really shine.
FAQs
1.How to make a white background transparent?
You can use the Magic Eraser tool to make a white background transparent. Find the Magic Eraser tool in the left toolbar, click the white background, and press the Delete button. Now, you can see the white background becomes transparent.
2.Can I make a part of my image transparent in Photoshop?
Yes, you can use the Pen Tool or Lasso tool to make a part of an image transparent in Photoshop. Select the tool you want to use and then trace to select the part of the image you want to make transparent.
3.How do I save an image with a transparent background in Photoshop?
To save a transparent background image in Photoshop, go to File, click Save As, and select PNG as the file format. Before saving, ensure the box next to Transparency is checked.