


How to Cut Out Images in Photoshop (User-Friendly)
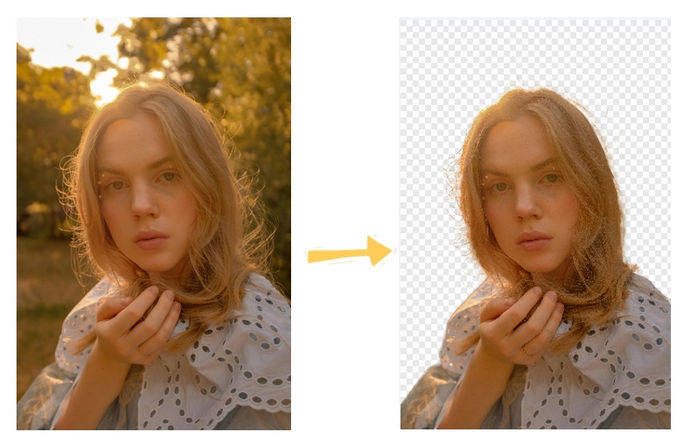
Cutout, a photo with transparent background, is widely applied in design like adding a person to photo or making a collage. To get a perfect cutout, you need to master the skill of cutting out images in Photoshop. As a professional software for image creation, graphic design, and photo editing, Photoshop offers more than one way to create a cutout image with its various tools. However, it requires patience and practice to learn to use Photoshop.
Today, we will lead you through this blog to learn how to cut out images in Photoshop with a user-friendly and step-by-step tutorial guide.
Let’s get started!
What is a Cutout Image?
A cutout image is actually a photo with the background removed or a picture with a transparent background. It is widely applied in many fields, including daily life photos, profile pictures, and graphic design materials. A cutout image allows you to add various pictures and colors as its background, unleashing your creativity and meeting your practical demands.
3 Easiest Methods for Cutout Images in Photoshop
As we all know, Photoshop is complicated for new beginners and some guides online are difficult to follow due to the version of PS. Therefore, we are going to provide you 3 Photoshop cut out tutorials for cutout images that are actionable in all PS versions, including the Quick Selection Tool, the Magic Wand Tool and the Pen Tool. Each method has its advantages, and you can choose one that suits your situation.
Method 1. Quick Selection Tool
The Quick Selection Tool in Photoshop comes in handy when you need to remove object with intricate edges. It works like a brush and is able to detects similar colors and textures automatically. As a result, you can make precise selections and cut out part of image effectively, especially the objects with hair or fur.
Here are the details on how to cut out part of an image with the Quick Selection Tool.
- Step 1. Open Photoshop and upload the picture you want to edit.

- Step 2. Click on “Select and Mask” on the top menu bar, and you will find the photo is masked with a light mosaic. Now continue to choose the Quick Selection Tool in the left toolbar, move your mouse over the part you want to keep, and finally click the “OK” button at the bottom.
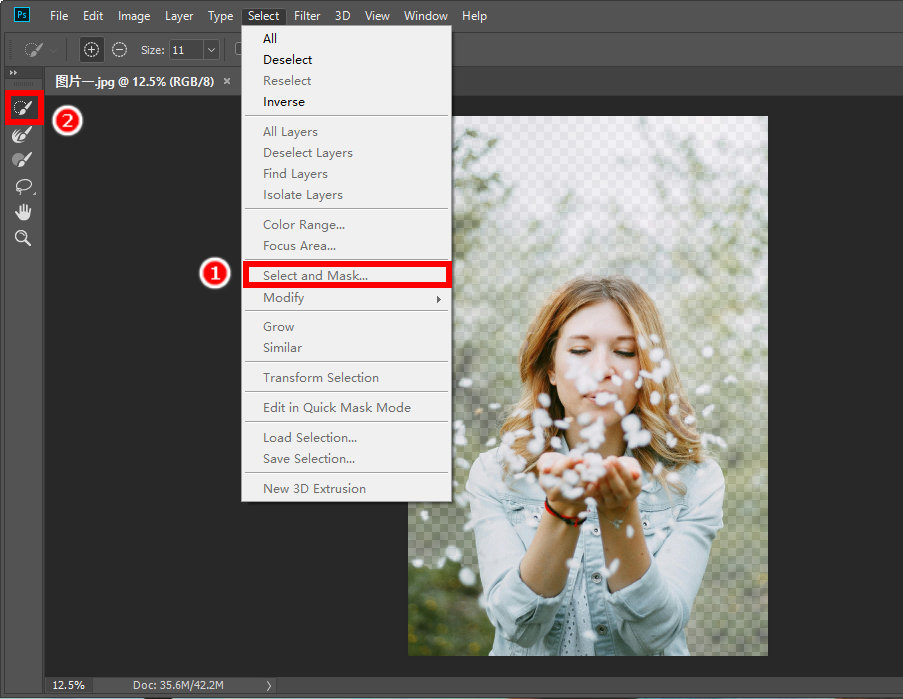
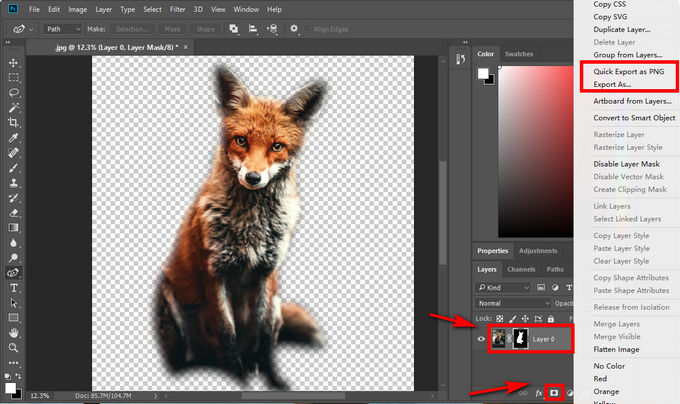
- Step 3. After finishing the step 2, you will find the part you choose is surrounded by dotted lines. Click the button at the bottom to create a new layer, and the background on the original layer will turn transparent.

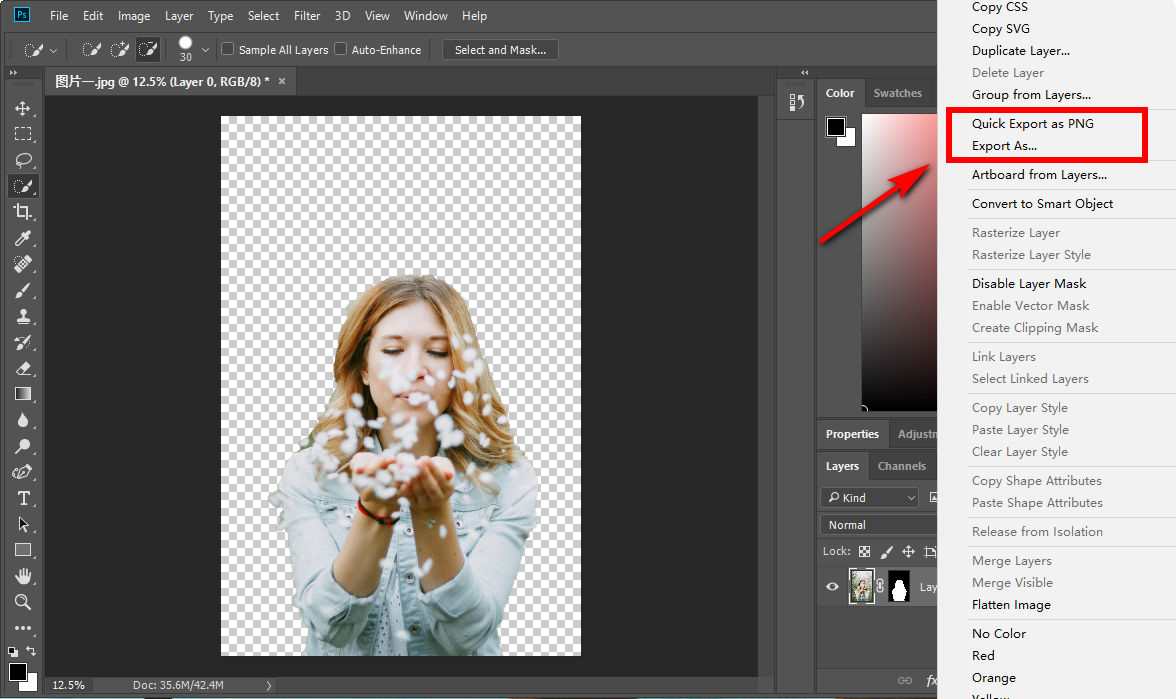
- Step 4. Finally, Right-click on the layer, choose “Quick Export as PNG” or click “Export As” to download the picture in other formats. By following these steps, we successfully crop the person out of the photo.
Method 2. Magic Wand Tool
The Magic Wand Tool offers the easiest way to remove the background from a picture. It can accurately recognize selected area of similar color with a single click. Besides, this tool adeptly identifies distinct boundaries between foreground and background. Hence, you can use the Magic Wand Tool in Photoshop to cut out shape with solid background.
Now, let’s come to the part about how to cut out an object in Photoshop with it.
- Step 1. Open Photoshop and upload the image. Select the Magic Wand Tool on the left toolbar.
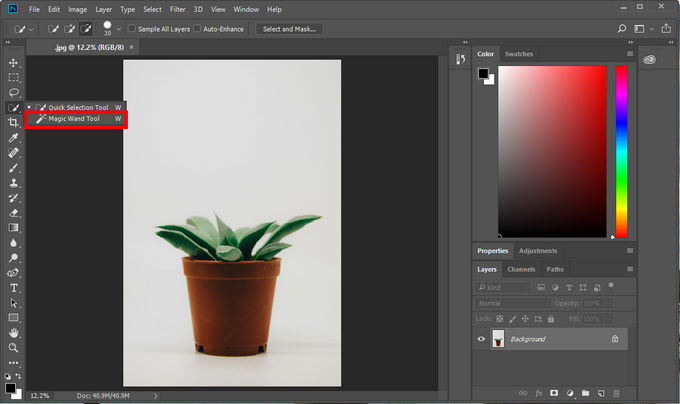
- Step 2. Now, use this tool and click on the solid background in this picture. Then, the plant and the rest of the parts have dotted lines around them. If the lines do not fit your picture well, adjust the tolerance value at the top of the menu.

- Step 3. Then click “Select” at the top of the menu, and choose Inverse. This :Inverse” tool exchanges the selected object from the background to the plant. After that, click the “Add a mask” button on the right bottom.
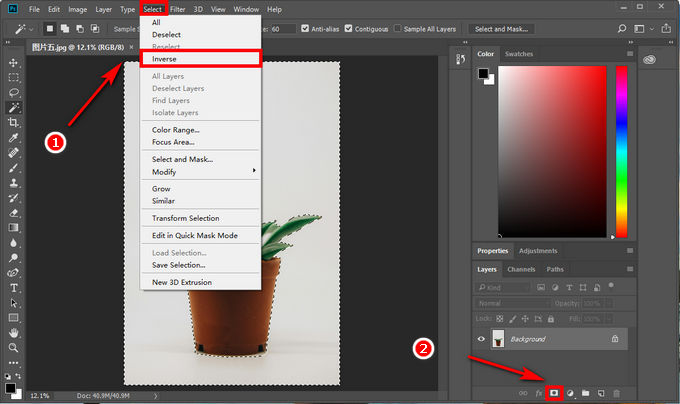
- Step 4. By these steps, a plant with a transparent background is successfully created. Now, you can click the layer and export the cutout picture in PNG or other formats.

Method 3. Pen Tool
The Pen Tool in Photoshop primarily designed for creating precise selection and path. You can use it to manually trace objects with intricate outlines. Thanks to its unparalleled control and precision, you can resort it to cut out a person or an object against complex background.
Let’s move on to the guide on how to cut background out of picture with this tool.
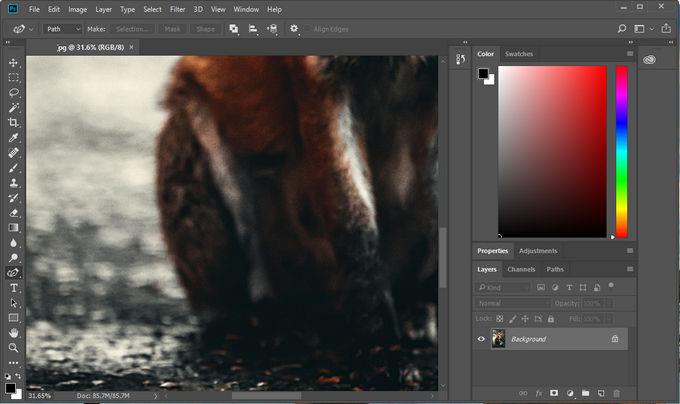
- Step 1. Open Photoshop and upload the picture. Press “Alt” and zoom in with your mouse to magnify the picture like this:
- Step 2. Press “P” to choose the Pen Tool quickly in the toolbar, which allows you to outline the subject precisely. Be free to click on the edge as the starting anchor point, and then continue to move around the edge until the whole subject is outlined by those anchor point.
If you create the wrong path, move the point directly or click the Edit button at the top of the menu. Then click the “Step Backward” button to undo your path. In the whole process, you can adjust and control the shape of the curve by holding and dragging it in different directions.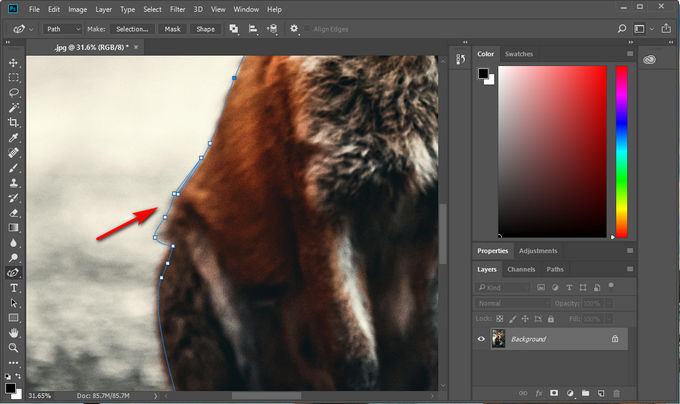
- Step 3. Right click on the picture, and choose “Mask Selection”, and keep choose the “New Selection” > “OK” on the popup window.
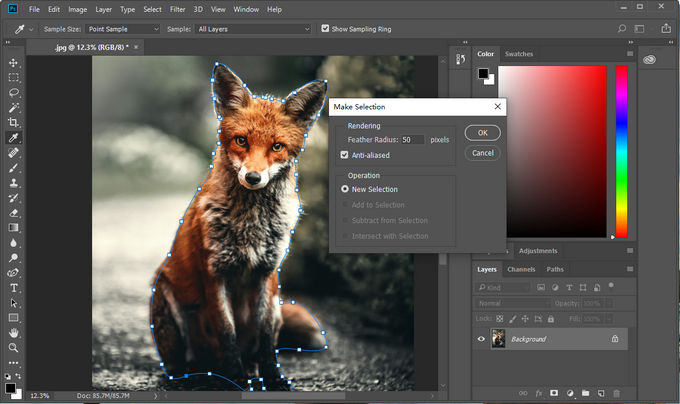
- Step 4. As the above steps, the subject will be surrounded with a black-and-white dotted line, this means the subject is successfully selected. Then you should click the icon on the bottom to add a mask to the original layer. After the background becomes transparent, you can export the cutout image.
Cut Out Pictures with Online and Handy Photoshop Alternative – AnyEraser
We have mentioned 3 ways to make Photoshop cutouts, however, perhaps some of you still find it time-consuming to find buttons and follow instructions, and have no idea about some problems during editing in Photoshop.
Due to the complicated process of using Photoshop, have you ever considered using an add-on or an easy-to-use Photoshop alternative to make cutout image, saving lots of time and effort?
Plugins or add-ons are often challenging to find and install and even have security problems. Therefore, an online cutout image maker may be your best choice.
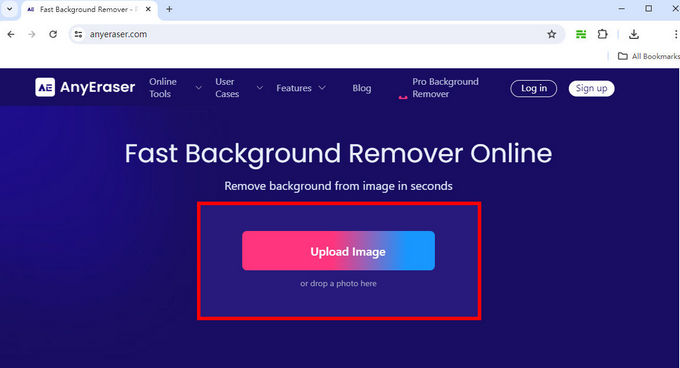
AnyEraser, an online picture background remover, enables you to make cutout images in an instant without any technical skills or installing complicated software. Its AI-powered technology helps to recognize objects accurately and delivers a perfect cutout with a clear and smooth edge. What’s more, it is totally free of charge and safe, giving you the best editing experience.
Now, let’s come to the guide on how to cut out an image with AnyEraser.
- Step 1. Visit AnyEraser and upload your picture.
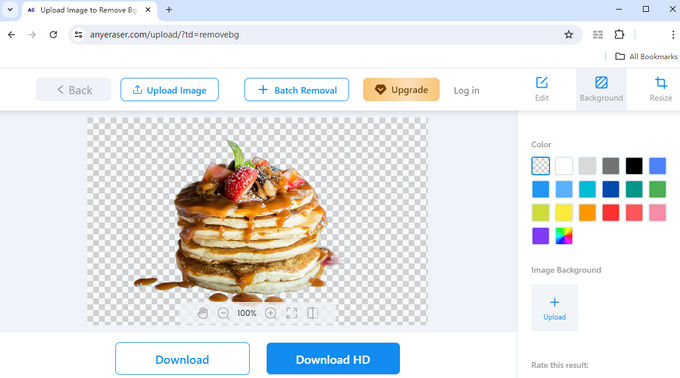
- Step 2. Once you upload the image, the online background remover will create a cutout image within 5 seconds. And then, you can directly download the picture by clicking the Download button at the bottom.
Follow the instructions above and a picture with a transparent cutout is generated.
Conclusion
Today, we share a beginner-friendly guide on how to cut out image in Photoshop. After reading this post you are in the high possibility to handle the Photoshop cutout tools including the Quick Selection Tool, Magic Wand Tool, and the Pen Tool.
However, if you think it’s still challenging and time-consuming to learn the steps, you can resort to another handy alternative of cut out tool in Photoshop. We recommend AnyEraser online background remover for its quick response and stunning removal performance.
If you have editing needs now, don’t hesitate to put the tutorial into practice.
FAQs
How can I remove part of an image in Photoshop?
You can use Quick Selection Tool to cut out image with well-defined edge. If you’d like to edit something out of the image with solid background, the Magic Wand Tool is recommended. However, when handling objects against a complex backdrop, the Pen Tool is your best choice.
How to cut out a person in Photoshop?
You can use the Quick Selection Tool to cut out a person. First, open the image with Photoshop. Second, choose the Quick Selection Tool, then click and drag the person. The Quick Selection Tool will automatically select areas around the person. You can refine the selection if necessary. Third, click to create a new layer. Finally, export your cutout image.
How to cut out a shape in Photoshop?
You can resort to the Magic Wand Tool to edit your picture quickly. First, open the picture in Photoshop. Second, click the Quick Selection Tool and click on the background area you plan to erase. Then the Magic Wand Tool will select all pixels that are similar in color. Finally, create a new layer and download your image.