AnyErase AI Background Remover
- Perfect details
- HD output
- Batch process
Use this AI background remover to make image transparent and showcase subject in its all glory. View all pro features >
Secure Download

How to Add Signature in Outlook (Ultimate Guides)
Email signatures are a great way to quickly add your contact information and other important details to an Outlook message. Adding signature in Outlook has become an increasingly important part of people’s daily work.
As one of the most popular email clients, Outlook allows you to create and add personalised signatures that make your email messages more credible and professional and let your email recipients easily get in touch with you.
In this guide, we will show you how to create transparent signature online and how to add signature in Outlook, thus enhancing your brand influence and communication efficiency. Whether you use Outlook on the web, Windows, Mac, or mobile, you can learn what you need.
Let’s get started!
Preparation: Create a Handwritten Signature for Outlook
Before adding a signature in Outlook, you may need to prepare a handwritten signature. This will add a personal touch to the messages you send, making your emails look more professional and stand out from the crowd.
As a matter of fact, learning how to do a handwritten email signature in Outlook is super simple. Firstly, you can write down your signature on a piece of paper, then take a picture to get your signature photo. But it will look unprofessional and informal with a background in your Outlook signature.
Hence, it is necessary to turn your signature photo into a transparent PNG image. Here, we recommend an online signature background remover: AnyEraser Digital Signature Maker. After that, you can add the transparent handwritten signature to your email signature in Outlook.
How to add handwritten signature in Outlook? Just follow the simple steps:
Step 1. Upload your signature picture to AnyEraser E-Signature Maker.
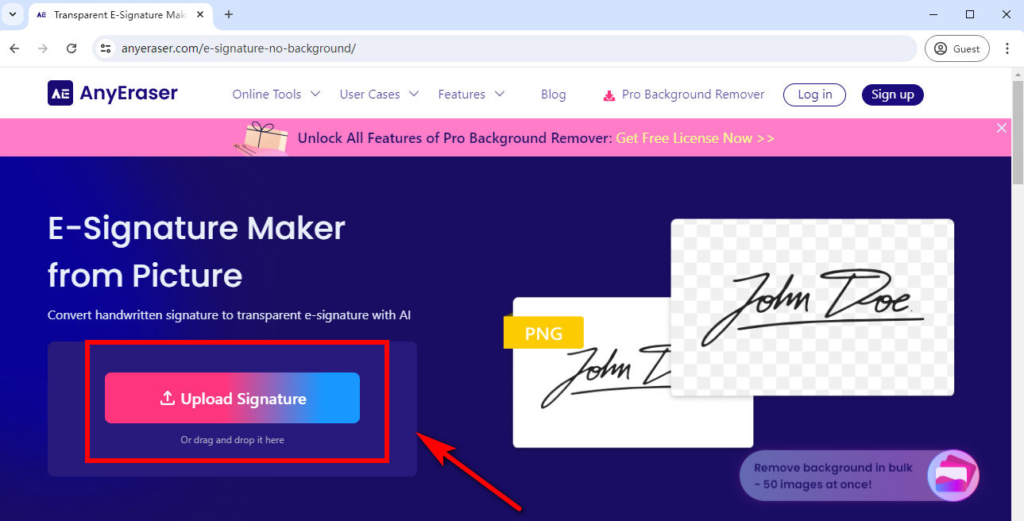
Step 2. After that, AnyEraser will automatically remove the background from your signature in seconds without losing quality.
Step 3. Download the transparent signature in a PNG image. Now, you can effortlessly add the handwritten signature to your Outlook signature.
How to Add an Email Signature in Outlook Web?
Are you wondering how to add a signature in Outlook online? We will show you how to get it done step by step.
Create Signature in Outlook
Here’s how to easily create and add your signature in Outlook.com:
Step 1. Go to your Outlook, and click the gear icon in the top right corner of the page for settings.
Step 2. In the pop-up settings window, select “Mail” and choose “Compose and reply.”
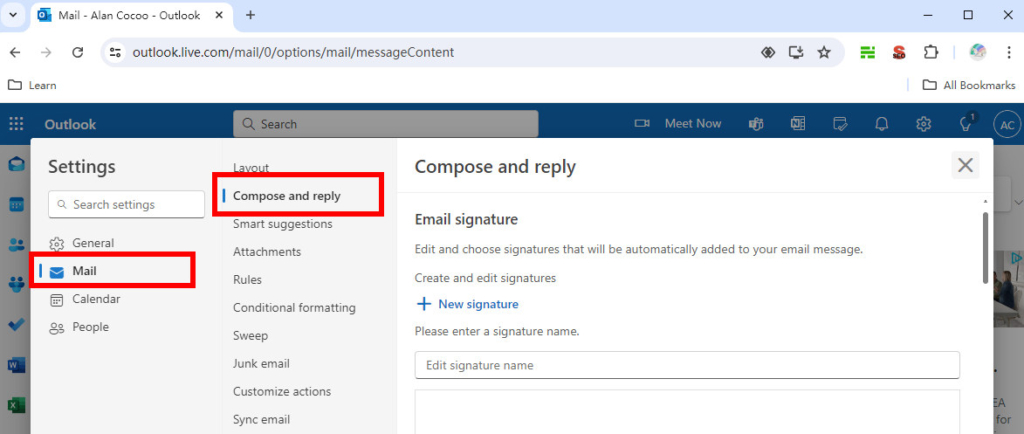
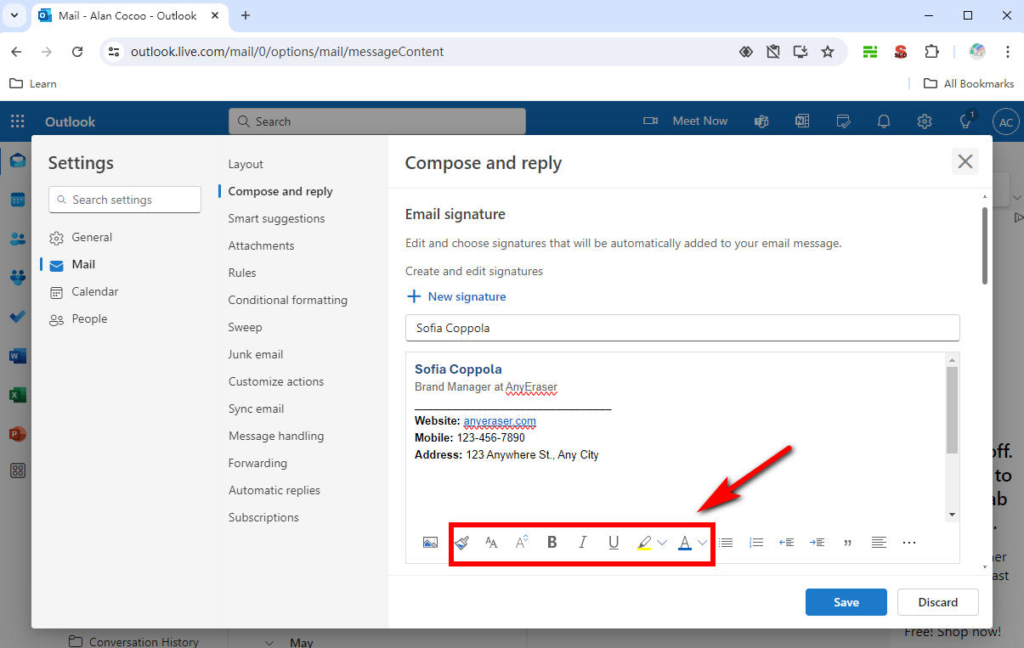
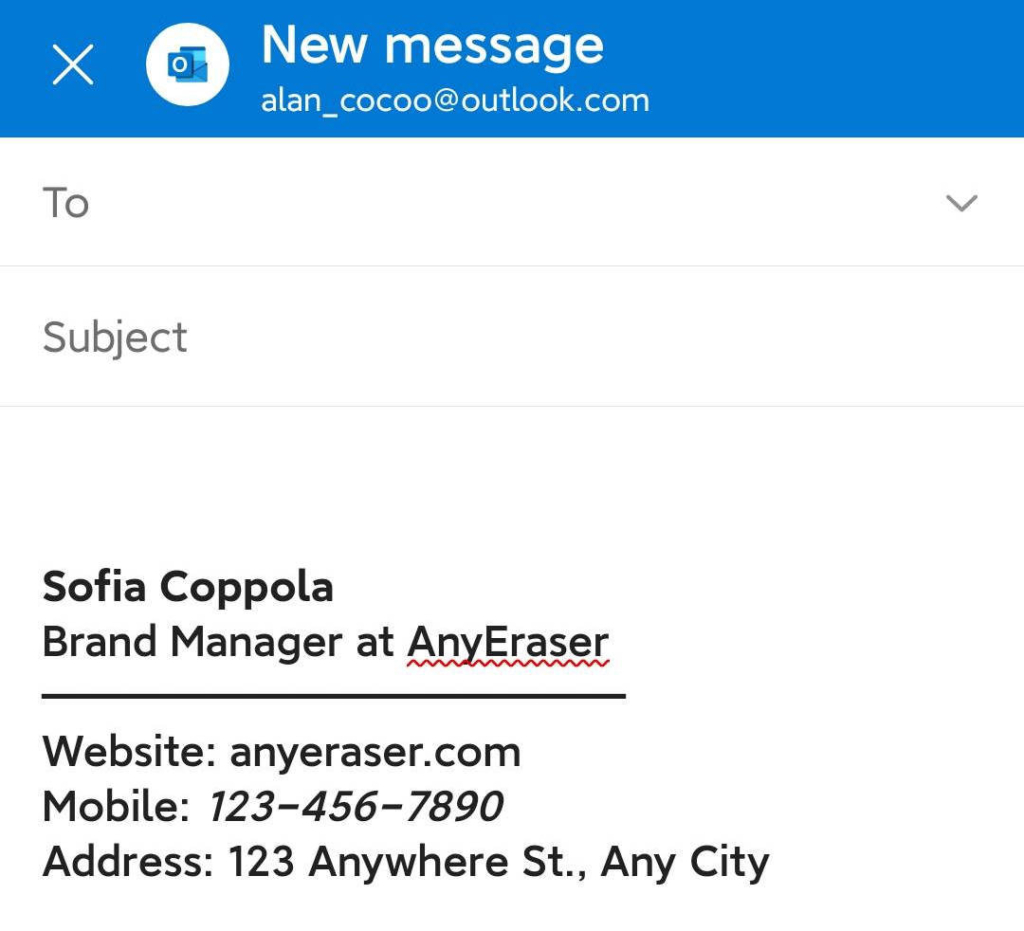
Step 3. Under the “Email signature” section, name your new signature and type in your signature information in the text box. Also, you can change the font size, type, color, and more using the available formatting options.
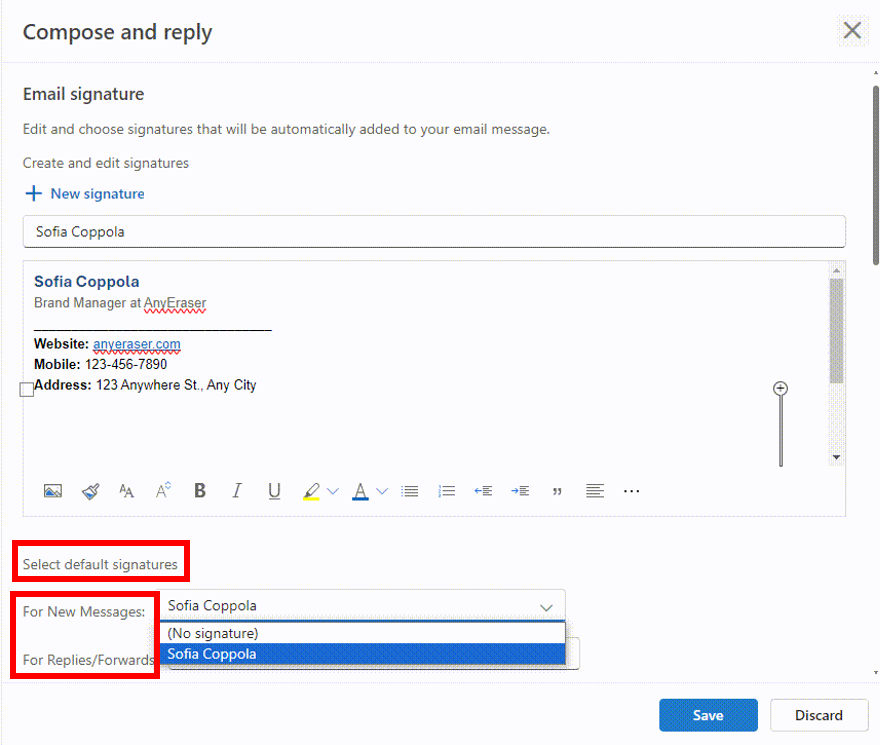
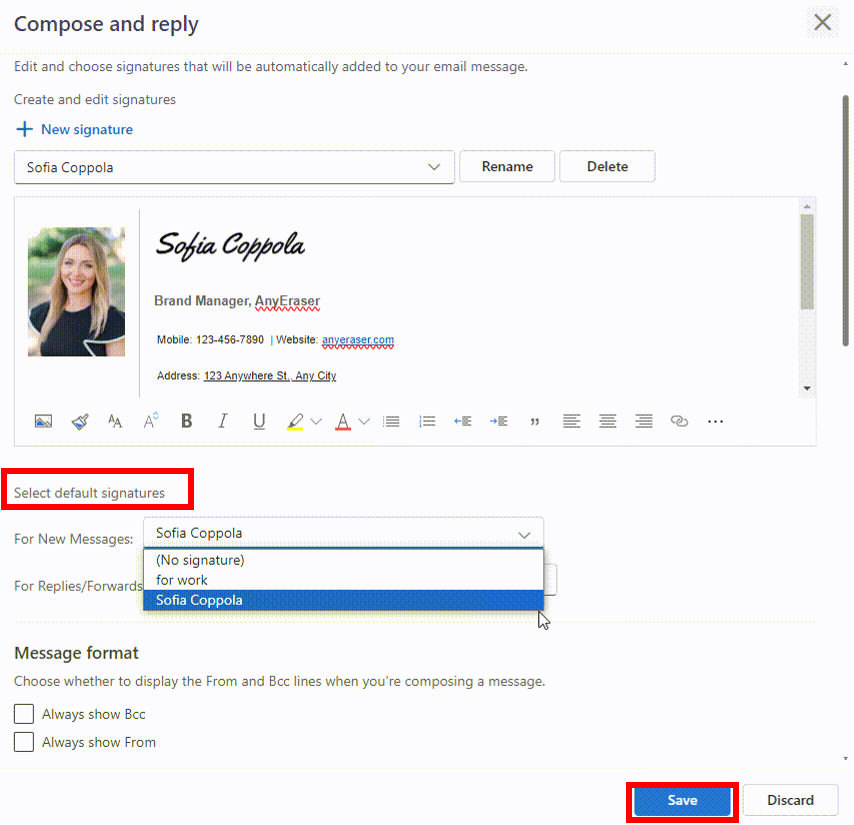
Step 4. Once you’re satisfied with your email signature, navigate to “Select default signatures.” Here, you can choose to have your signature displayed automatically for new messages, replies, or forwards. Select “Save” to save your signature for Outlook when you’re done.
Add Image to Email Signature
Outlook makes it easy to insert an image into your email signature. For instance, adding a handwritten signature image, headshot, company logo, icons, etc., to your email signature can personalize your messages and make a deep impression on your email recipients.
How to add image to Outlook signature? Let’s take a handwritten signature as an example:
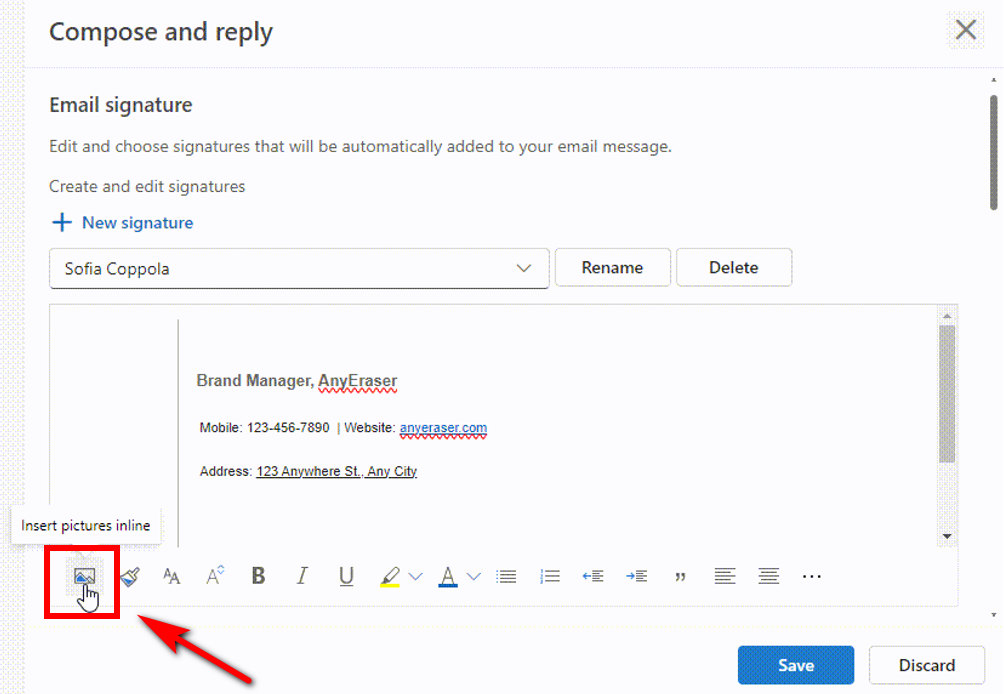
Step 1. Place your cursor where you want the handwritten signature to appear. Select the image icon and upload the signature created with AnyEraser Digital Signature Maker.
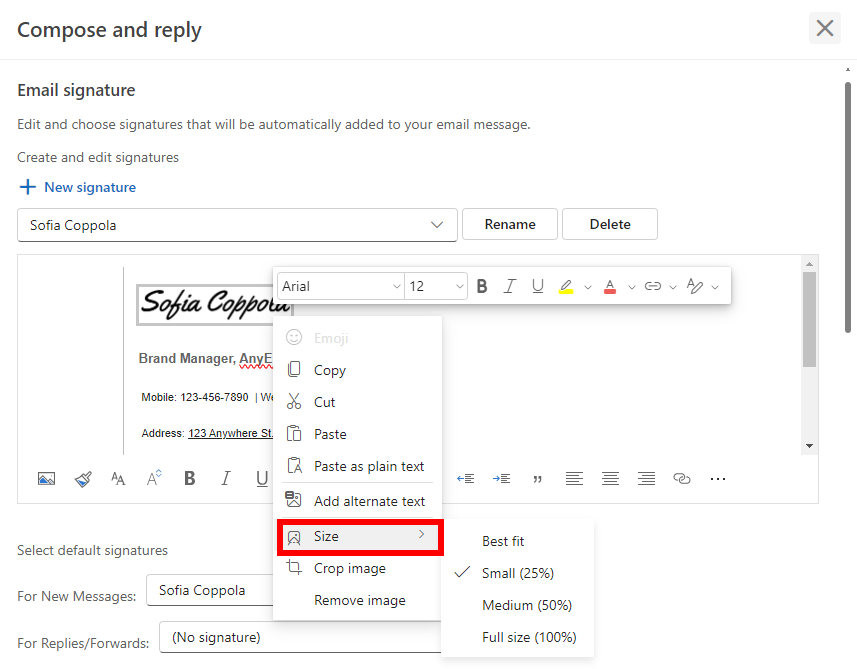
Step 2. Right-click the inserted signature image to resize it.
Step 3. Then you can also add a headshot using the steps above. Set the default signature and click “Save” to save the changes.
Change Signature in Outlook
In Outlook, you can create one or multiple personalized signatures for your email messages. A great email signature gives your business and brand credibility and marketing opportunities. But if your email signature is outdated, whether it’s a phone number change or a new job title, you’re missing out on big opportunities.
So, let’s learn how to change signature in outlook on the web:
Step 1. Select the email signature you would like to update, and then edit it in the signature edit box.
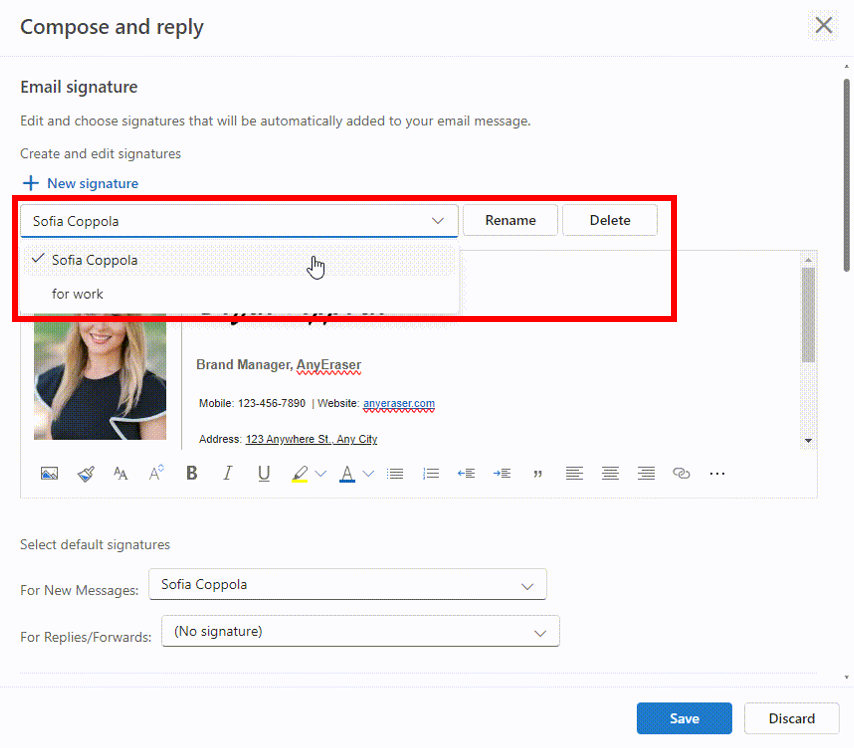
Step 2. When you’re done, select “Save” to save changes.
How to Create Signature in Outlook for Desktop?
If you’re using the Outlook app to add signatures on Windows or Mac, the process is similar to that on Web.
How to Make a Signature in Outlook for Windows
Here are the steps you can set up signature in Outlook Windows app:
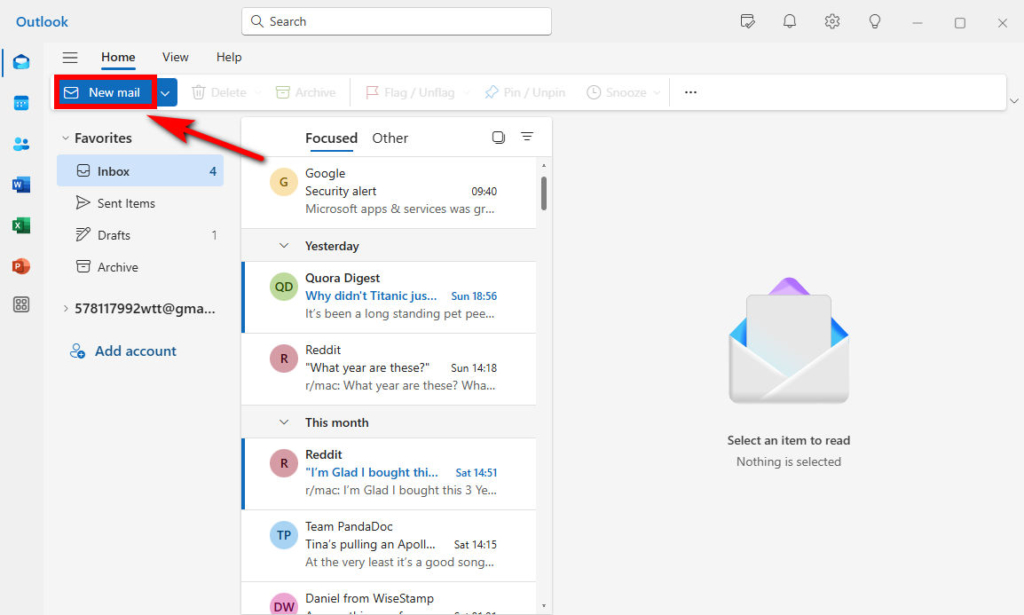
Step 1. Open the Outlook Windows app and click “New mail” to open a new email message.
Step 2. Select the “Signature” icon and choose “Signatures…” to attach one of your email signatures to this message.
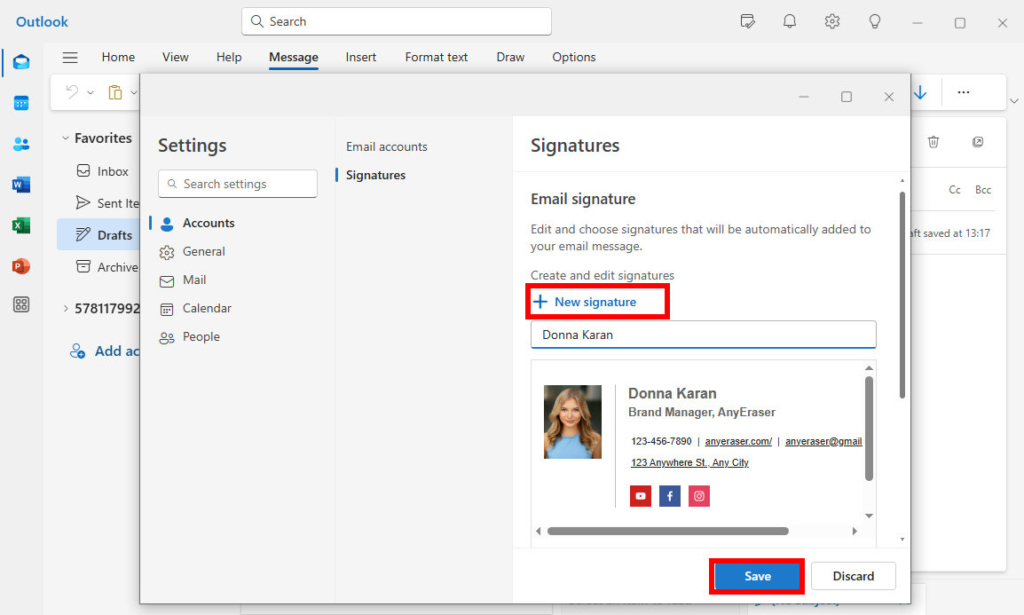
Step 3. In the pop-up “Setting” page, select “+ New signature” and type a name for the new signature. In the edit box, you can type in your signature information or paste your created signature. Click “Save” to save the signature.
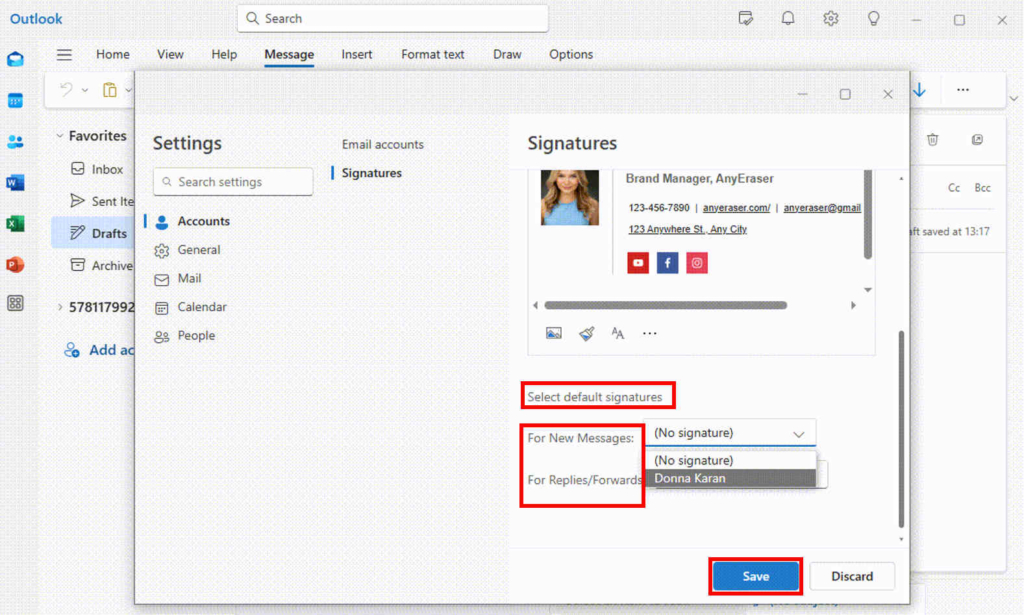
Step 4. Under the edit box, find the “Select default signatures” section. If you want the signature to appear on your new emails automatically, select the signature in the New Messages list. If you want the signature to appear on the messages you reply to or forward, then choose the signature in the Replies/Forwards list. Click “Save” to save your settings.
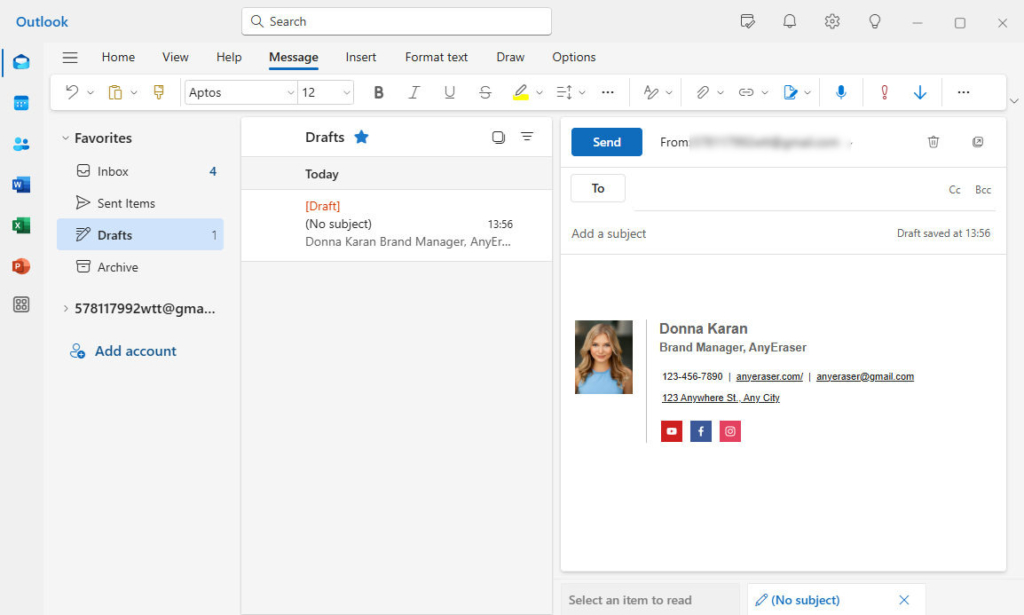
Step 5. Now, you can test your signature by composing a new email.
How to Add Email Signature in Outlook for Mac
To add signature in Outlook on Mac desktop, you can do the following steps:
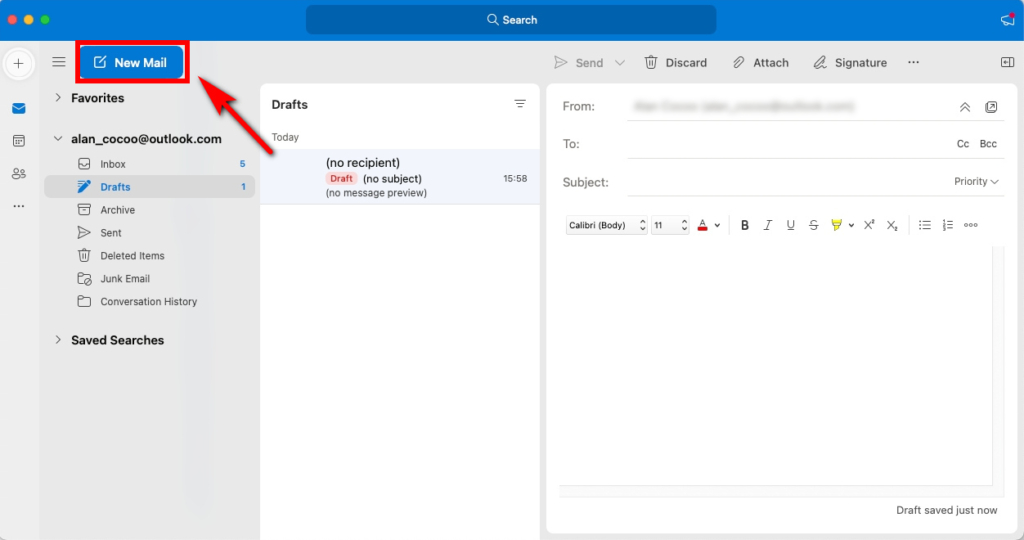
Step 1. Select “New Mail” to open a new email.
Step 2. Select “Signature” in the toolbar, and choose “Manage Signatures.”
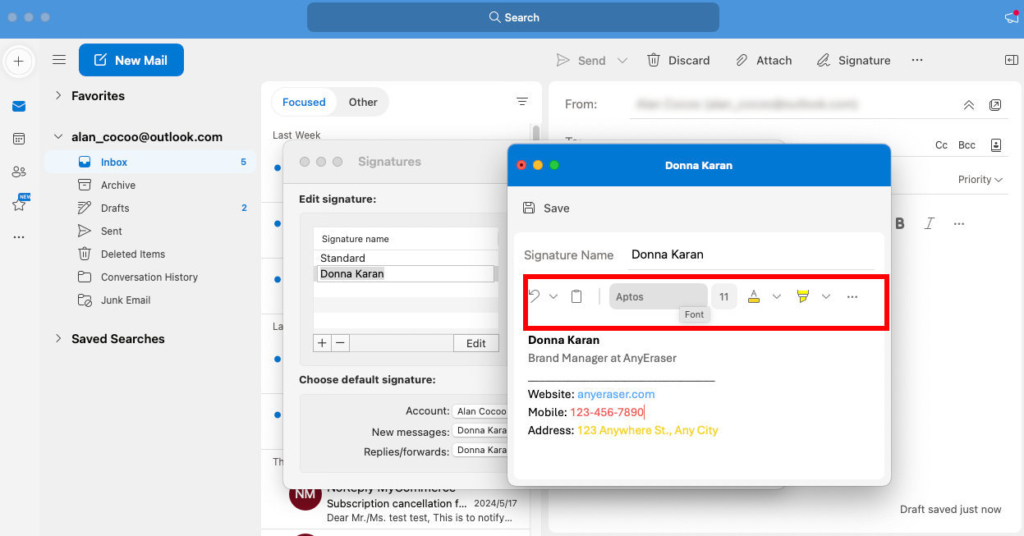
Step 3. Select “+” and type a name for the signature.
Step 4. In the edit box, type in your signature information and format it the way you like. Then, click “Save” to save the signature.
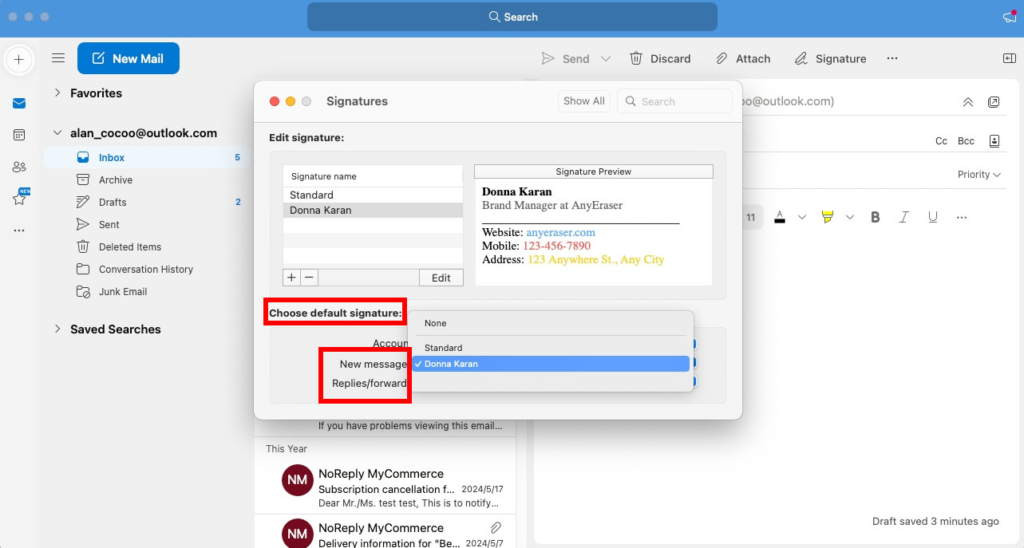
Step 5. Under “Choose default signature,” include your newly added signature for new messages or replies/forwards.
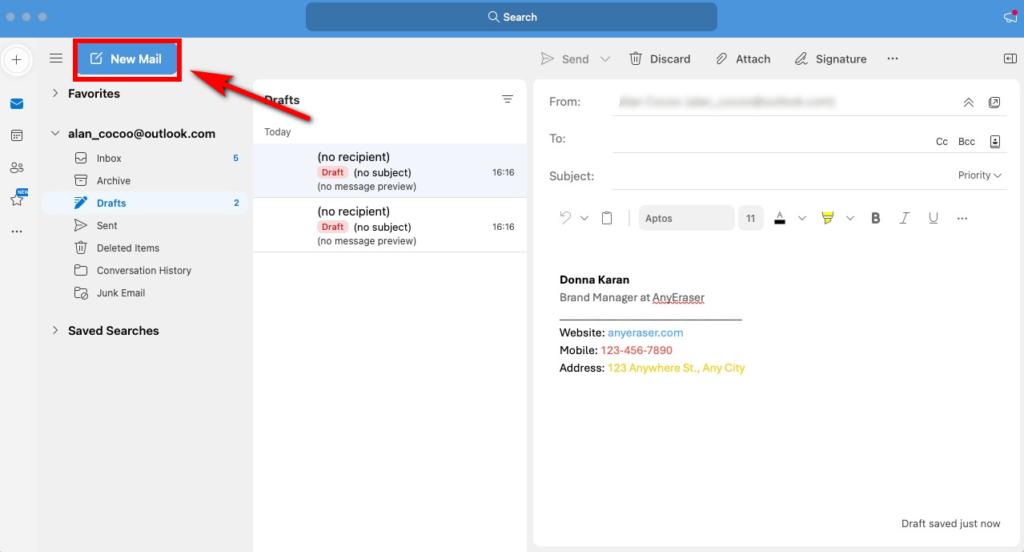
Step 6. Select “New Email” to open a new email and check the signature you created.
How to Set Up a Signature in Outlook Mobile App?
Do you often use your mobile device to send email messages? If so, you need to know how to create email signature in Outlook mobile app. Auto signature in Outlook helps you quickly sign your emails and make a good impression on the recipient.
To set up signature in Outlook on Android or iPhone devices, please follow the steps below:
Step 1. Open your Outlook mobile app and tap your profile icon in the top left corner.
Step 2. Tap the gear icon in the lower left corner for settings.
Step 3. Select “Signatures.”
Step 4. Type in your email signature information. Then, you can design a plain text signature using the available formatting options. Next, hit the checkmark at the top right to complete the setup.

Step 5. Open a new email message to check if the signature is added to the footer of a new message.
Tips:
This tutorial was captured on the Android version of the Outlook mobile app, yet you can follow the similar steps to add a signature on iPhone.
Conclusion
In summary, adding signature in Outlook is simple. It also saves time manually entering your contact information every time you send an email.
Now you know how to add signature in Outlook on the web, desktop, and mobile. Plus, you have learned how to create a handwritten signature for Outlook using the AnyEraser online signature background remover tool, taking your email signature to the next level.
AnyEraser Digital Signature Maker can help you get the perfect transparent background image in seconds, not only for a handwritten signature, but also a headshot and a company logo. Thus, you can set up a professional and credible Outlook signature.
Start to use AnyEraser to create your new email signature and add it to Outlook now!
FAQ
How to Create a Signature in Outlook 365?
1. Create a New Email, then select Signature in the toolbar, and choose Signatures… in the dropdown menu.
2. Then, click the New button to create an email signature.
3. Add your signature in the signature text area.
4. Choose the signature you want to use for your new emails, as well as replies/forwards. Otherwise, click (none).
5. Click OK once you're done.
How to Set up Signature in Outlook Desktop?
1. Run Outlook on your Windows and compose a new email message.
2. Click the drop-down arrow of the Signature icon, and select the Signatures... option.
3. Click the +New signature. Name your new signature and paste your signature details into the textbox. Then, click Save.
4. Select the signature as the default for new messages or replies/forwarding.
How to Edit Signature in Outlook Online?
1. Sign in to Outlook on the web and select the gear icon for Settings.
2. Select Mail and choose Compose and reply.
3. Under Email signature, use the formatting options to change your signature's appearance.
4. Select Save when you're done.
