AnyErase AI Background Remover
- Perfect details
- HD output
- Batch process
Use this AI background remover to make image transparent and showcase subject in its all glory. View all pro features >
Secure Download

How to Add a Signature in Gmail (Step-by-Step Guide)
Although there are various forms of communication, email remains the most direct and reliable way to catch the full attention of your recipient, and it is an essential part of business exchange.
When it comes to email, Gmail is the most popular email service for users worldwide, because it’s free, easy to use, and offers a variety of features. As a frequent Gmail user, you may tend to insert signature in Gmail when you sending out promotional emails or reaching out to prospective partners.
Adding signature to Gmail not only helps your email recipient learn about you quickly but also increases your professional persona, and it makes a good impression on potential clients or connections.
Now, you can learn how to add a signature in Gmail with the most comprehensive guide.
Let’s get started!
Part 1. How to Add Email Signature in Gmail?
The importance of email signature cannot be stressed enough because it adds credibility to yourself and your business. In fact, it is easy to add an email signature to Gmail with the following steps.
Create Signature in Gmail
How to add a signature in Gmail? Let’s start by creating a new email signature in Gmail:
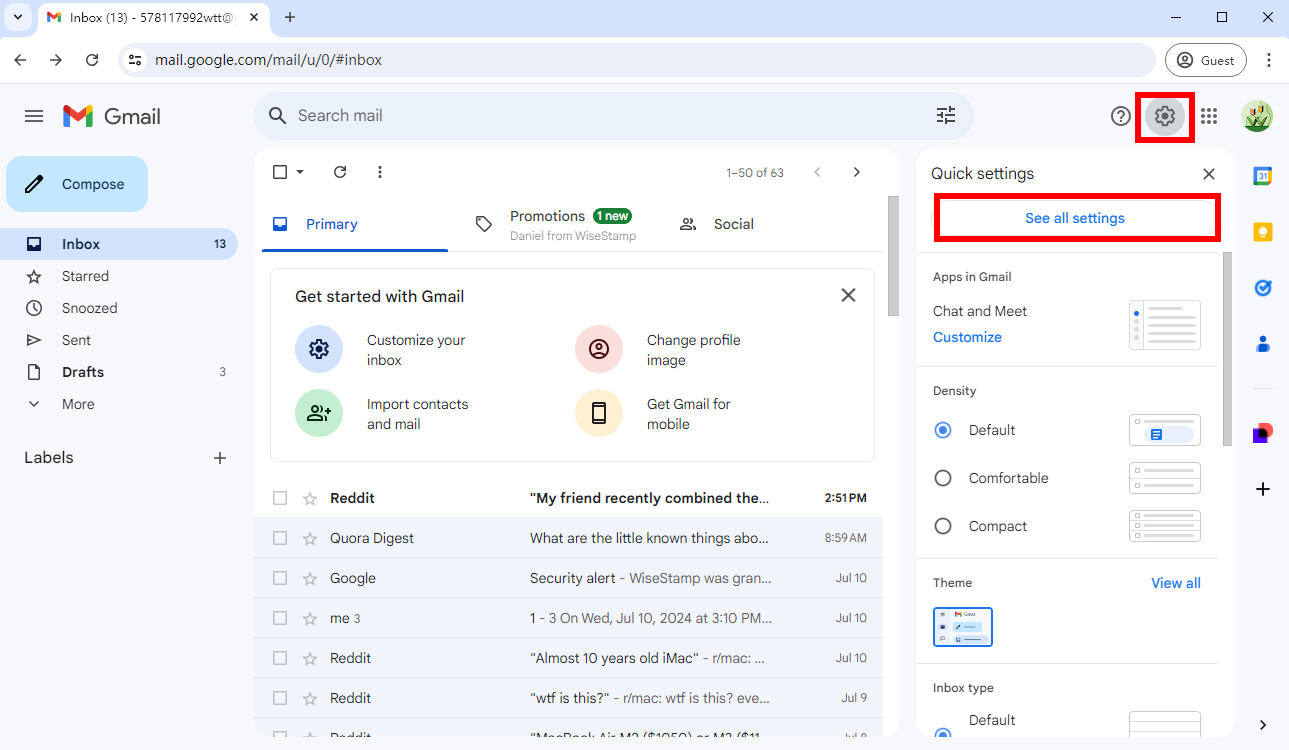
- Step 1. Open your Gmail, click the gear icon for settings on the top-right of the Gmail screen, and choose “See all settings.”
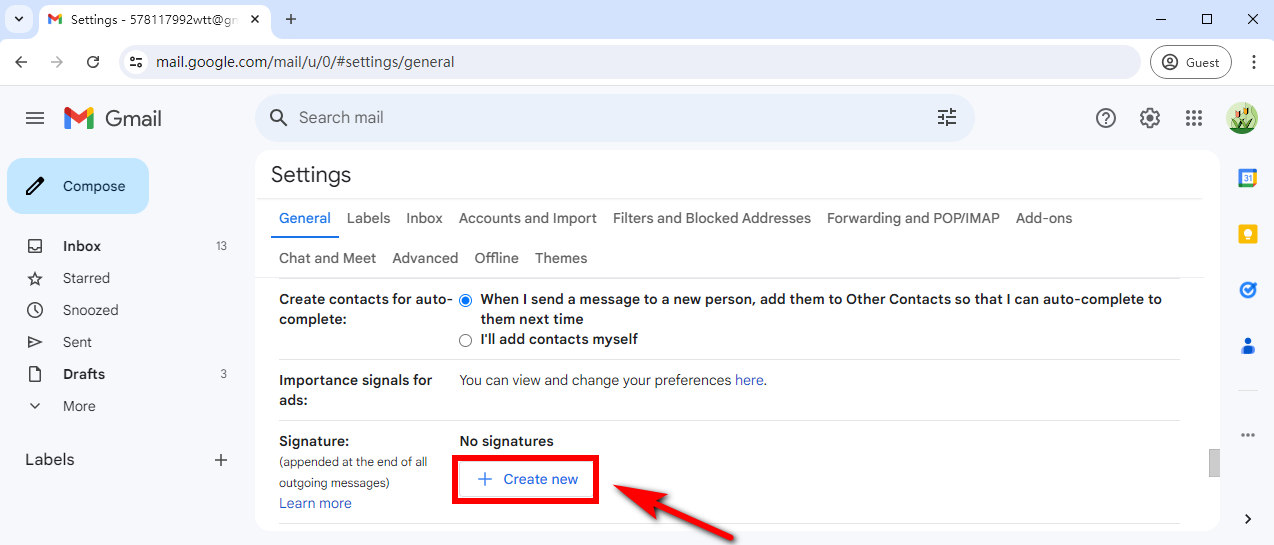
- Step 2. Scroll down the Settings tab and find the “Signature” section, then click the “+ Create new” button.
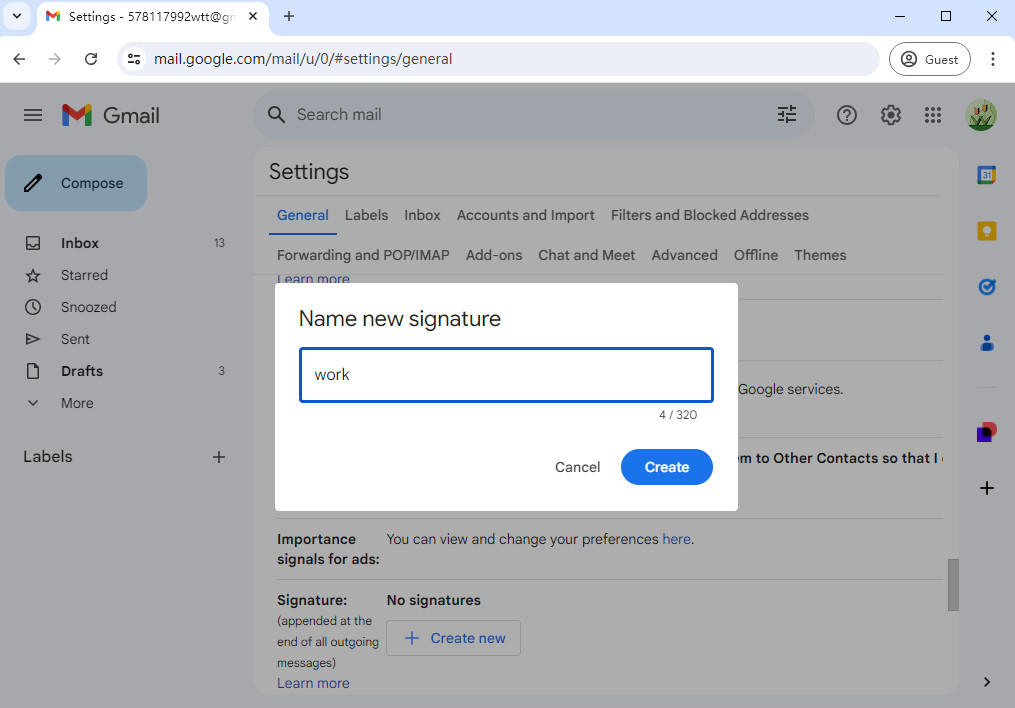
- Step 3. Name your new signature. For example, you can type “work” to indicate that you are using this signature for work. Then click on “Create.”
- Step 4. Add your signature details: click inside the signature editor text box to type in your full name, job title, company name, and contact information.
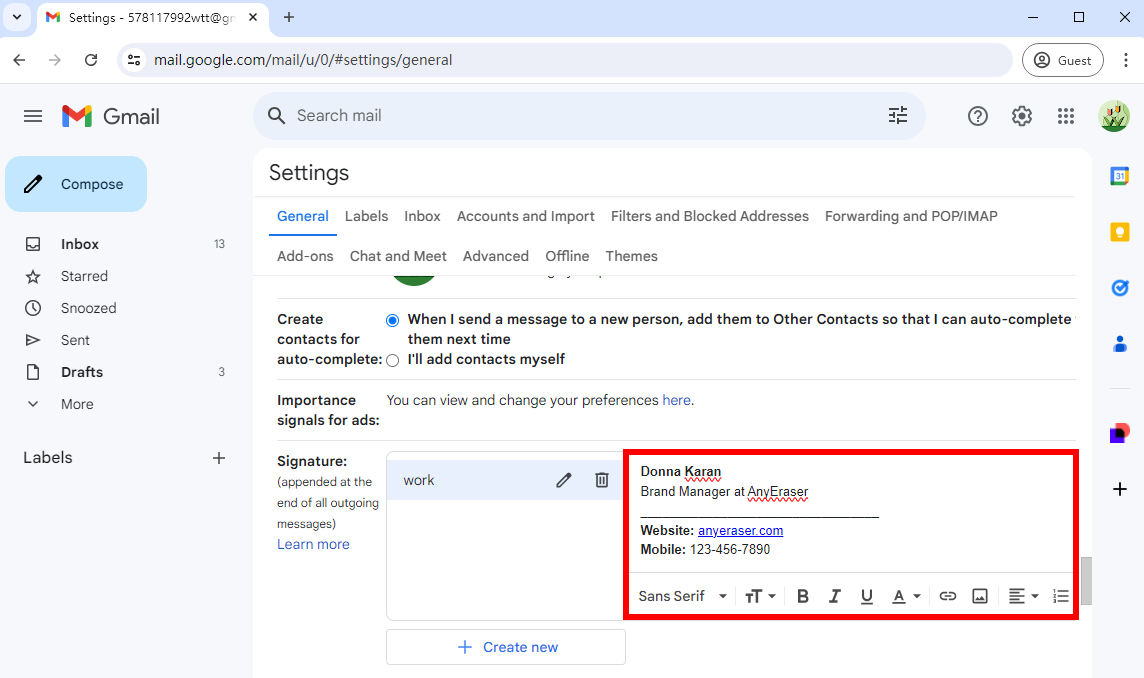
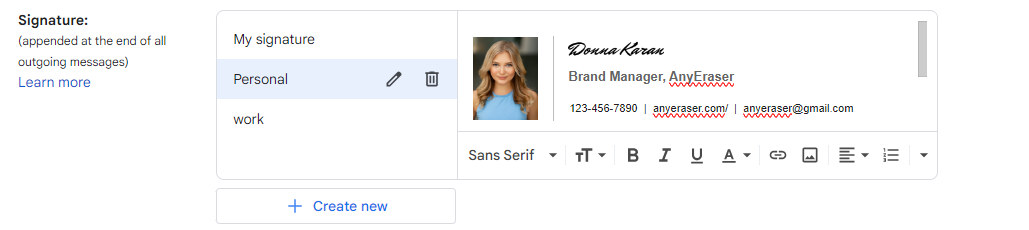
- Here, we provide a common Gmail signature example for reference, you can copy and paste it into your Gmail signature editor:
Donna Karan
- Brand Manager at AnyEraser
- ———————————–
- Website: anyeraser.com
- Mobile: 123-456-7890
- Address: 123 Anywhere St., Any City
Tips: Break up text with dividers will make your email signature more professional. You can use consecutive underscores to make a separator line between your job title and your contact information.
- Step 5. Set auto Gmail signatures after creating an email signature: Click the dropdown menu below the Gmail signature editor, and choose the signature you want to set as your default signature. When you reply/forward your email to someone, it’s up to you whether you want your signature to display.
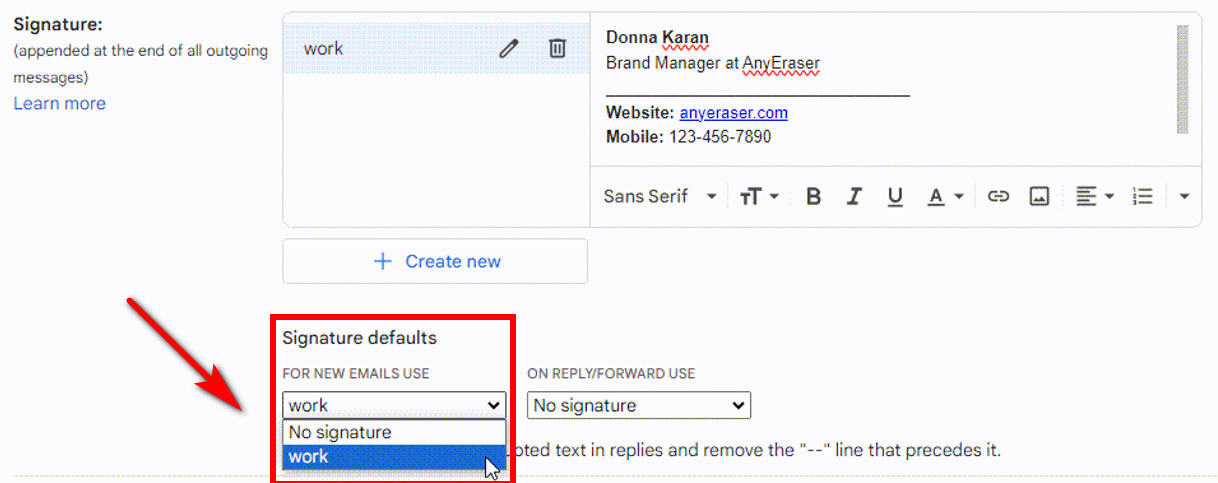
- Step 6. Once complete, click ”Save Changes” at the bottom of the page.
How to Edit Signature in Gmail
You can customize your email signature design by adjusting the sizing, fonts, or colors to make it more professional.
Change signature font: Click on where it says “San serif” to choose the font you want to use for your signature.
Change font size: Select the text you want to edit, and hit the “TT” icon to choose the text size you’d like to use (Small, Normal, Large, or Huge).
Change text color: Click on the “A” icon and select the text color you like.
Add an Image to Your Gmail Signature
Adding an image to your email signature, like a logo or a headshot, can personalize your messages and make a lasting impression on your recipients.
How to insert image in email signature in Gmail? Follow the simple steps:
- Step 1. In the text area of the email signature, place your cursor where you want to add the image, then click on the “Insert image” icon.
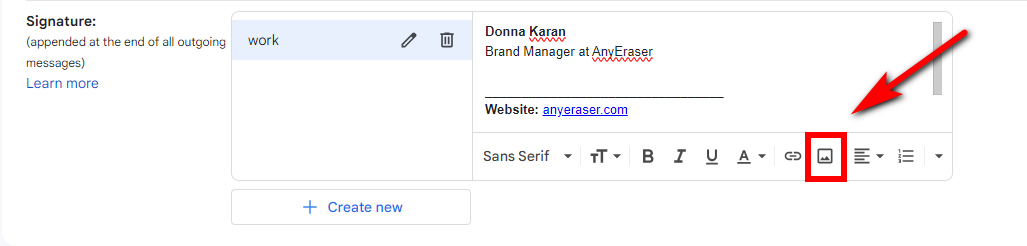
- Step 2. Upload an image from your device.

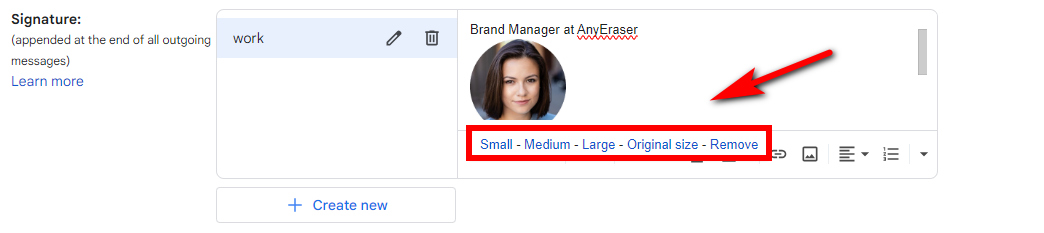
- Step 3. You can resize the image by clicking on the image, and choose the options in the popup menu as needed.
If you want to add an image to the left of the text in a Gmail signature, you’ll need to create a table for your image and signature in Google docs or World, then copy and paste it into Gmail, because Gmail does not allow you to add a table. This is complicated.
But don’t worry, there is a great method to easily solve the problem. That is to add HTML signature in Gmail.
How to Add HTML Signature to Gmail?
To easily create an HTML signature, we advise using a free Gmail signature generator – Wisestamp. You can put your personal information and signature features like social media URL, headshot, banners, etc. in this tool. Then it will build a personalized and professional Gmail HTML signature. After that, Wisestamp will automatically send and install the signature in your Gmail account.
It’s super easy to use and helps you saves time and effort on email signature design.
Follow the steps to add an HTML signature to Gmail:
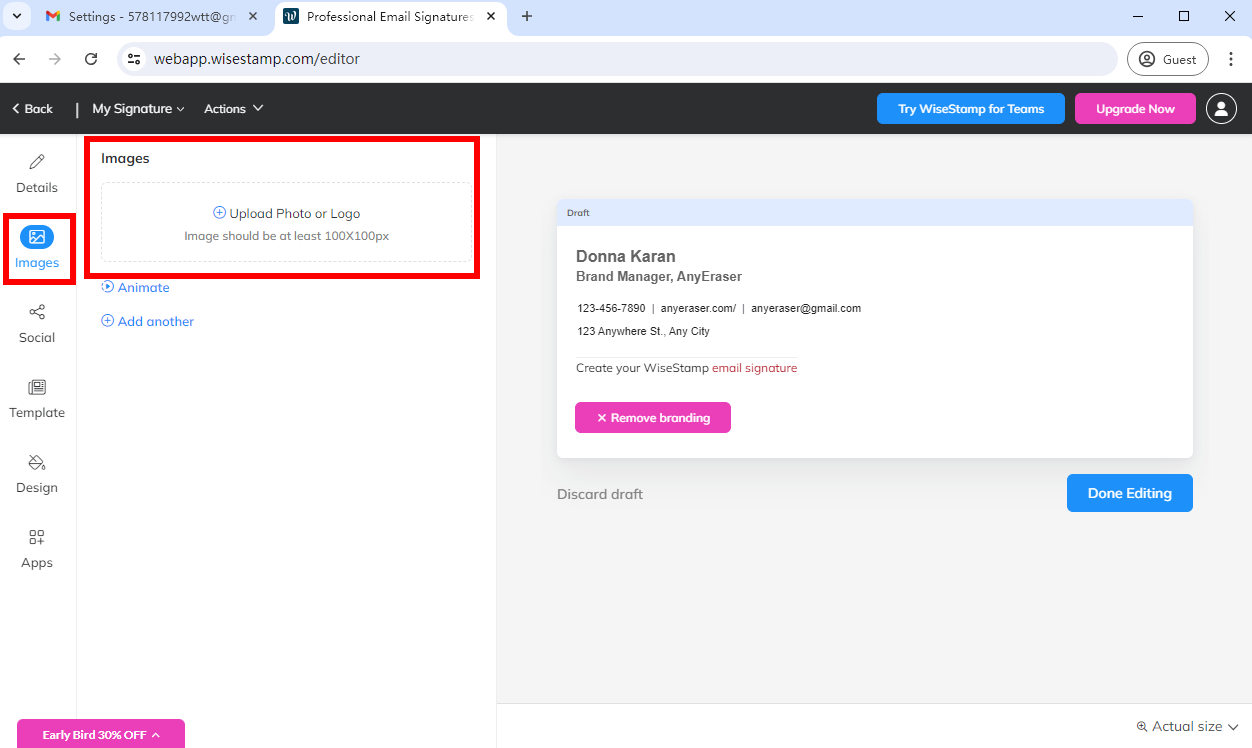
- Step 1. Go to Wisestamp Gmail Signature Creator, sign in to Wisestamp with your Gmail account. Then you can create HTML signature for Gmail by filling in your personal information.
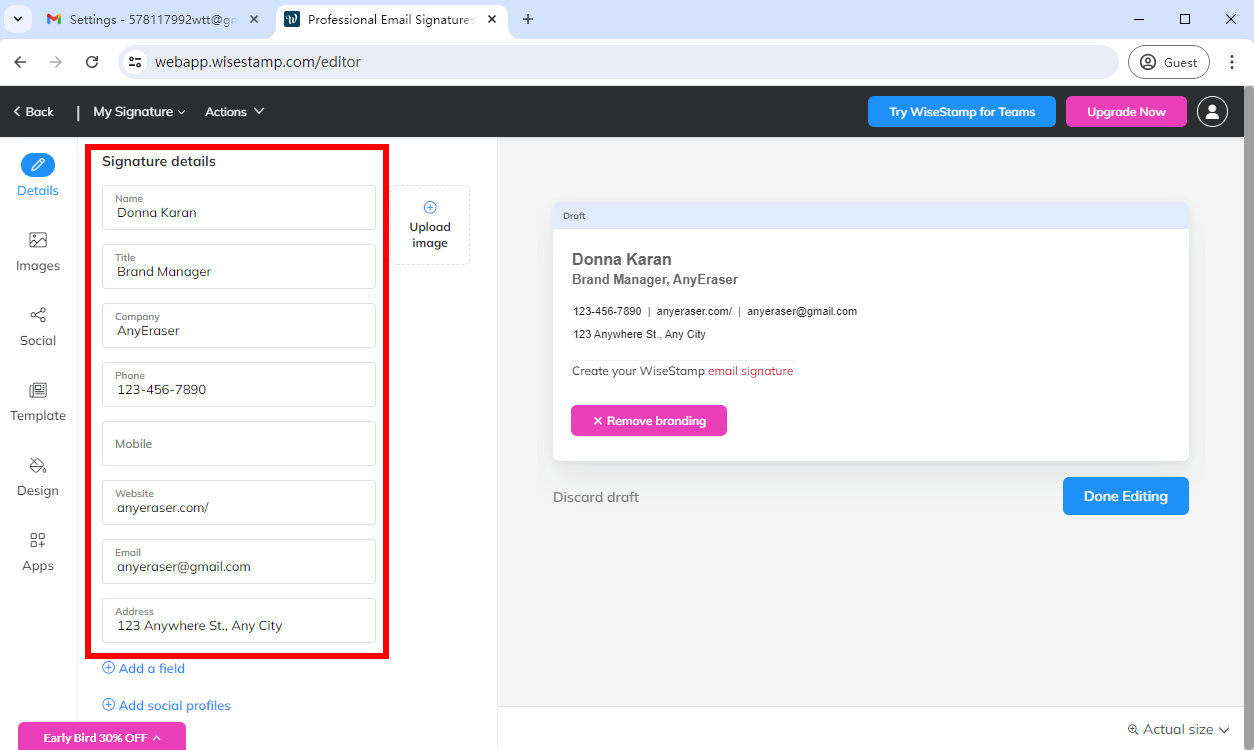
- Step 2. Upload a photo or logo from your device.
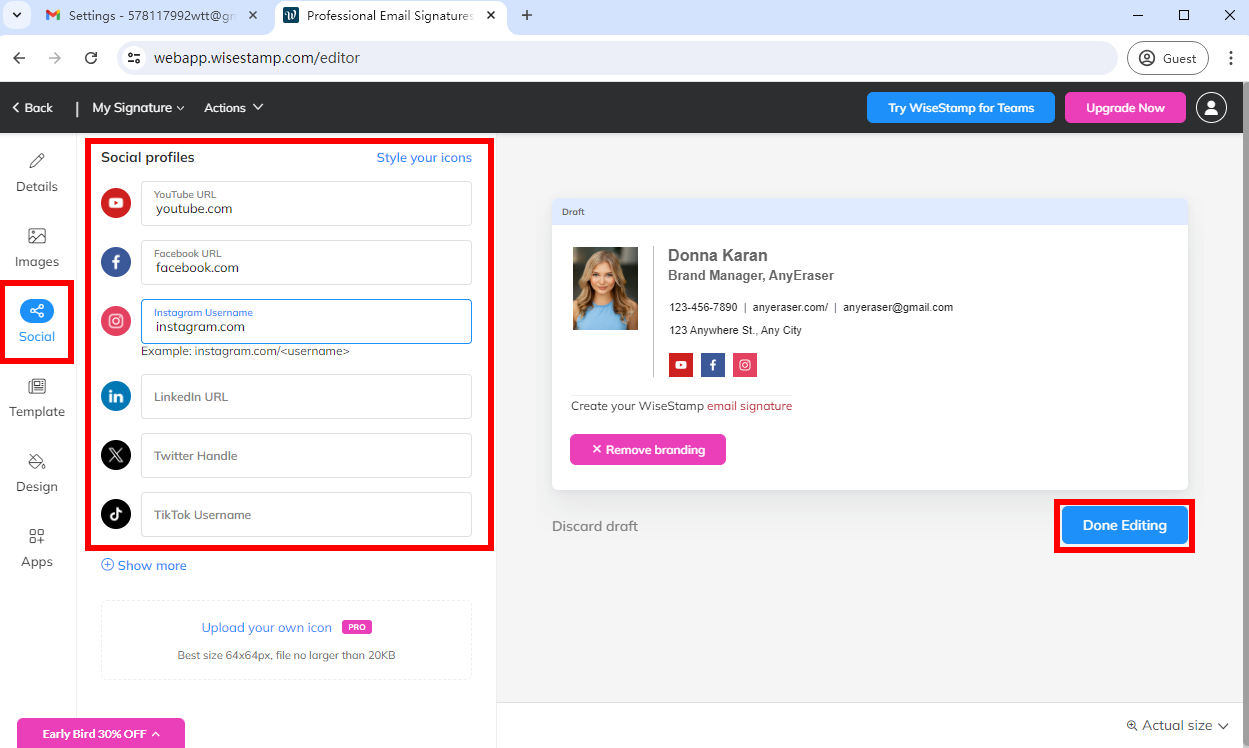
- Step 3. Add your social profiles. When you have completed your personal information, this tool will automatically generate an email signature for you. Then click on “Done Editing.”
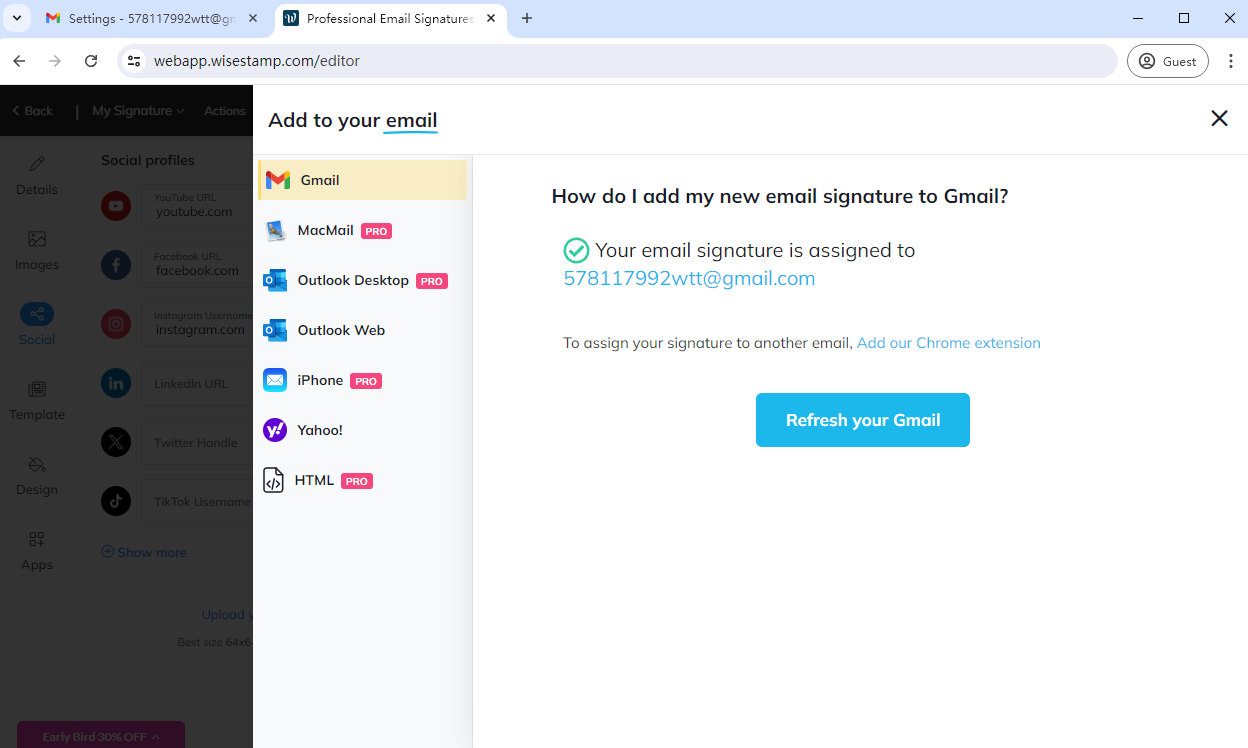
- Step 4. Then, the created email signature will automatically be added to your Gmail account.
- Step 5. Go to Gmail and set this new HTML signature as default for new emails. And make sure to save your changes when you’re done the setup.
How to Add Handwritten Signature in Gmail?
Have you ever been sending an email and wanted to sign off with a handwritten signature? Maybe it’s a vital email that requires a handwritten signature, or perhaps you want to add a personal touch to your email.
Actually, it’s easy to add a handwritten signature to your Gmail signature. You can use the simple method like writing your signature on a piece of paper and then take a picture of it to get your signature photo, but it will look unprofessional in your Gmail signature.
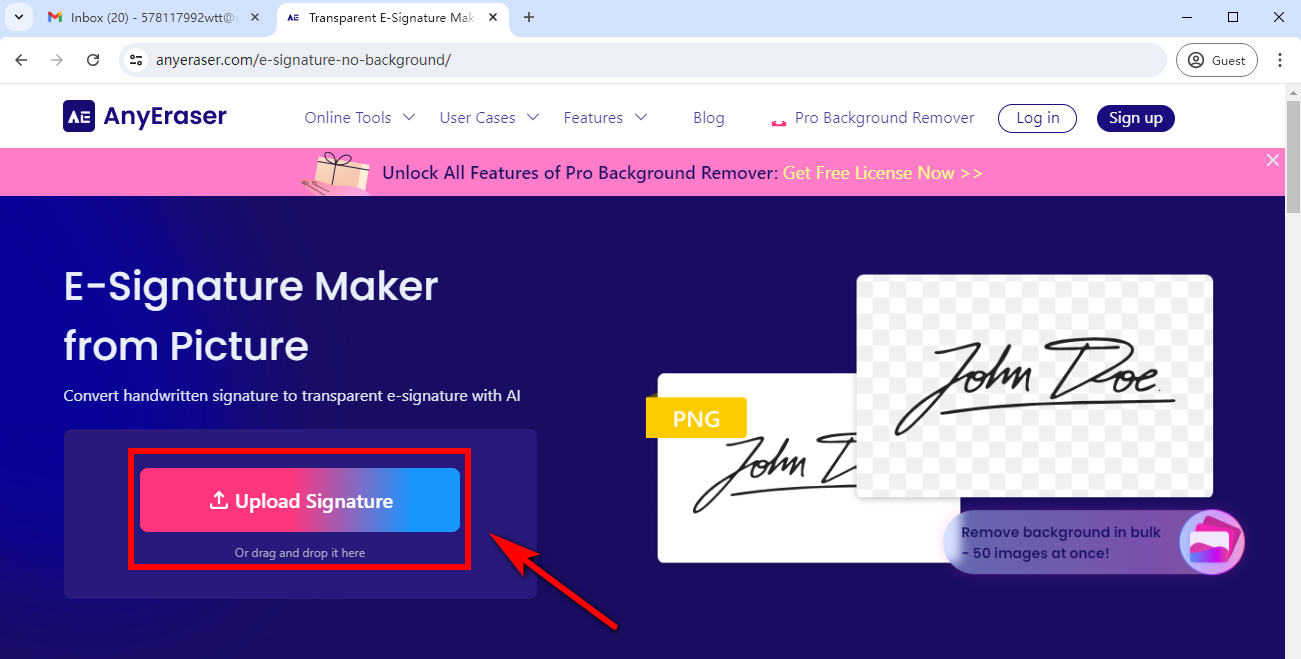
Therefore, it is necessary to turn your signature photo into a transparent PNG file. Here we recommend you an online background remover – AnyEraser Digital Signature Maker to get this done. Then, you can add the transparent handwritten signature to your Gmail signature.
Just follow these steps below, you can easily learn how to add a handwritten signature in Gmail with a few clicks:
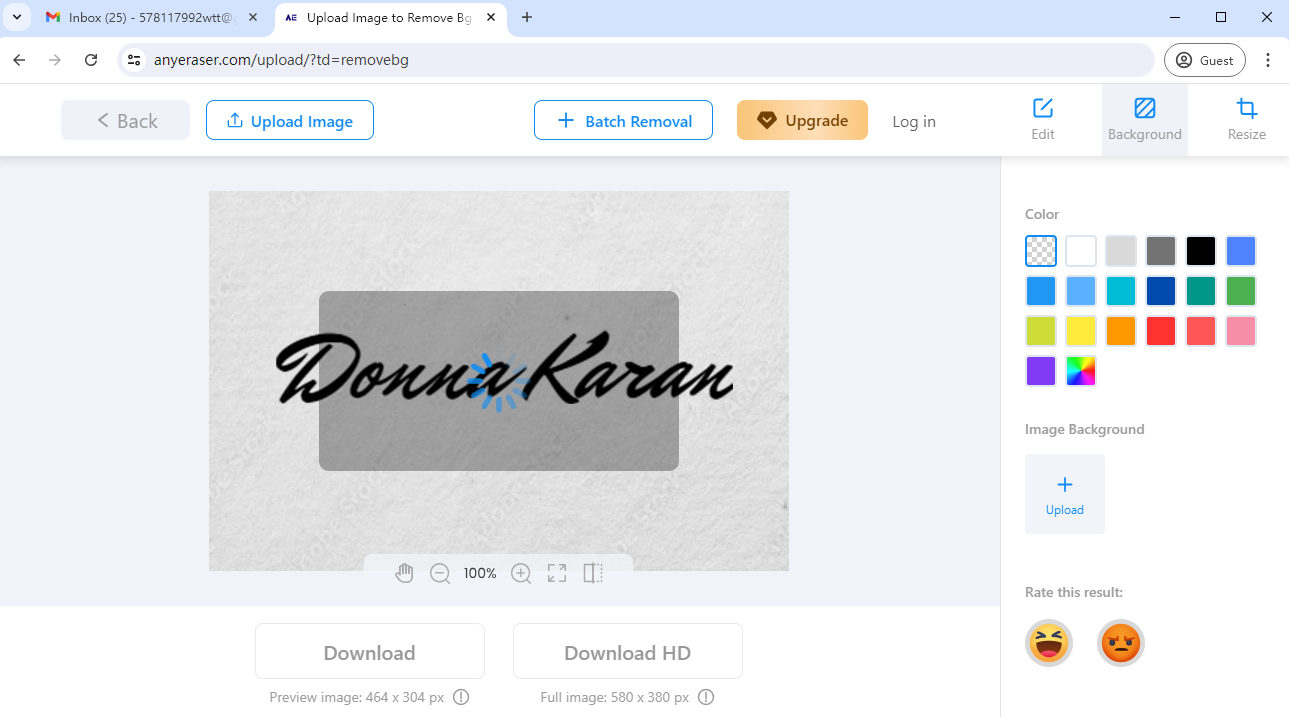
- Step 1. Go to AnyEraser Digital Signature Maker and upload your handwritten signature image.
- Step 2. AnyEraser Gmail signature generator will automatically remove the background of the signature in an instant.
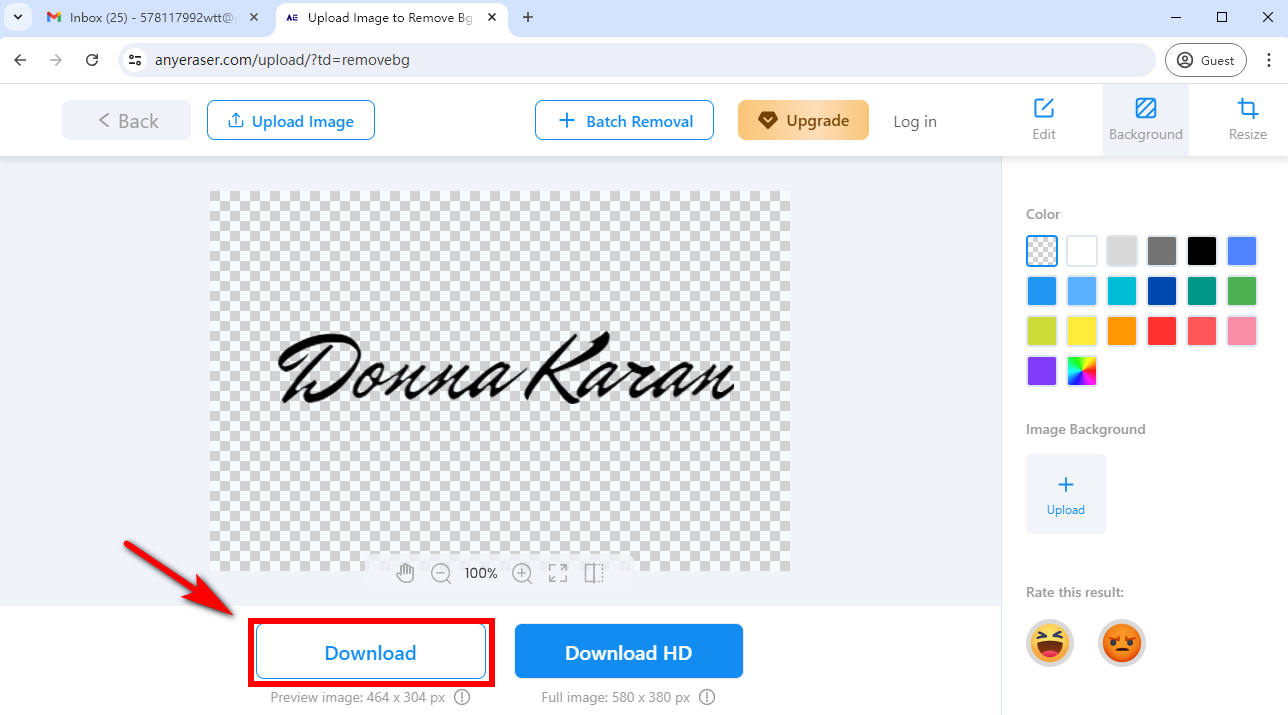
- Step 3. Download the transparent signature in PNG format.
- Step 4. Now, you can add the handwritten signature in your Gmail signature editor. Go to your Gmail, click the gear icon in the top right corner, then choose “See all settings > Signature.” Place the cursor where you want to insert a handwritten signature, then click on “insert image” and upload the signature created with AnyEraser.
- Step 5. Click “Save Changes” once you completed it.
Conclusion
To sum up, adding a signature in Gmail is essential for personalizing your emails and making them more professional.
In this article, we have explored 3 different methods on how to add a signature in Gmail. We also look at how to edit and customize your Gmail signature, and create a handwritten signature for Gmail with AnyEraser.
But that’s not all! AnyEraser Electronic Signature Maker is not only suitable for removing background of a handwritten signature, but also for a company logo or headshot. So, you can make full use of this tool to help you create a professional and authentic Gmail signature!
FAQ
How to Add Signature to Gmail in Mobile?
1. Open the Gmail app and tap Menu in the top left.
2. Scroll to the bottom, then click Settings.
3. Choose the Google Account where you want to add a signature.
4. Select Mobile signature, then enter the text for your signature.
5. Click OK once you are done.
How Do I Change My Signature in Gmail?
1. Open Gmail, click the Settings gear icon in the top right corner, and select See all settings.
2. Scroll down to the Signature section in the General tab. Then click + Create new signature.
3. Name your new signature.
4. In the text box, add your signature, including your name, job title, contact information, and other details.
5. Format your signature by adding images or changing the text style.
6. Click Save Changes at the bottom of the page.
How to Add Signature in Gmail with Logo?
1. Open your Gmail. Click the Settings tool in the upper right corner, and select See all settings.
2. Scroll down to the Signature section, click Create new, and name your new signature.
3. Enter your signature text in the box, then place your cursor where you want the logo to appear, and click the Insert image icon in the toolbar.
4. Upload a logo image from your computer, and resize it as needed.
5. Scroll to the bottom of the page and click Save changes.
Why is My Gmail Signature Not Showing Up?
Because the signature is not set as default. On Gmail, you can go to Settings, then select See all settings, then find the Signature section. Make sure your signature is set for new emails or replies/forwards use, and not the No signature option.
