AnyErase AI Background Remover
- Perfect details
- HD output
- Batch process
Use this AI background remover to make image transparent and showcase subject in its all glory. View all pro features >
Secure Download

How to Remove Background in Photopea (Full Guide)
Are you frustrated by complicated photo editing programs while removing background from images? Beyond doubt, erasing background from images can be a challenging and tedious task if you don’t have any image editing skills.
Fortunately, there are several practical tools in Photopea to help you effortlessly remove background from image, even if you’re a beginner.
In this tutorial, we will walk you through how to remove background in Photopea using 4 easy ways, along with an AI background remover online tool to delete background in 1 click. Thus, you can effortlessly brighten your pictures and create professional-looking and stunning designs.
Read on and explore the best solution!
Part 1. Remove Background in Photopea with 4 Tools for Any Image
Photopea is a free online photo editing tool that offers a wide range of powerful tools for background removal, graphic design, and photo editing without the need for registration or payment.
With an interface similar to Photoshop, Photopea supports editing versatile file formats like PSD, Sketch, XD, PDF, PNG, JPG, SVG, etc., providing a convenient way to edit images directly in your web browser. Once you have completed editing, you can export it in various formats, including PSD, JPG, PNG, WEBP, and more.
Here, we picked 4 most commonly used tools to help you remove background in Photopea. Depending on the image and its complexity, you can use one or multiple of these tools to complete the image background removal task.
Let’s move on.
Remove BG – Easy and Fast
The first Photopea background remover we are going to introduce is Photopea’s AI feature – Remove BG. This built-in tool automatically identifies your image’s main subject and then removes the background of your image with a few clicks.
Below are the instructions on how to remove background in Photopea online with Remove BG tool.
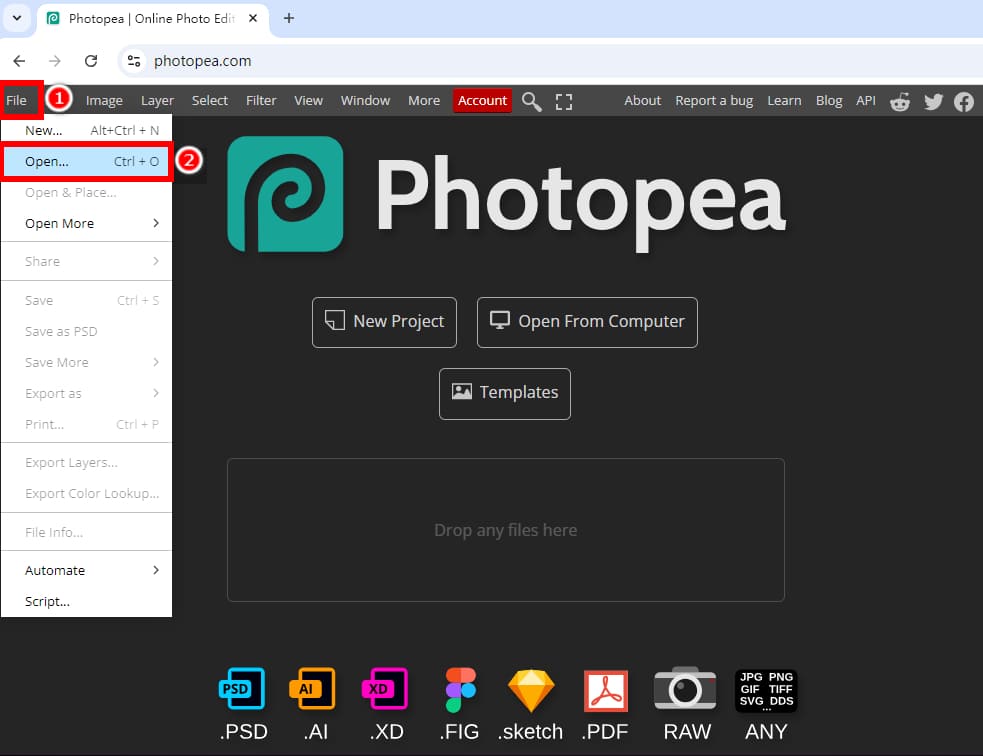
Step 1. Go to Photopea and upload an image by clicking “File” in the top toolbar and selecting “Open…”. Alternatively, you can drag an image directly into Photopea.
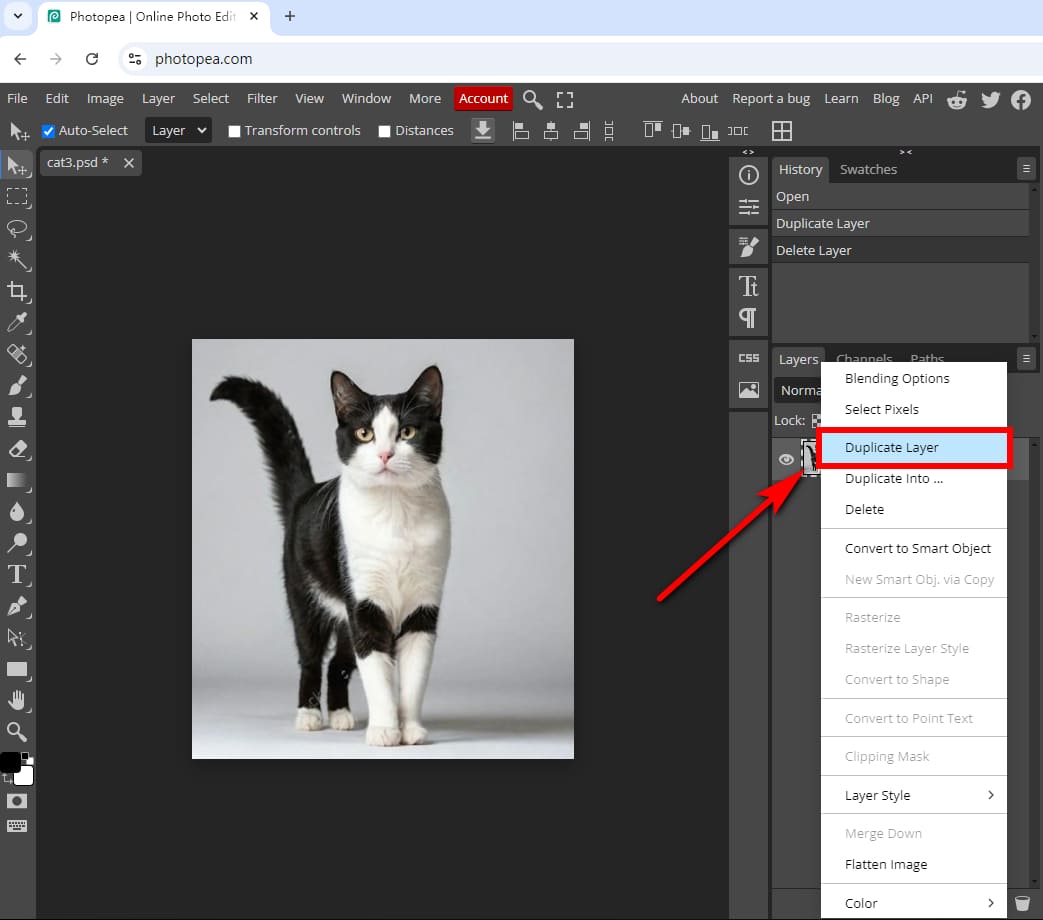
Step 2. Right-click the layer and select “Duplicate Layer” to duplicate the image layer so that you can see a before and after comparison.
Step 3. Hide the bottom layer by unticking its eye icon, then select the top layer. Next, click “Select” in the top toolbar and choose “Remove BG.” This tool will remove background in Photopea within a few seconds.
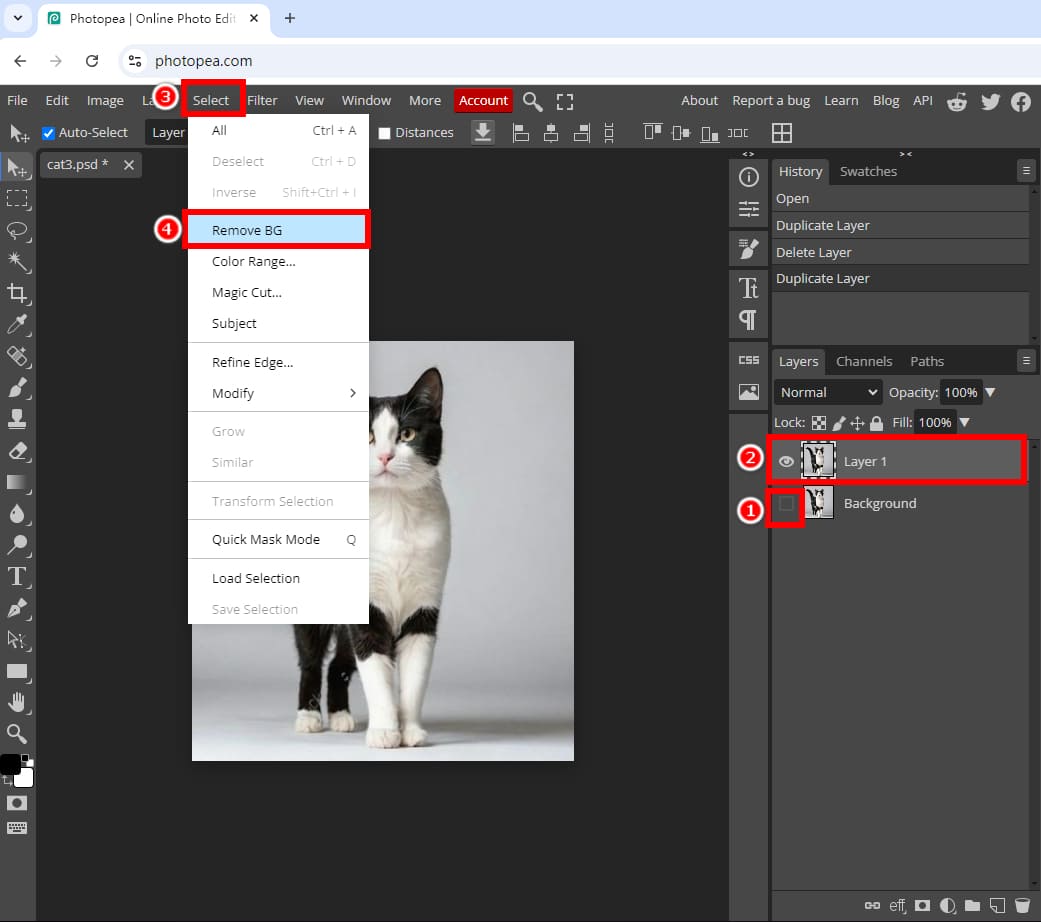
Tips: If the image remains part of the background, you need to repeat the previous step until the background is completely deleted.
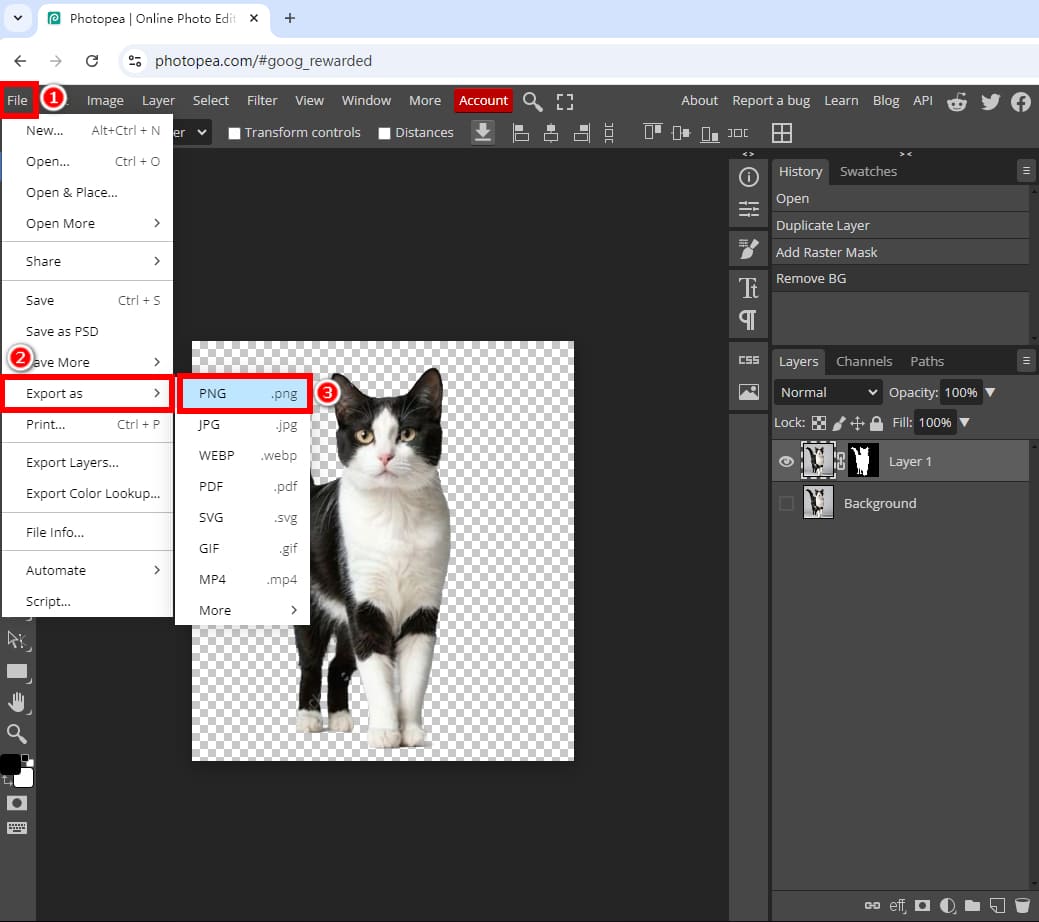
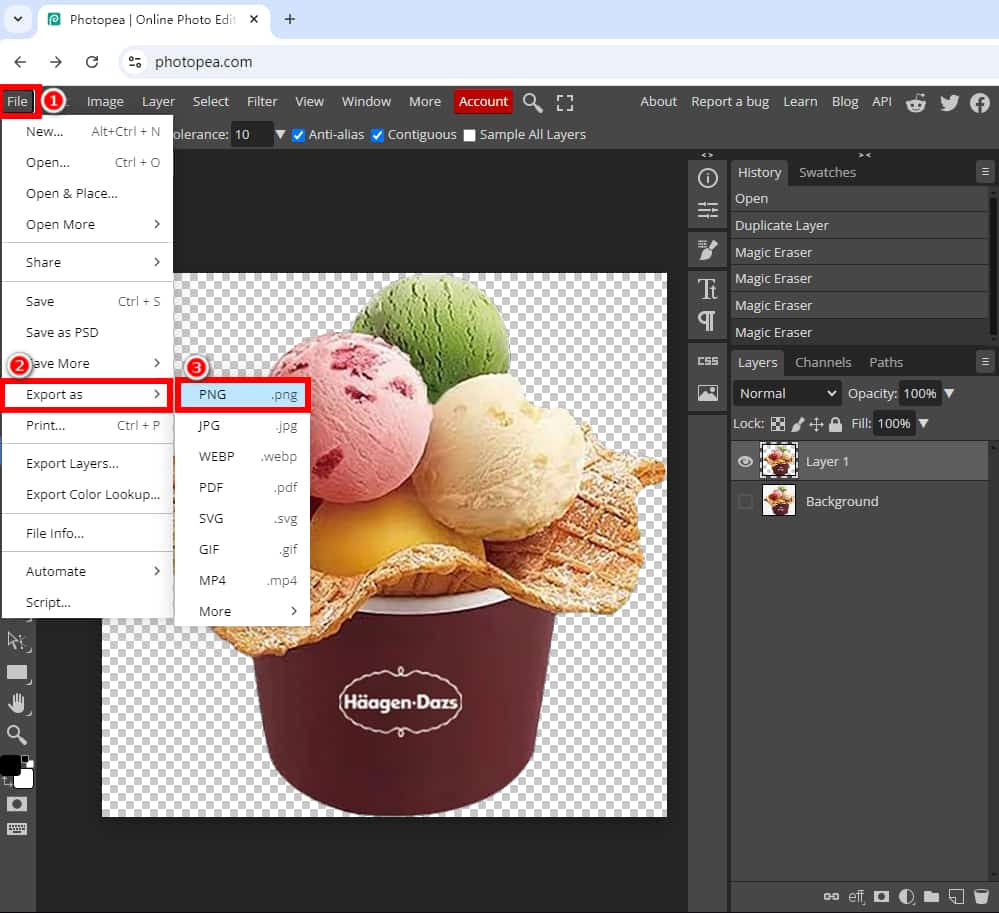
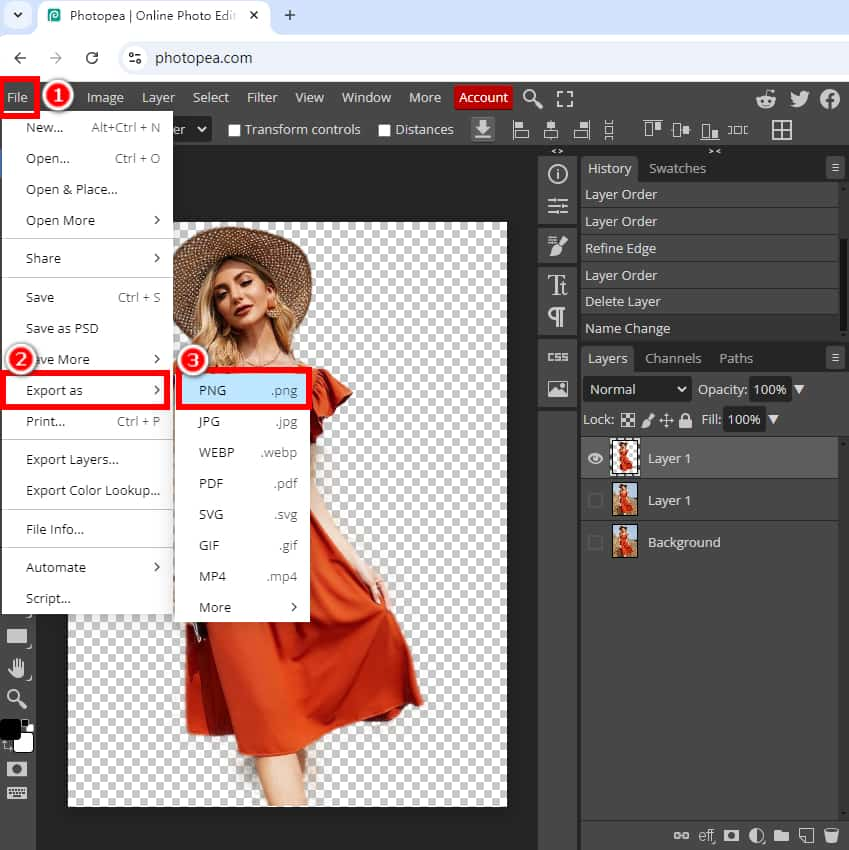
Step 4. Once the image background is deleted, you can save the image without background as a PNG file: go to “File” > “Export as” > “PNG.”
Magic Eraser – Process Solid Backgrounds
The second background removal tool in Photopea is the Photopea Magic Eraser tool. This is a good choice if you have images with solid backgrounds. Let’s take an image with a white background as an example.
How to remove white background in Photopea with the Magic Eraser? Follow the simple steps:
Step 1. Open an image in Photopea and duplicate the image layer. Then, right-click the “Eraser Tool” icon in the left toolbar and select “Magic Eraser.”
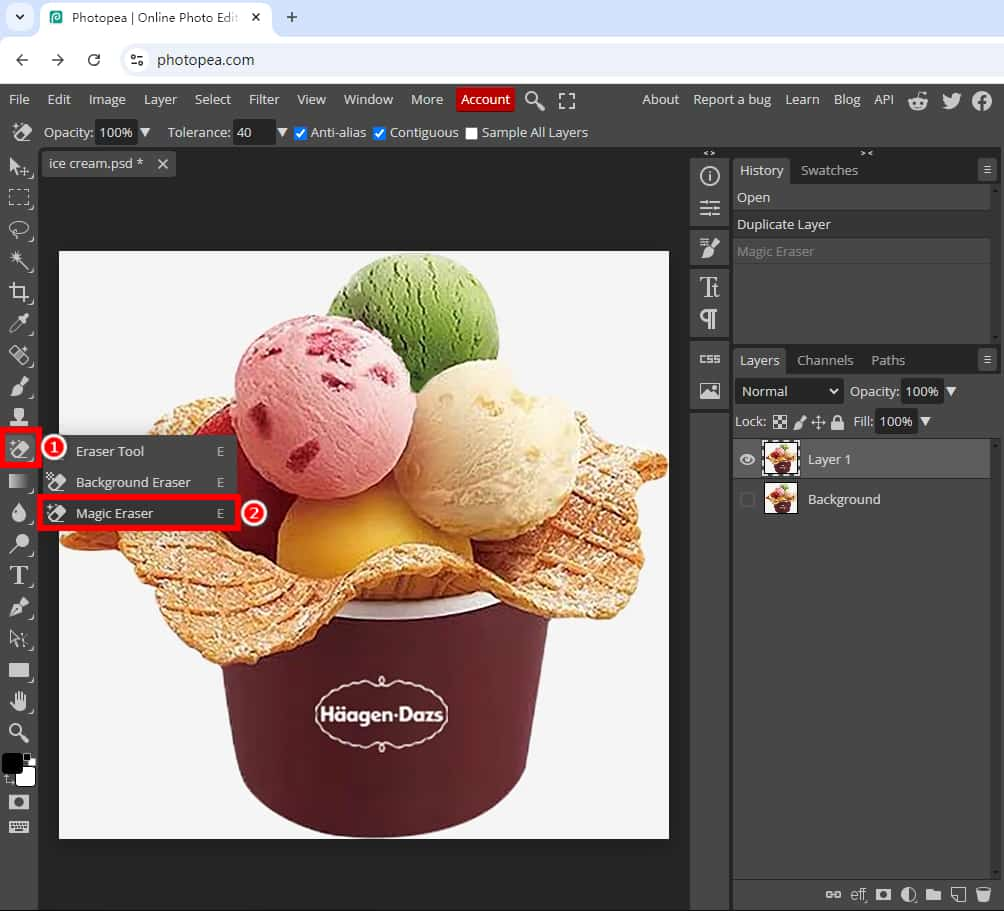
Step 2. Make sure the layer that needs editing is selected. Then, click on image’s white background to remove background in Photopea. Afterward, you can export it as a PNG image with a transparent background.
Tips: If some parts of the subject still keep the background color, you can zoom in (press “Ctrl“+ “+” key) and remove the remaining background with the same tool.
Magic Cut – Work on Most Images
Besides dealing with simple images or images with solid backgrounds, you will also need to handle more complex images or images with multiple colors backgrounds. So, the Magic Cut tool comes to the rescue. This Photopea background remover is slightly complicated, but it combines AI and manual work to provide accurate results for most images.
How to remove background on Photopea online using Magic Cut? Follow the steps below:
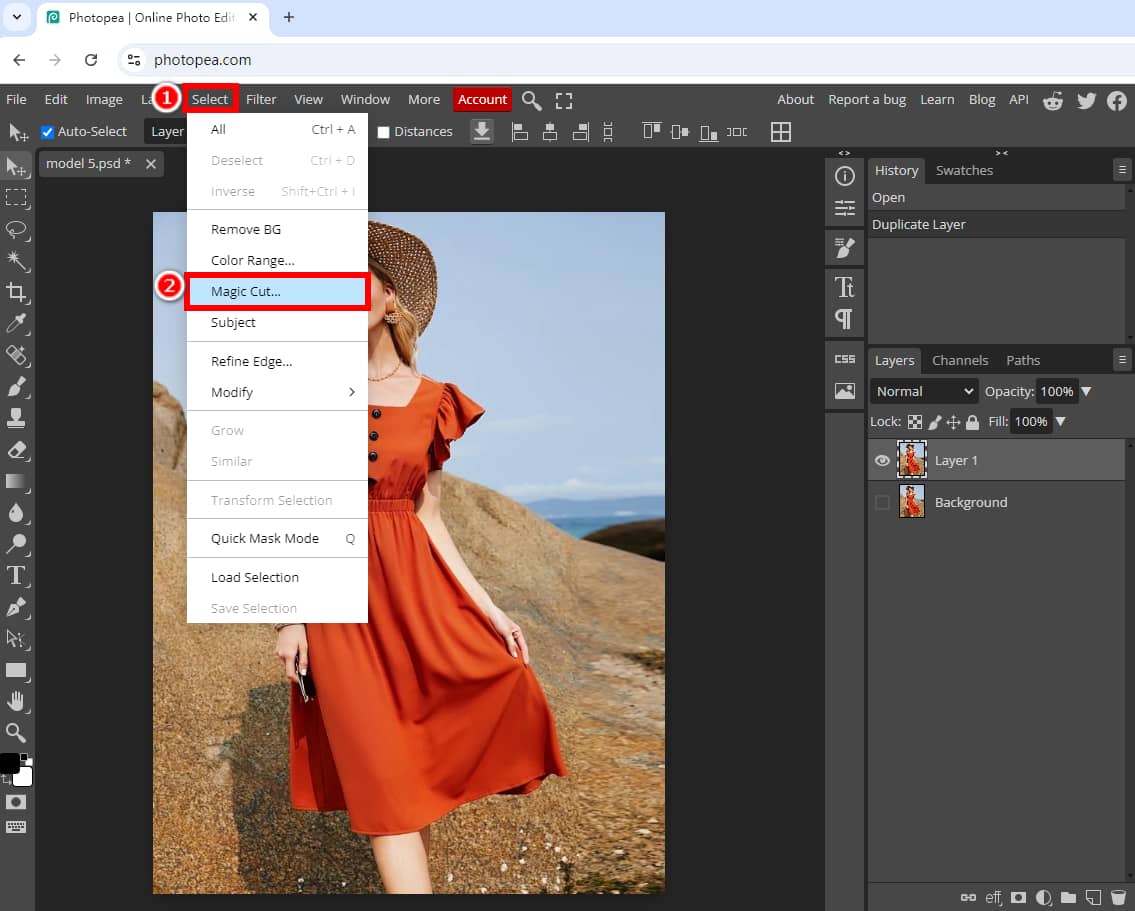
Step 1. Open Photopea, upload an image you want to delete background, and duplicate the image layer. Next, go to “Select” and choose “Magic Cut…”.
Step 2. Then, the windows as below will pop up, on the left side is the original image, and on the right side is the transparent image that the background has been deleted by Photopea.
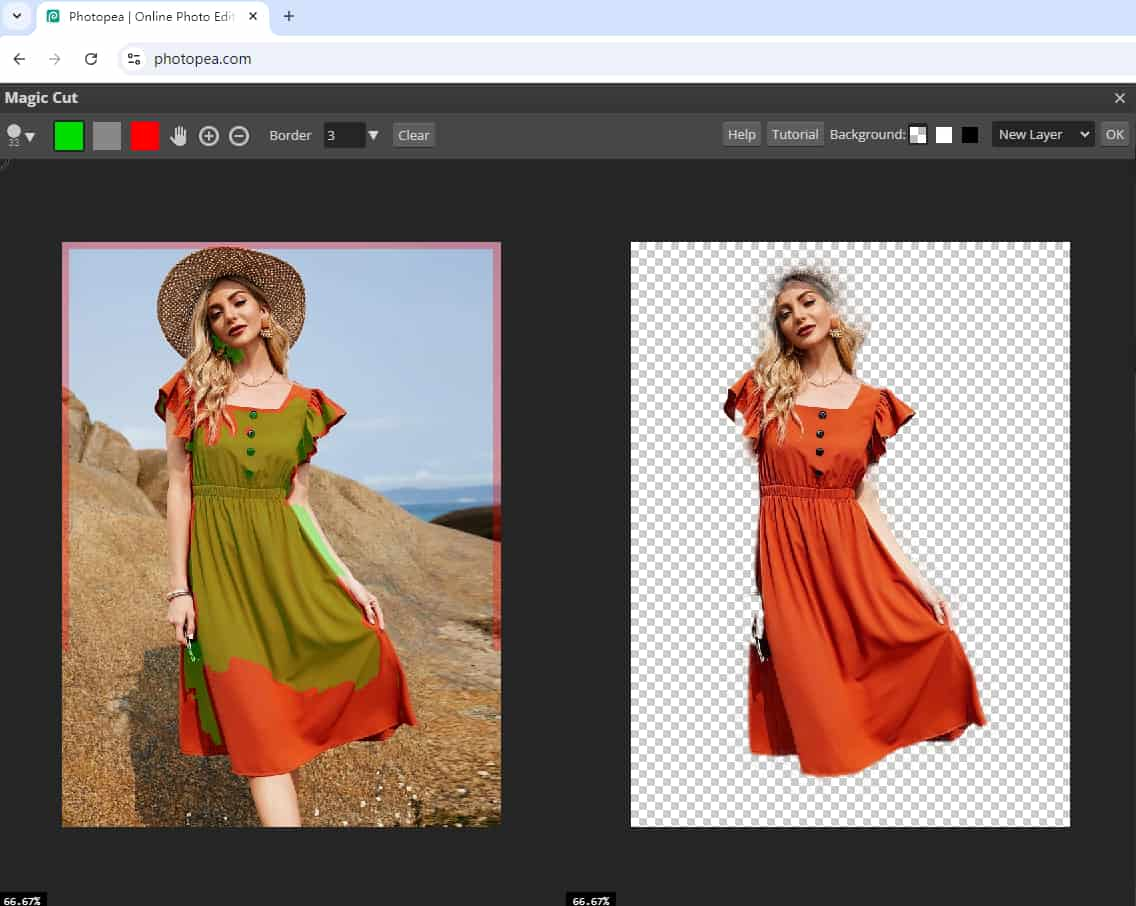
Step 3. Photopea doesn’t give an accurate result for this image, so let’s make it perfect. To make the missing parts of this woman visible, click the “Foreground” tool which is the green color, draw on the hat, hands, feet part of the original image, and wait a few seconds.
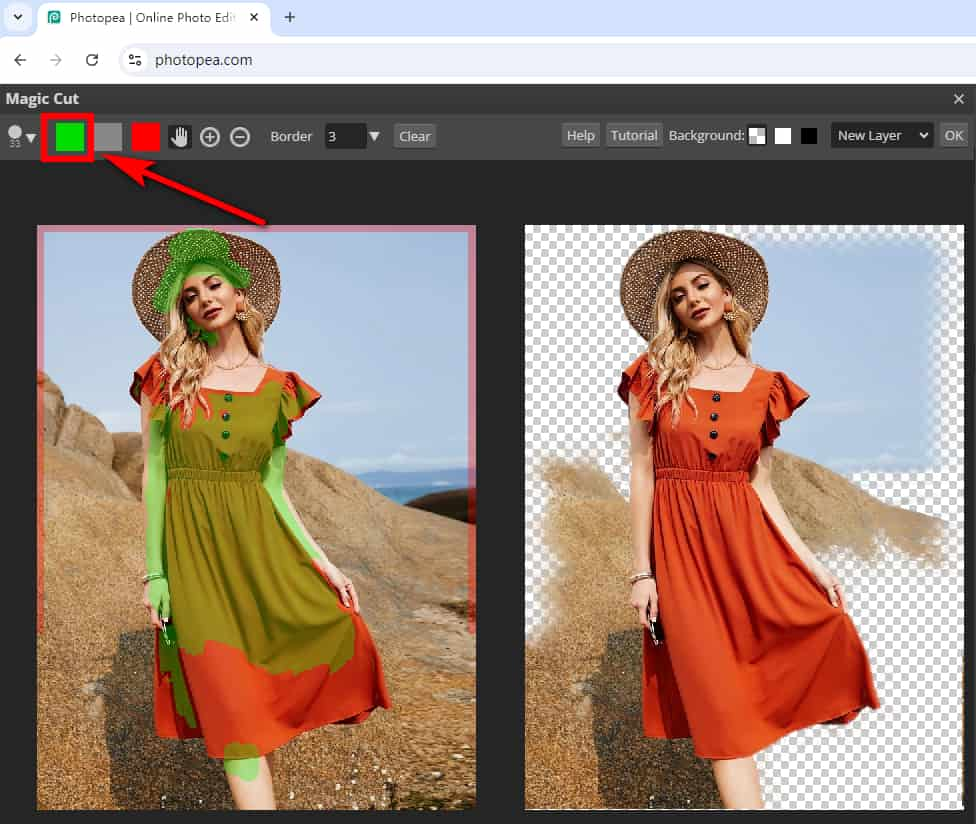
Tips: The green color (Foreground) indicates the parts to keep, while the red color (Background) marks the parts to remove. The gray color is used to erase the green and red areas. To undo the previous step, press Ctrl + Z.
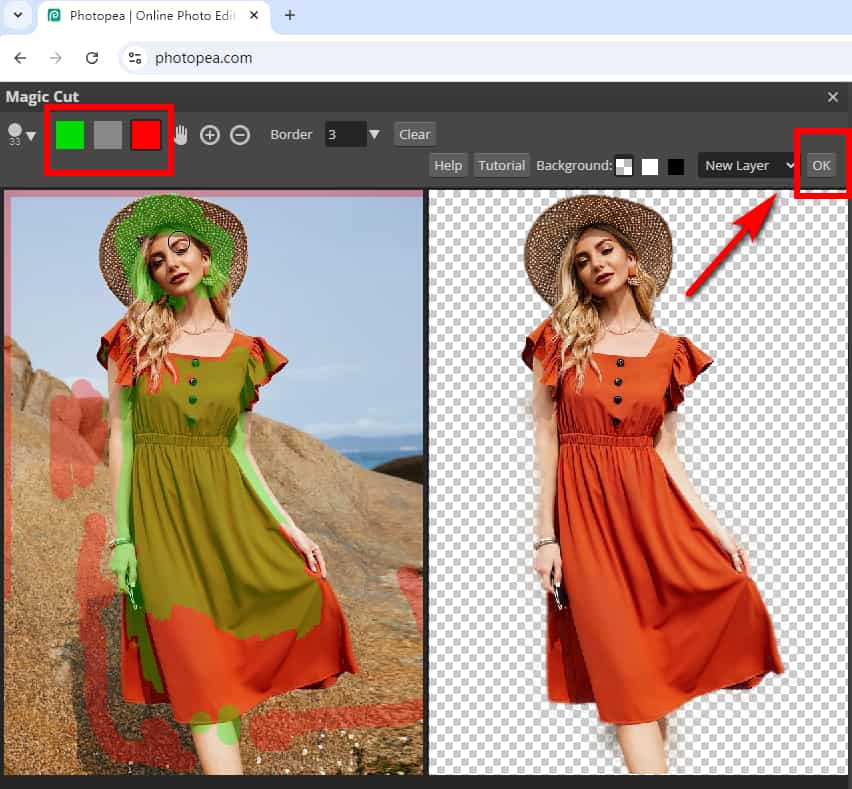
Step 4. The hat, hands, feet parts are visible now, but some background is added. To remove the background, select the “Background” tool which is the red color, and draw on the background of the original image. If we make a mistake in an area, we can clean it with the gray color brush. When you’re done, click on “OK.”
Step 5. Export the image without a background in a PNG format.
Pen – Handle Complex Images
The Pen tool in Photopea allows you to remove background from complex images. While this Photopea background remover is a little challenging to master for new users, it works effectively on pictures with intricate details and edges and ensures you a precise result.
Follow the easy steps on how to remove background in Photopea using the Pen tool:
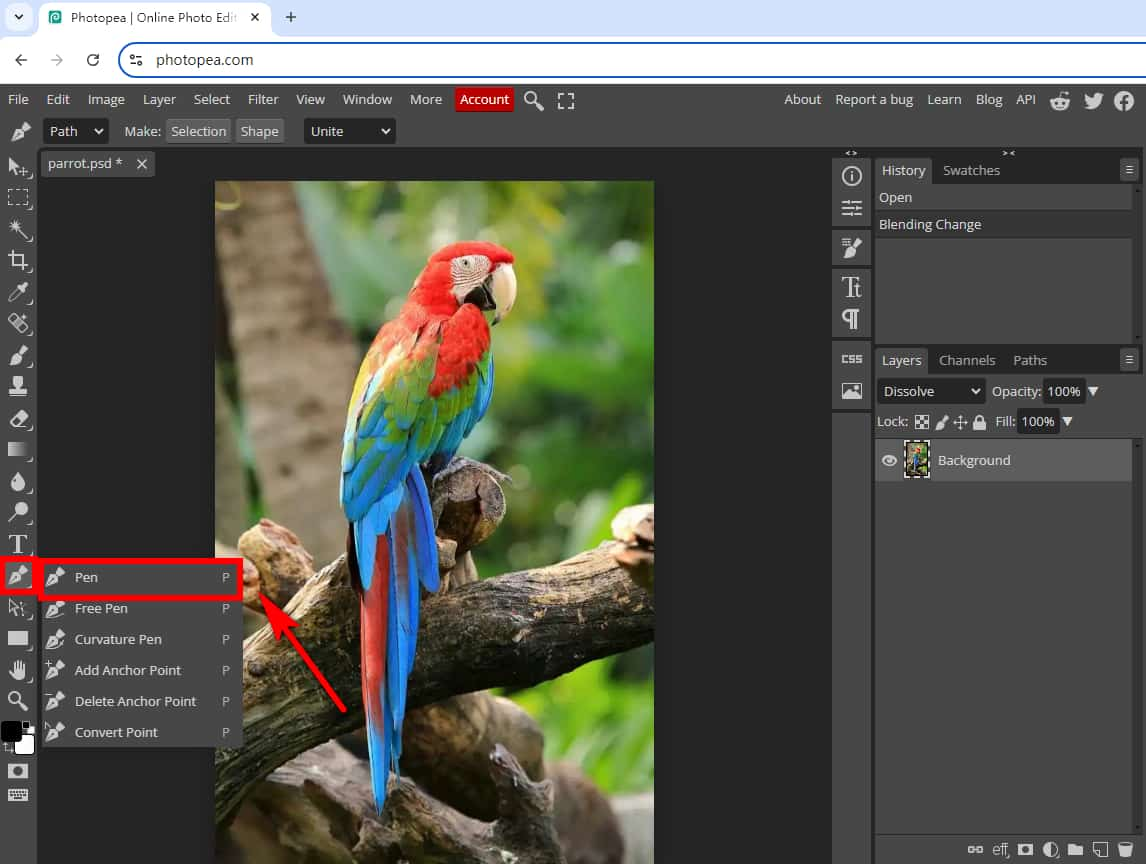
Step 1. Open Photopea in your browser and drag and drop an image to it. Next, select the “Pen” tool in the left toolbar.
Step 2. Draw the path around the subject: click and drag to add the nodes. Make a curve using the Pen tool whenever necessary, press “Alt” and drag like this.
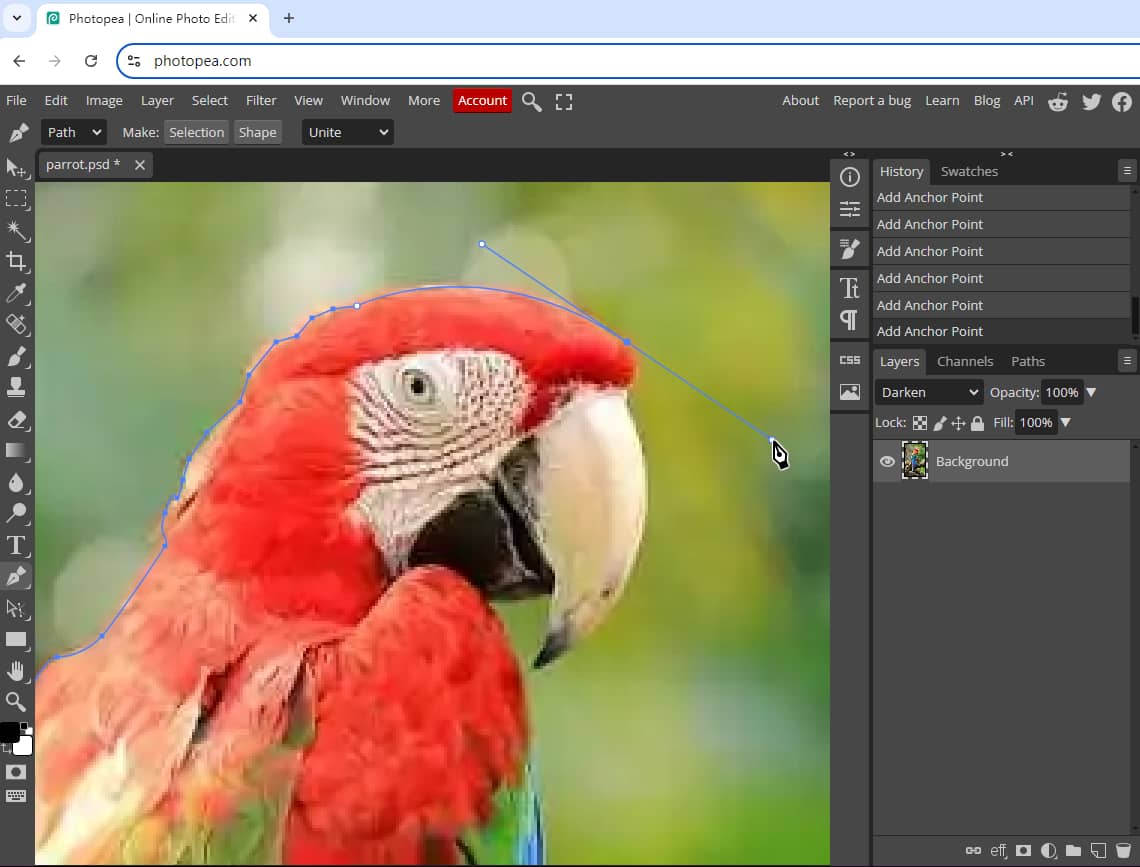
Tips: To zoom in, press the “Ctrl” + “+” keys. To zoom out, press the “Ctrl” + “–” keys. Make sure your path is slightly inside the subject.
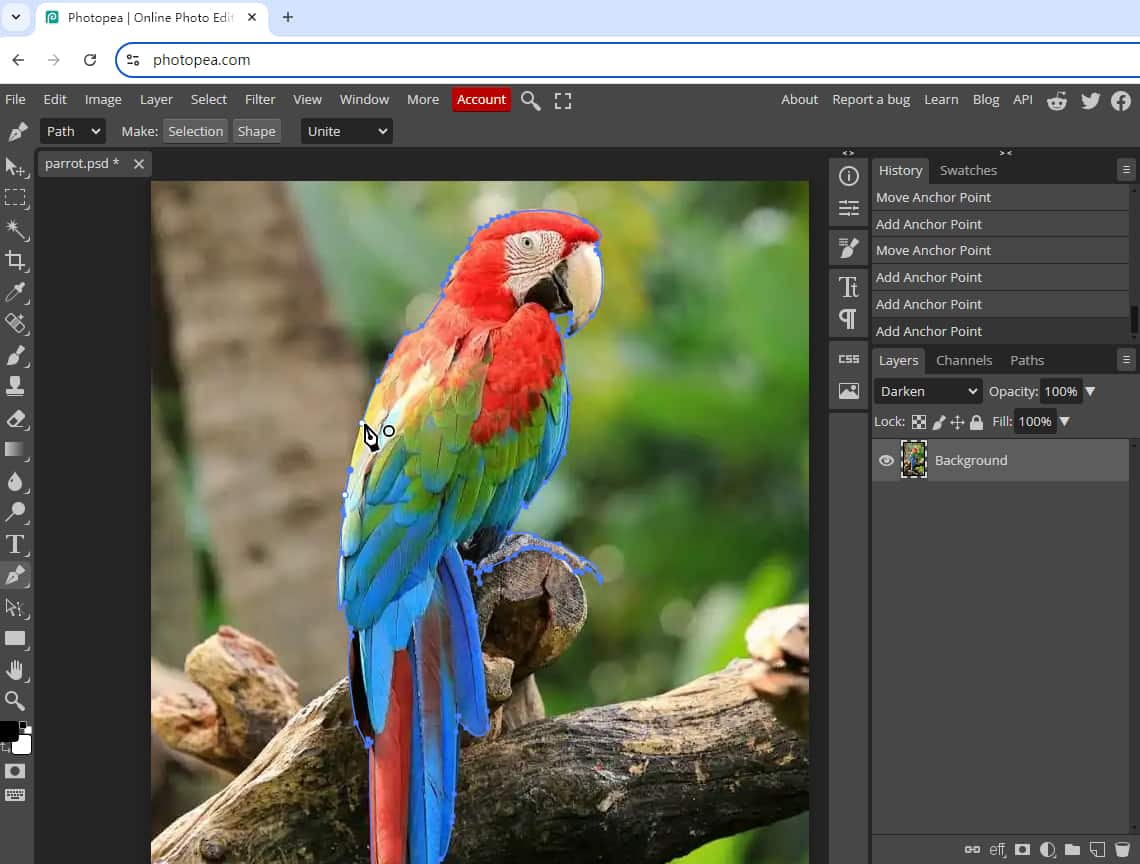
Step 3. Connect the last node to the first node to finish the loop.
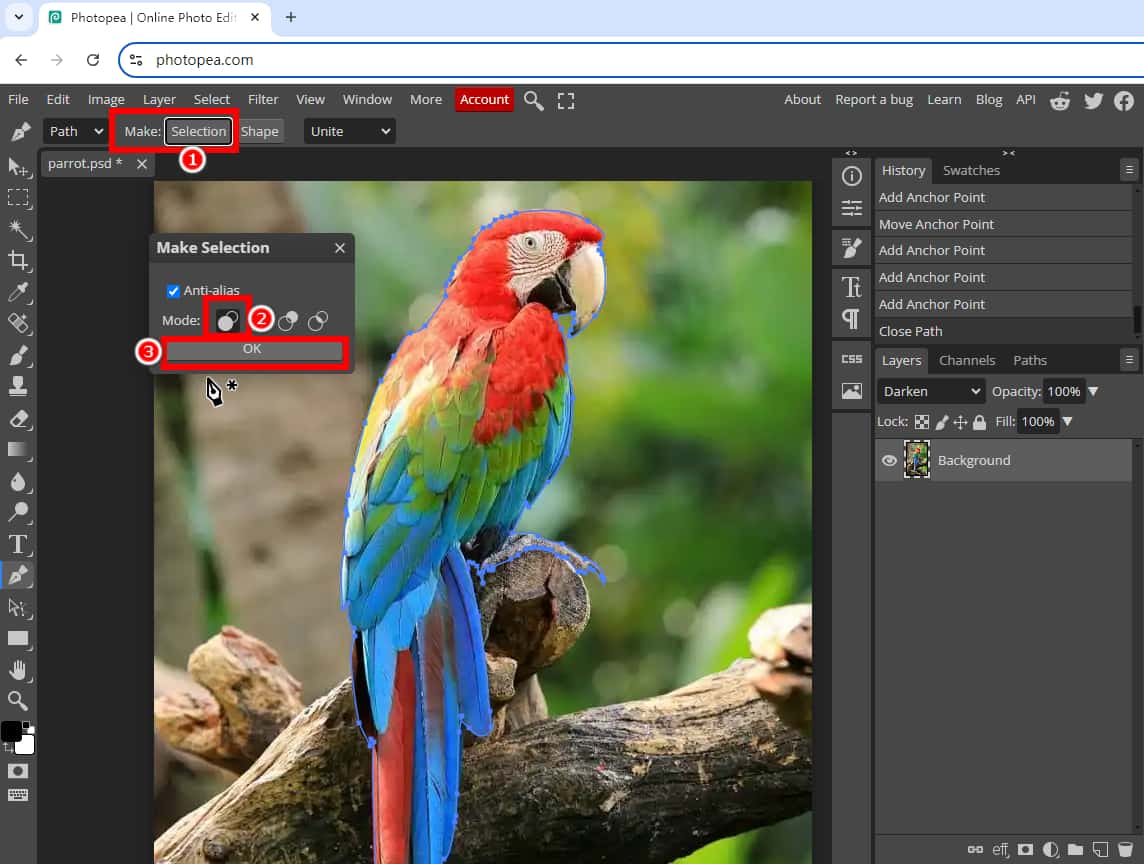
Step 4. Click on “Make Selection.” Then, select the first mode and click “OK.”
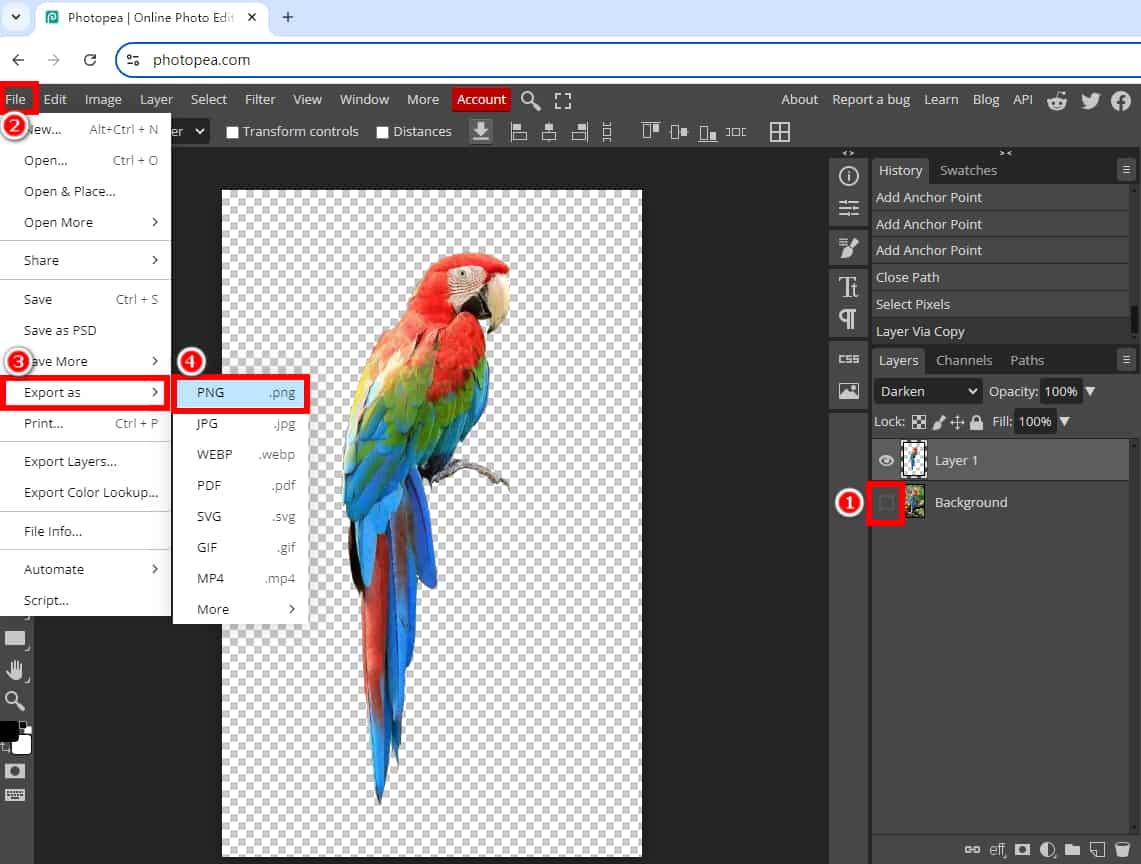
Step 5. Press the “Ctrl” + “0” keys to resize the picture to fit. Then, choose your image and press the “Ctrl” + “J” keys to duplicate only the selection. Hide the background, and then you can see the subject is extracted from the background. Afterward, you can go to “File” > “Export as” > “PNG” to get the transparent image.
Part 2. Best Alternative to Photopea – Remove Background with 1 Click
To help you remove background from image more easily, we have an ideal solution for you. AnyEraser Image Background Remover online tool, featuring advanced AI technology, can instantly remove background from images of any kind with 1 click, creating precise and high-quality results.
Moreover, this AI-driven background remover allows you to change an image’s background with solid color or a new background image in seconds, or resize your picture as needed, taking your photo to the next level.
Let’s take a look at how to remove background from image using the best Photopea alternative:
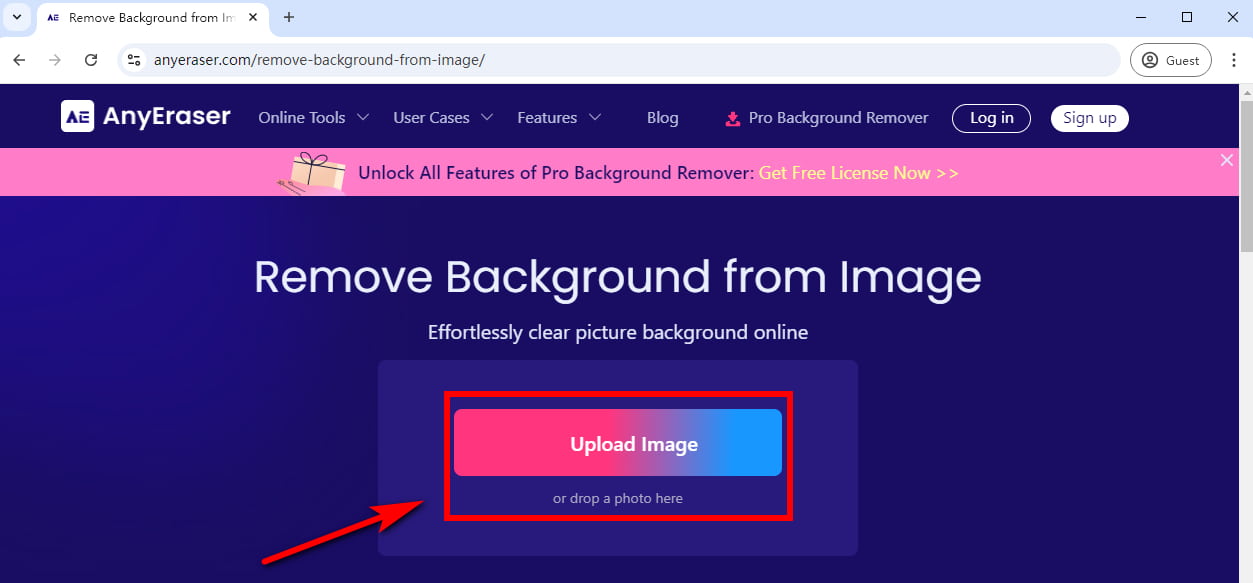
Step 1. Go to AnyEraser Background Remover and upload an image you want to work on.
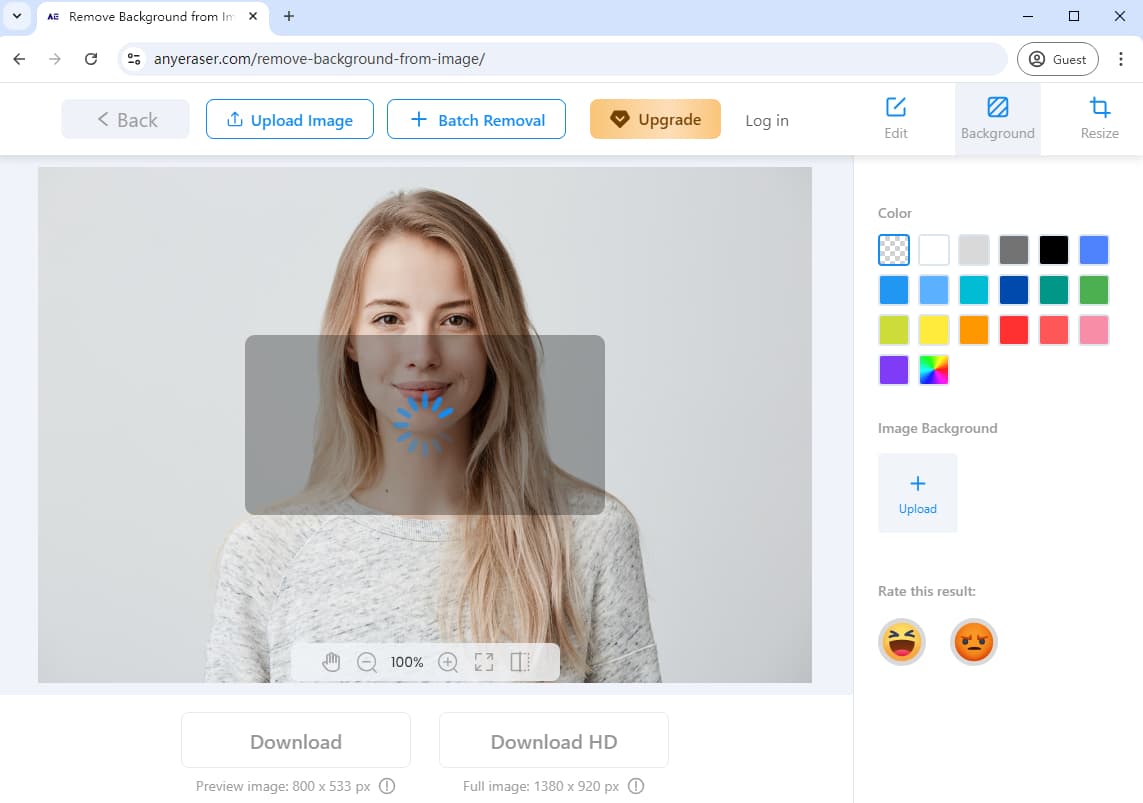
Step 2. Then, this image background remover will automatically get rid of background from image in seconds.
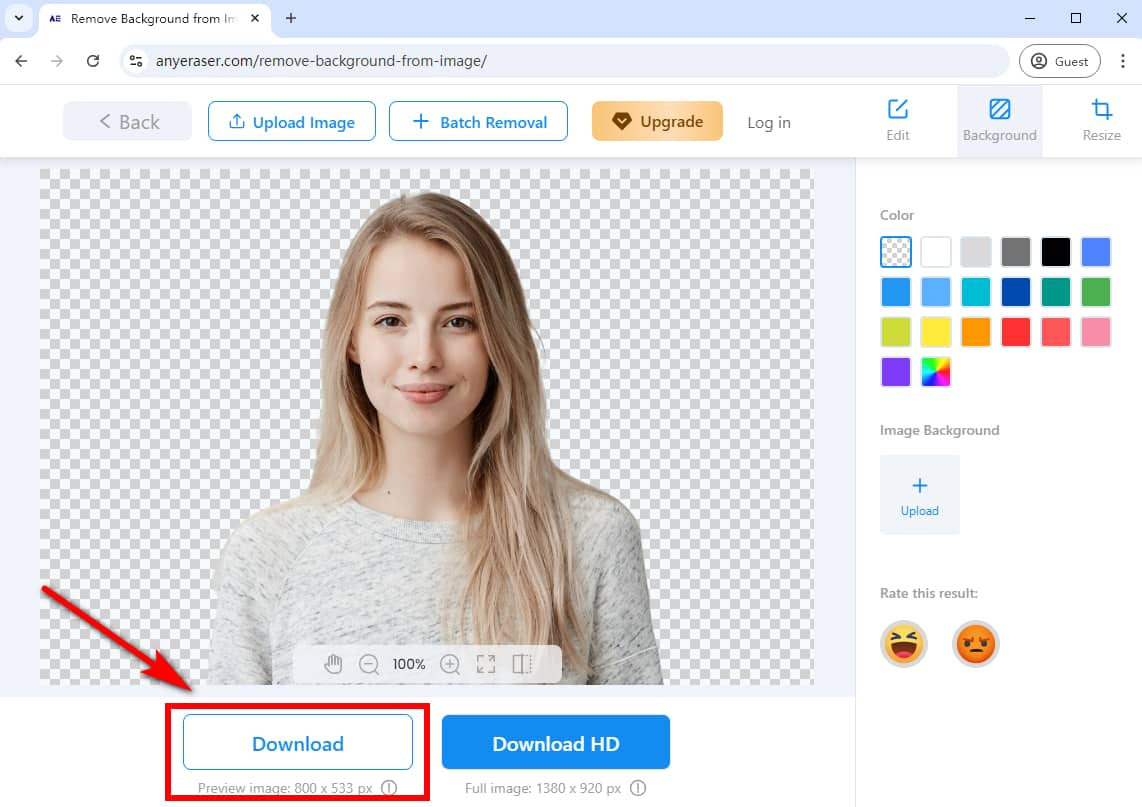
Step 3. Download the image with a transparent background in a PNG format.
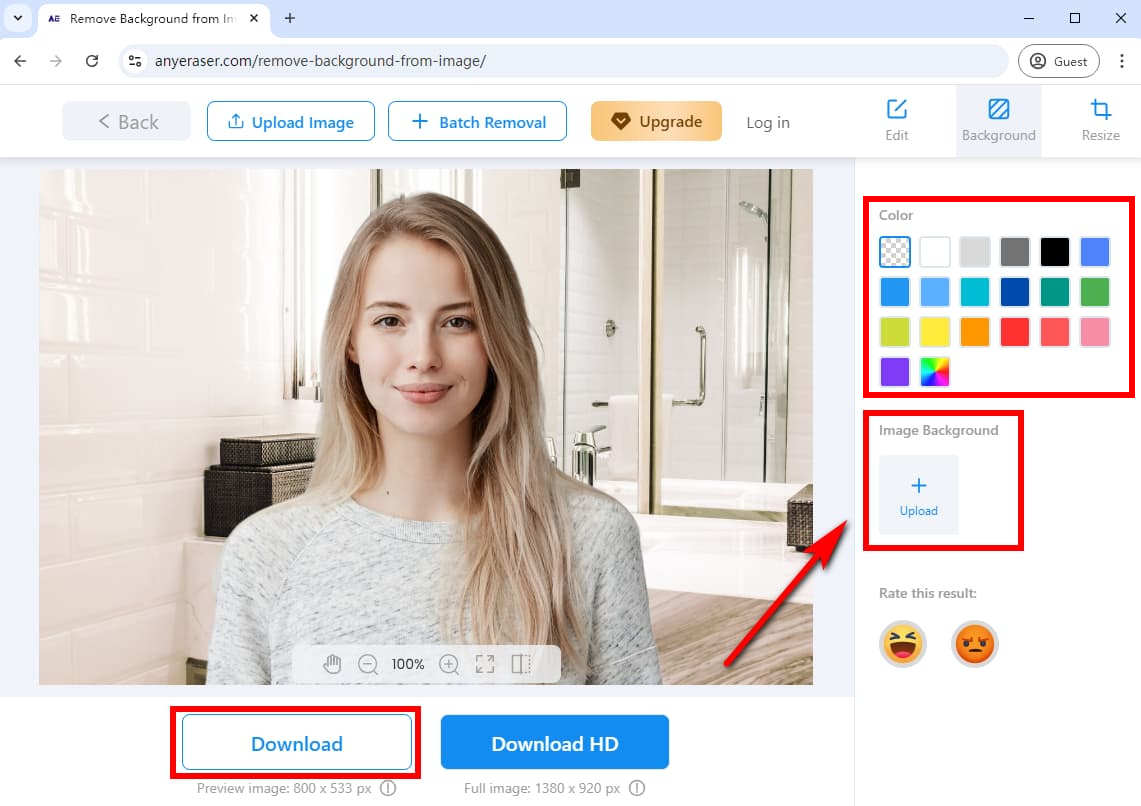
In addition to removing background from image, AnyEraser Image Background Remover allows you to add a new background in 1 click.
Here’s how to add a background to image with AnyEraser:
After removing the background of your image with AnyEraser, click on “+ Upload Image Background” to upload a background image. Alternatively, you can add a solid color to the cutout directly. Afterward, you can click “Download” to save the image.
Part 3. Bonus Tip: How to Add Background in Photopea
After getting rid of the background of your image, you may want to add a new one to enhance your image. Luckily, Photopea can help you add a new background to your image.
Here are the easy steps to add a background in Photopea:
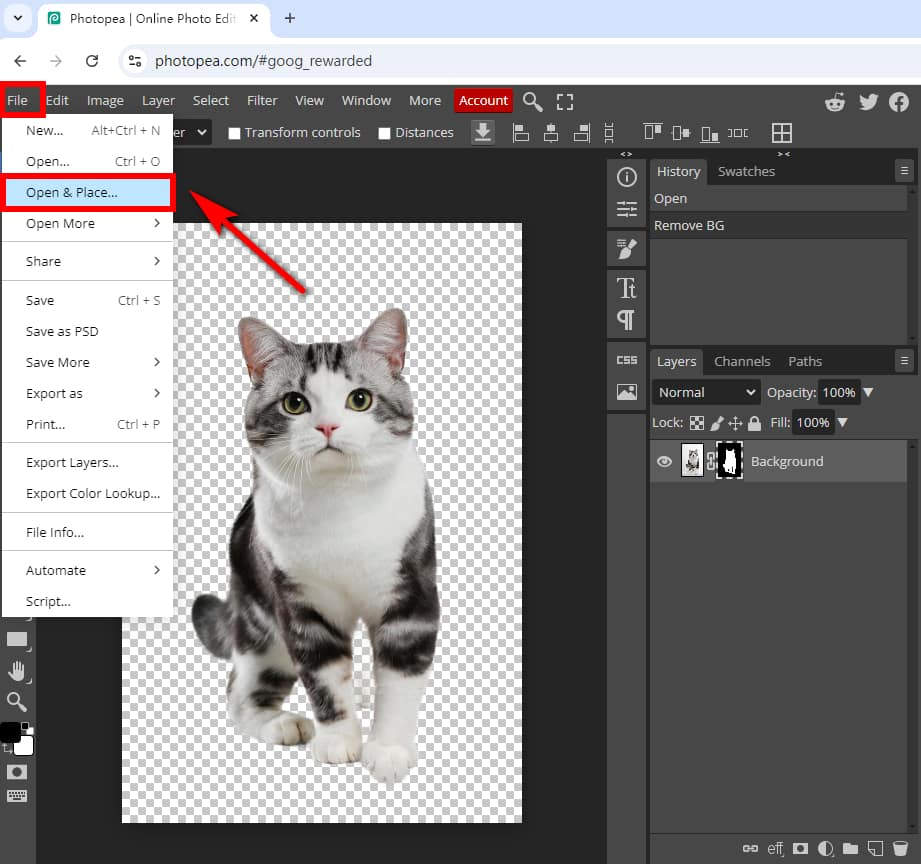
Step 1. Upload an image background to Photopea: Go to “File” and select “Open & Place…”.
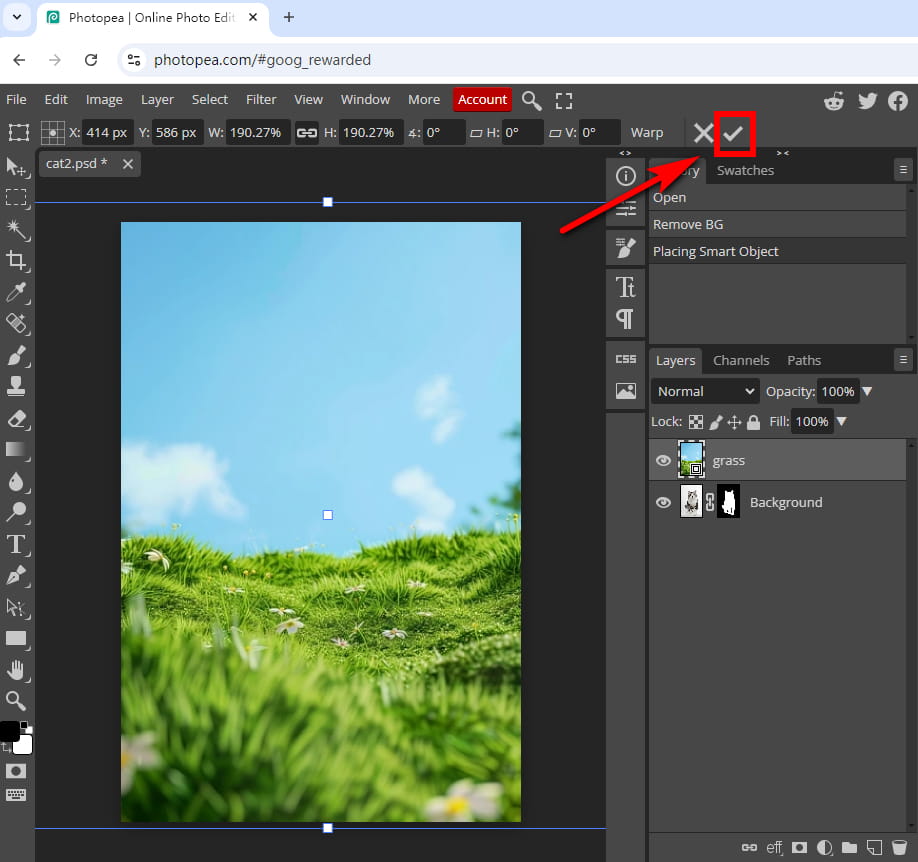
Step 2. The image that you open will be placed as a new layer. Next, you can move and resize the background image, and then confirm the background size by clicking on the “Confirm” icon or pressing Enter key.
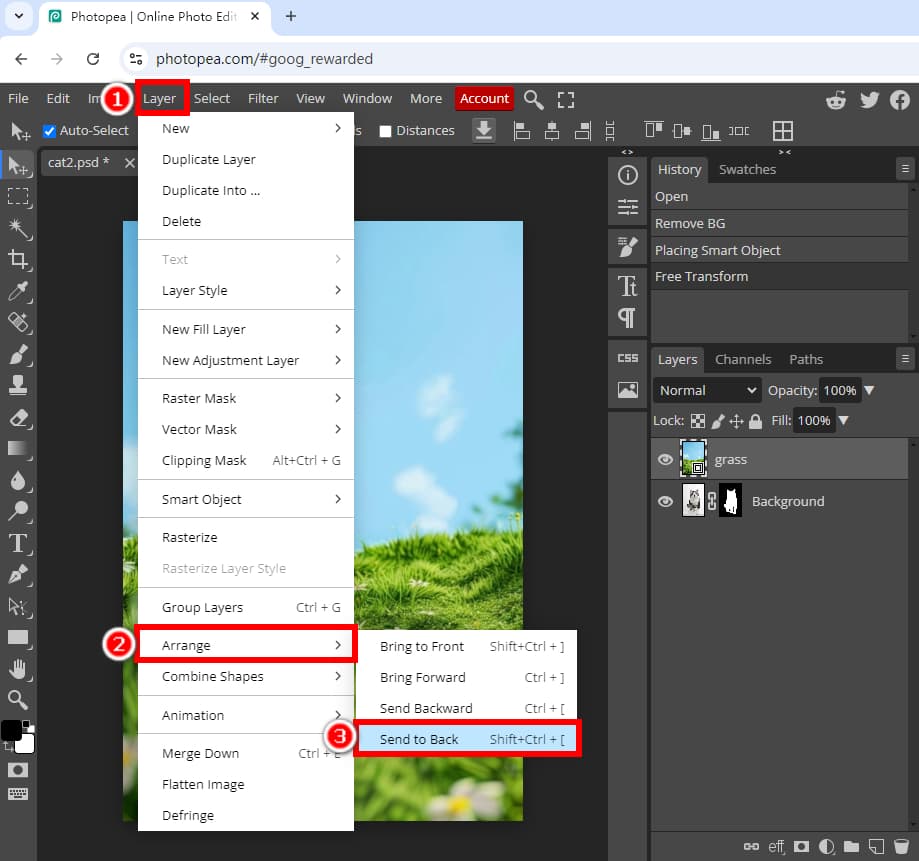
Step 3. If the new image background layer covers the original image, select “Layer” > “Arrange” > “Send to Back” to move the layer behind all other layers.
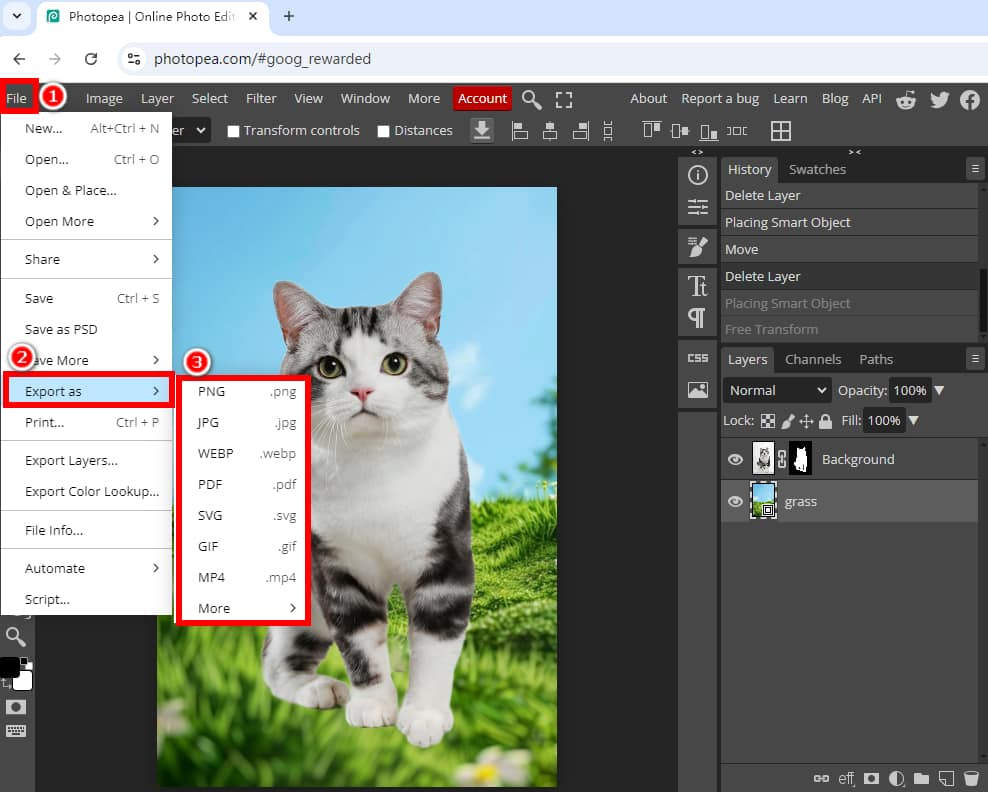
Step 4. When you’re done, click “File” and choose “Export as,” you can save the image in a PNG, JPG, WEBP, PDF, etc., format.
Tips:
If you want to add a new background to your image easier and faster, we recommend using the AnyEraser Background Remover online tool. It lets you to instantly add a new background to your image with 1 single click.
Conclusion
In this article, we’ve learned how to remove background in Photopea step-by-step. We’ve also explored how to easily add a new background to an image.
Out of all these Photopea background removal tools, we also introduced an AI background remover – AnyEraser Image Background Remover. This AI-powered background eraser allows you to remove image backgrounds with 1 click while retaining the fine details, ensuring high-quality and professional-looking results. Therefore, you can save a lot of effort and time for your creative designs.
Go ahead and try it out with AnyEraser today!
FAQ
1. How do I remove the background from a photo on Photopea?
You can use the Magic Eraser tool to remove background in Photopea:
1. Open your image in Photopea, right-click the Eraser Tool icon, and select the Magic Eraser tool.
2. Click on the background areas of your image to remove background in Photopea.
3. Go to File, select Export as, and choose PNG to save the image without background.
2. Does Photopea support batch-processing images?
No, Photopea doesn't support batch processing. You have to remove background from each image using Photopea's manual method. However, it only takes 1 click to remove background from images in bulk with AnyEraser Bulk Background Remover tool.
3. How to change background color in Photopea?
1. Make sure the subject and background are separated in Photopea, or your image has a transparent background. Then, select the background layer or create a new layer as a background layer.
2. Click the background color icon on the left toolbar to open the color picker window, then choose a color you like.
3. Go to Edit, select Fill, choose Background, then click OK.
Alternatively, you can use AnyEraser Background Remover to change the background color in 1 click.
